


By Robert Bucknell
Second Place Winner in the April 2024 PleinAir® Salon art competition for his realistic still life painting, “Afternoon Tea”
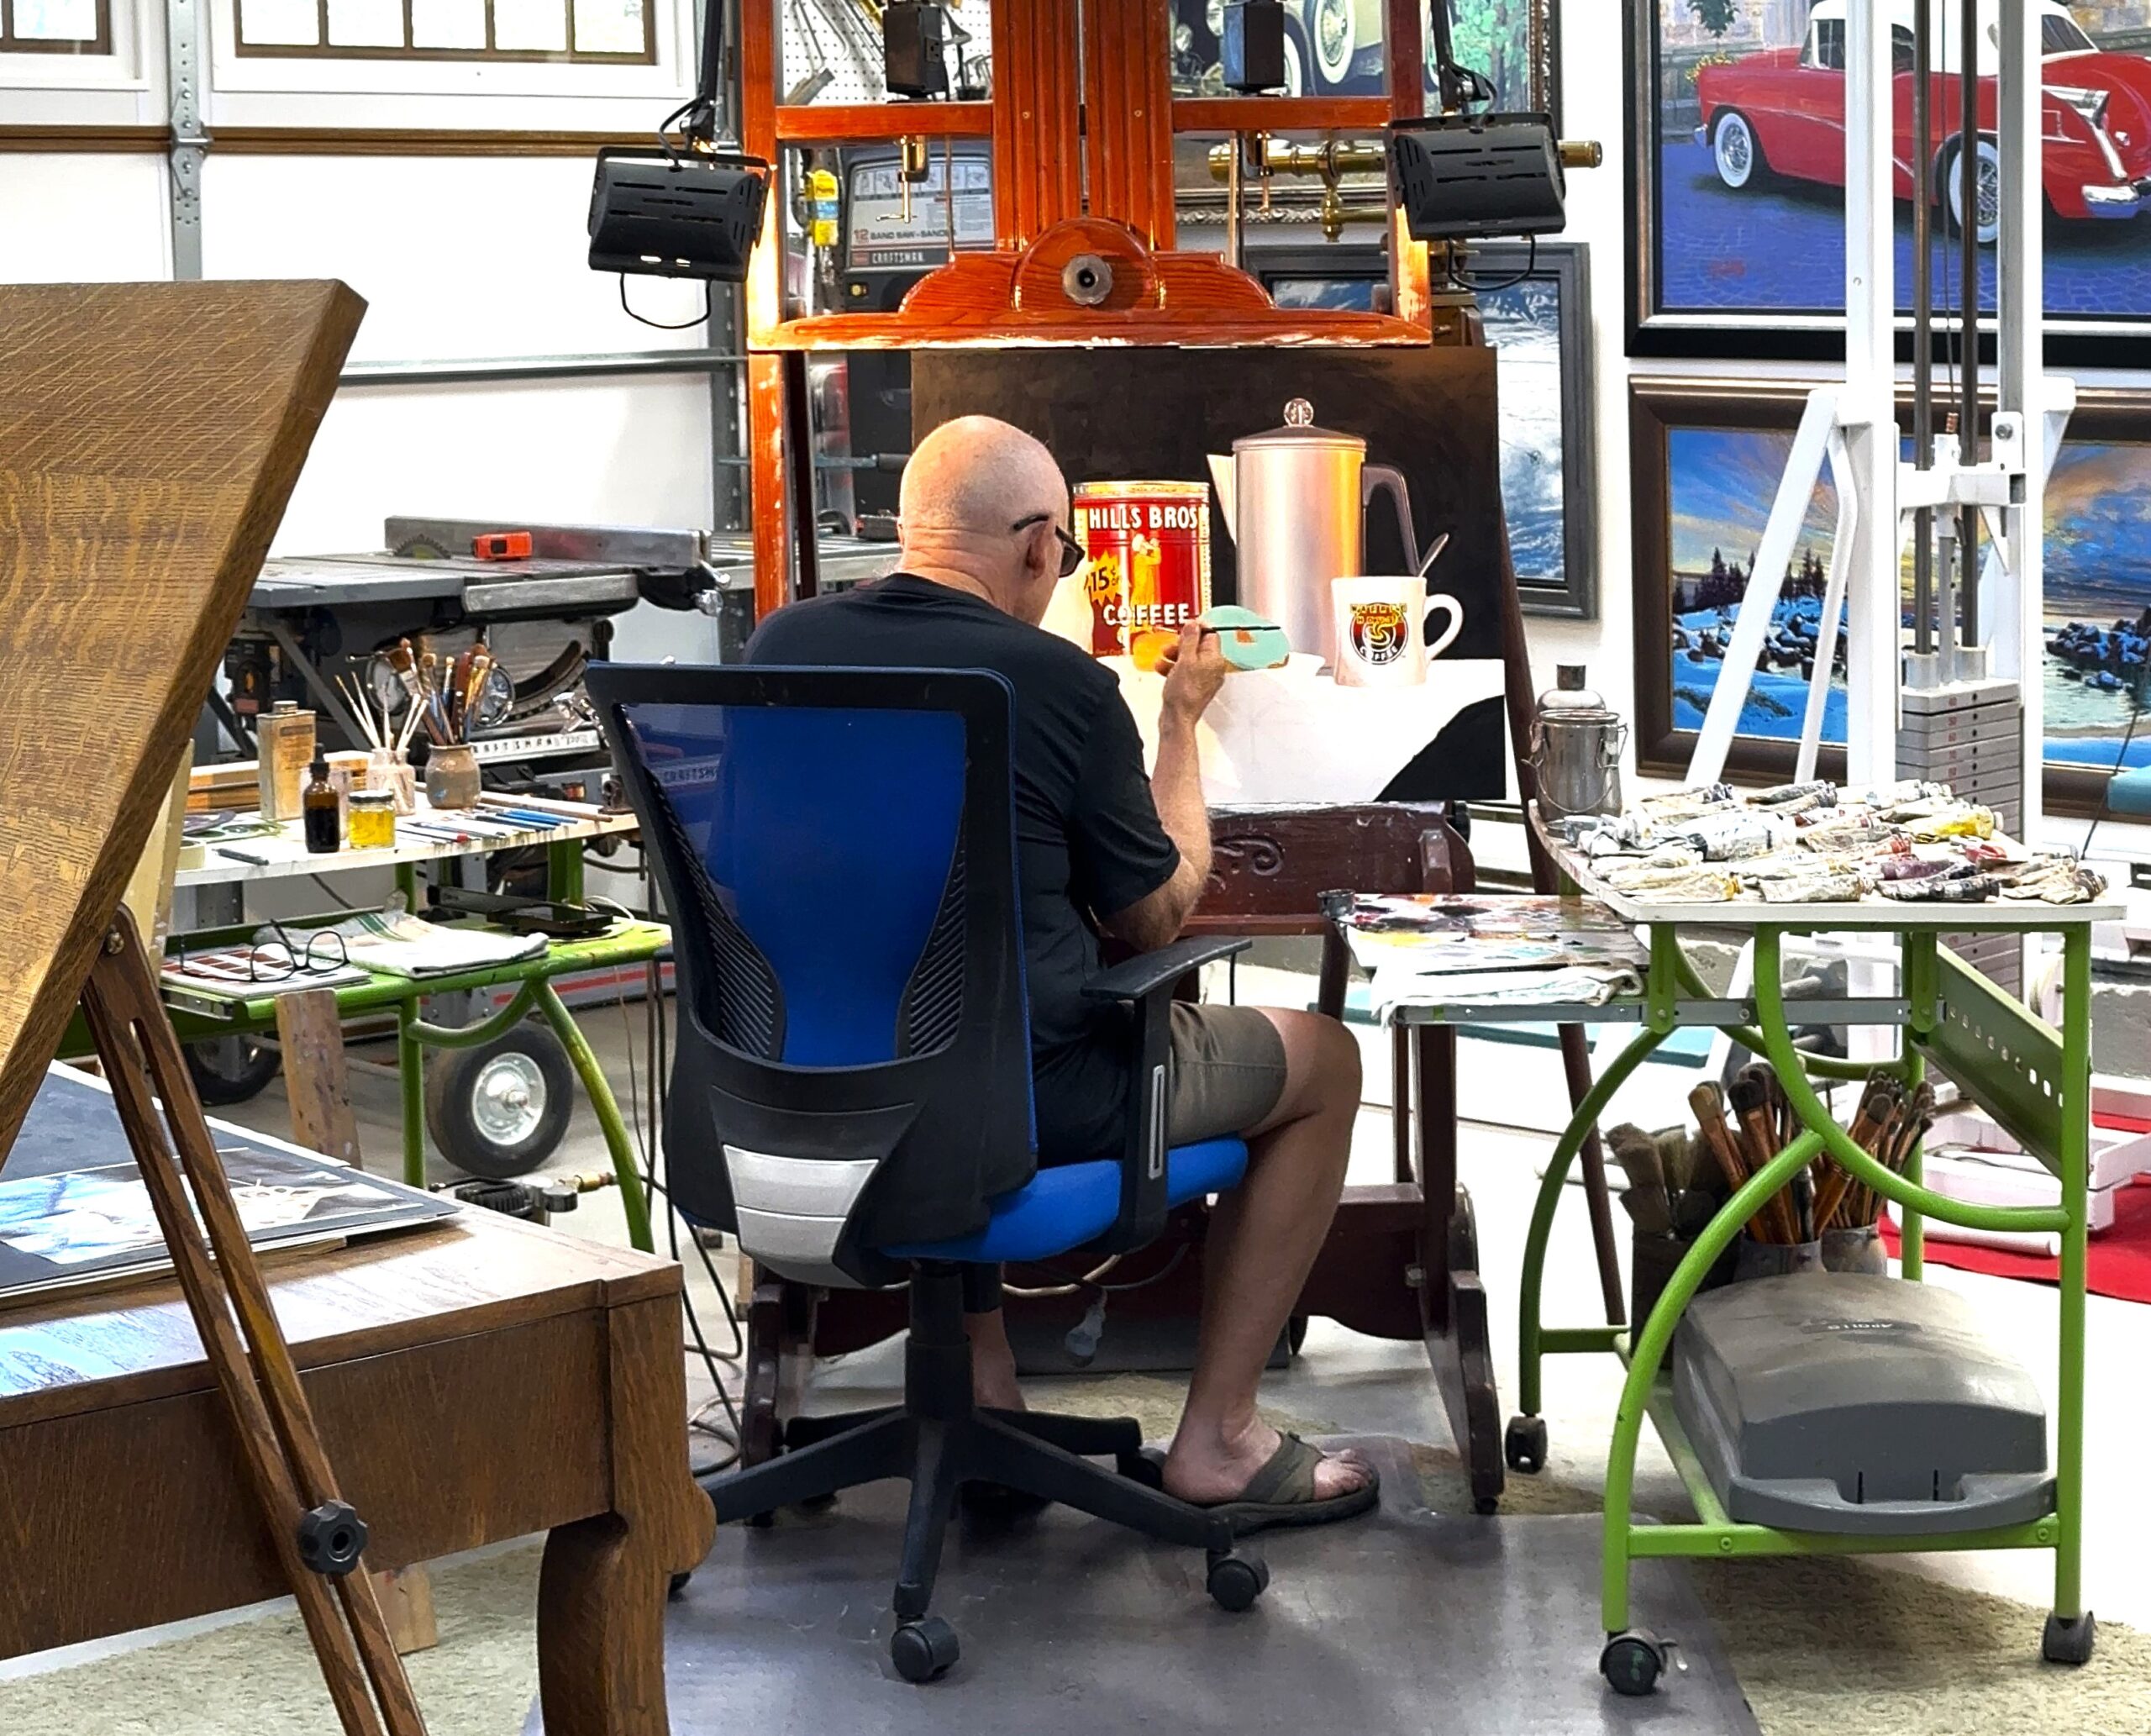
I love painting hyperrealism because we “see” very little of what we look at and when you set out to paint every little detail you discover a whole new unseen world. The following is my process for painting the still life “Retro Roast.”
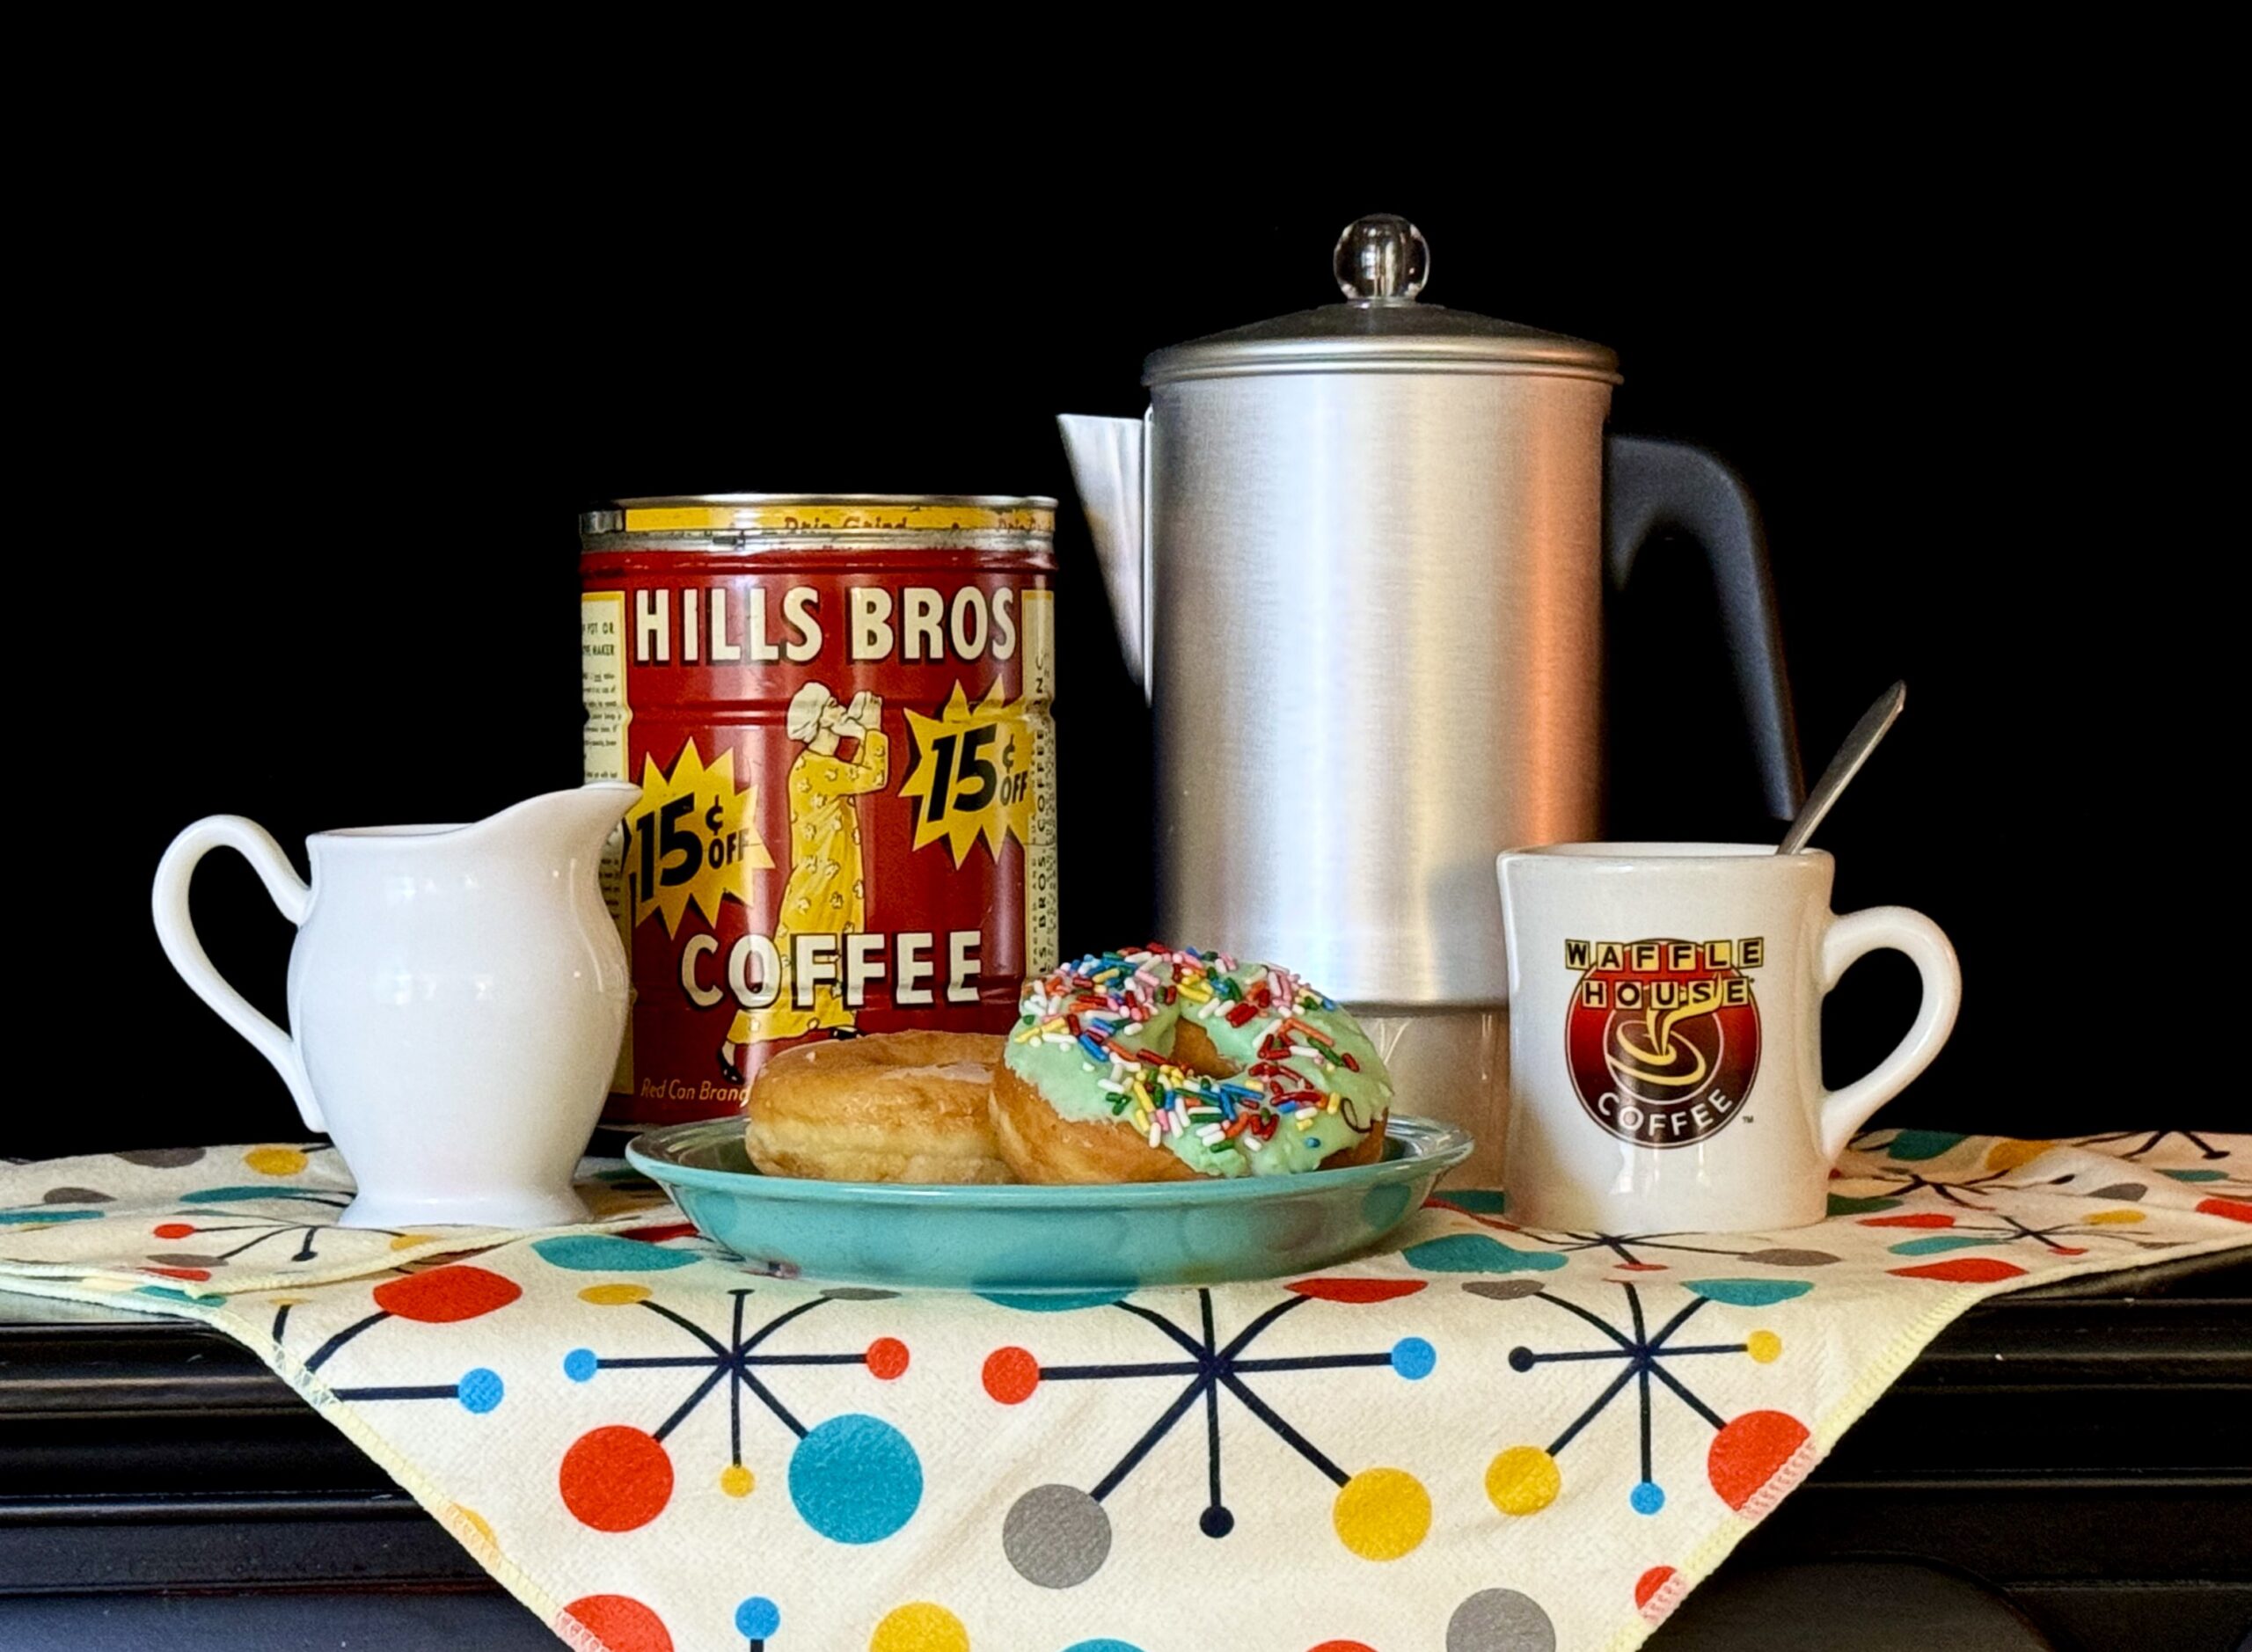
When I was growing up my mother used this Hills Brothers coffee and I was fascinated by the man on the can. I’ve always wanted to paint that guy. I chose each of the objects for this painting because they remind me of growing up in the 50’s and 60’s when life was carefree and the world seemed less complicated.
A Realistic Still Life Painting, Step by Step
1. Photo references. The first step of this still life painting was to arrange the objects in front of a black velvet backdrop and photograph them. Lighting is important and I like to use a combination of natural light from the window along with a small lamp on the opposite side. The lamp produces a warm reflection on the shiny objects giving it the effect I want. This requires taking the photographs at the right time of day.
***
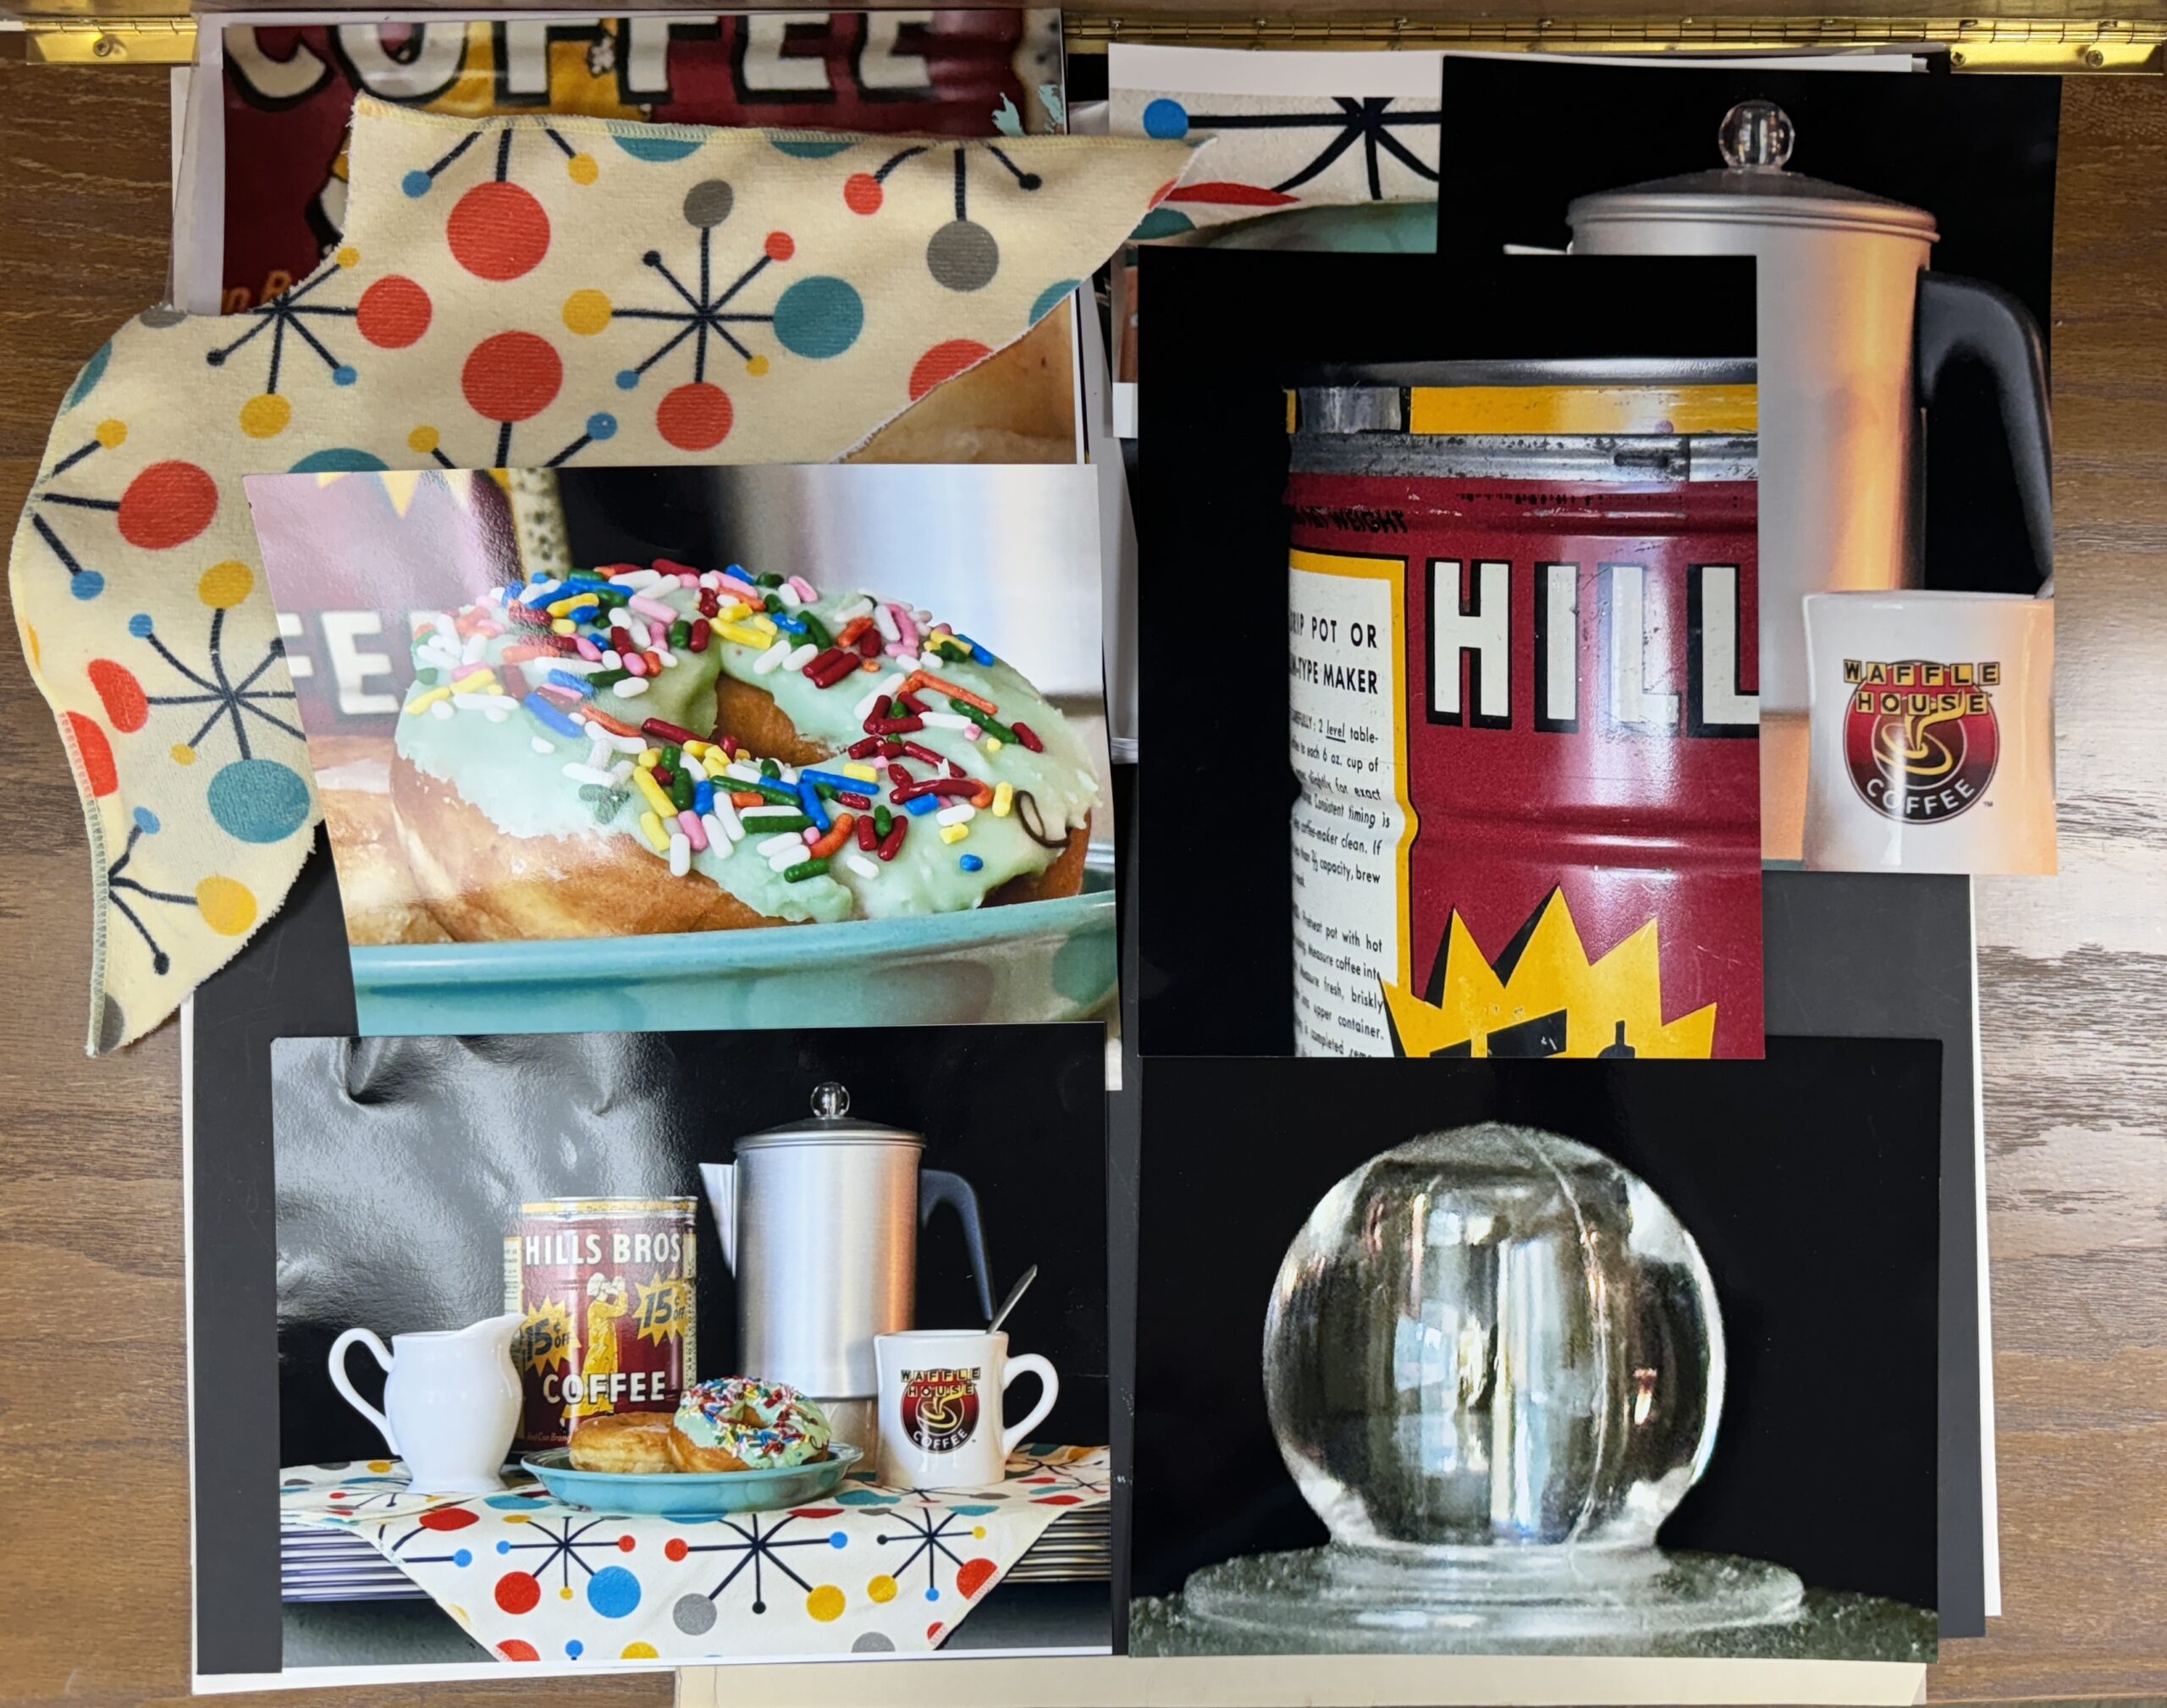
2. Additional References. To photograph the set up I used an iPhone 15 Pro Max that has a 48 megapixel camera with a macro close-up lens to focus in on each segment. The photos are then enlarged on the computer and printed on glossy photo paper for references.
***

3. Preparing the surface. For still life paintings I use ¼” MDF panels available at Home Depot, and prepare the surface using two coats of white oil base stain block primer sanded with 400 grit sandpaper. I projected the main photo onto the panel using my vintage Seerite opaque projector and then drew as much detail as I could. Next I filled in the background and began painting from my references.
***
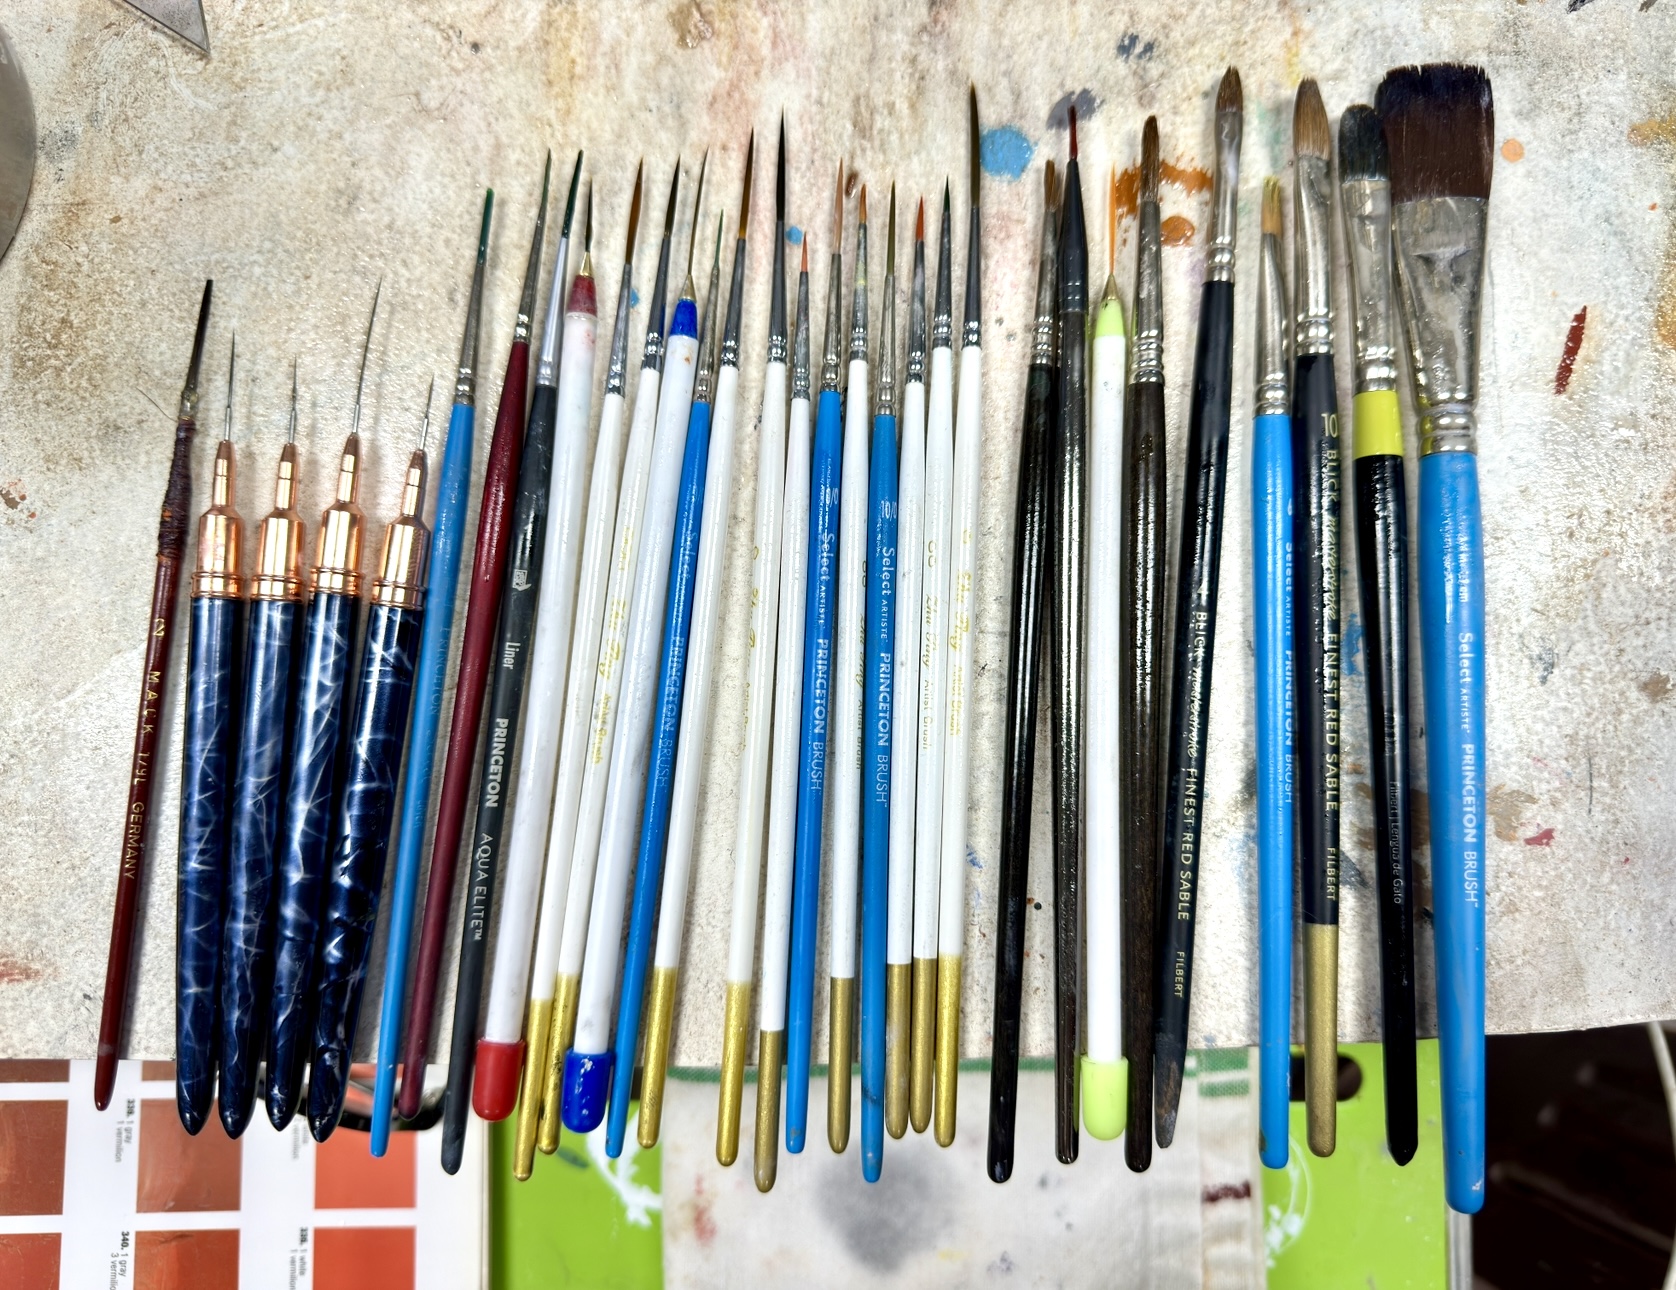
4. Brushes. I use Princeton’s synthetic fiber round liners and sable filbert brushes, but I don’t use synthetic filberts because they tend to curl up. Also, I use very small sign painters quills which track like no other brush. Having been a sign painter for many years, many of those disciplines have carried over into my paintings.
I’ve also recently discovered nail salon brushes which come in very small sizes, are good quality, and are reasonably priced. These brushes are perfect for extremely fine lines and tiny lettering. I keep cobalt dryer in a small eyedropper bottle and use it as needed.
After cleaning my brushes in odorless paint thinner, I dip them in lard oil.
***
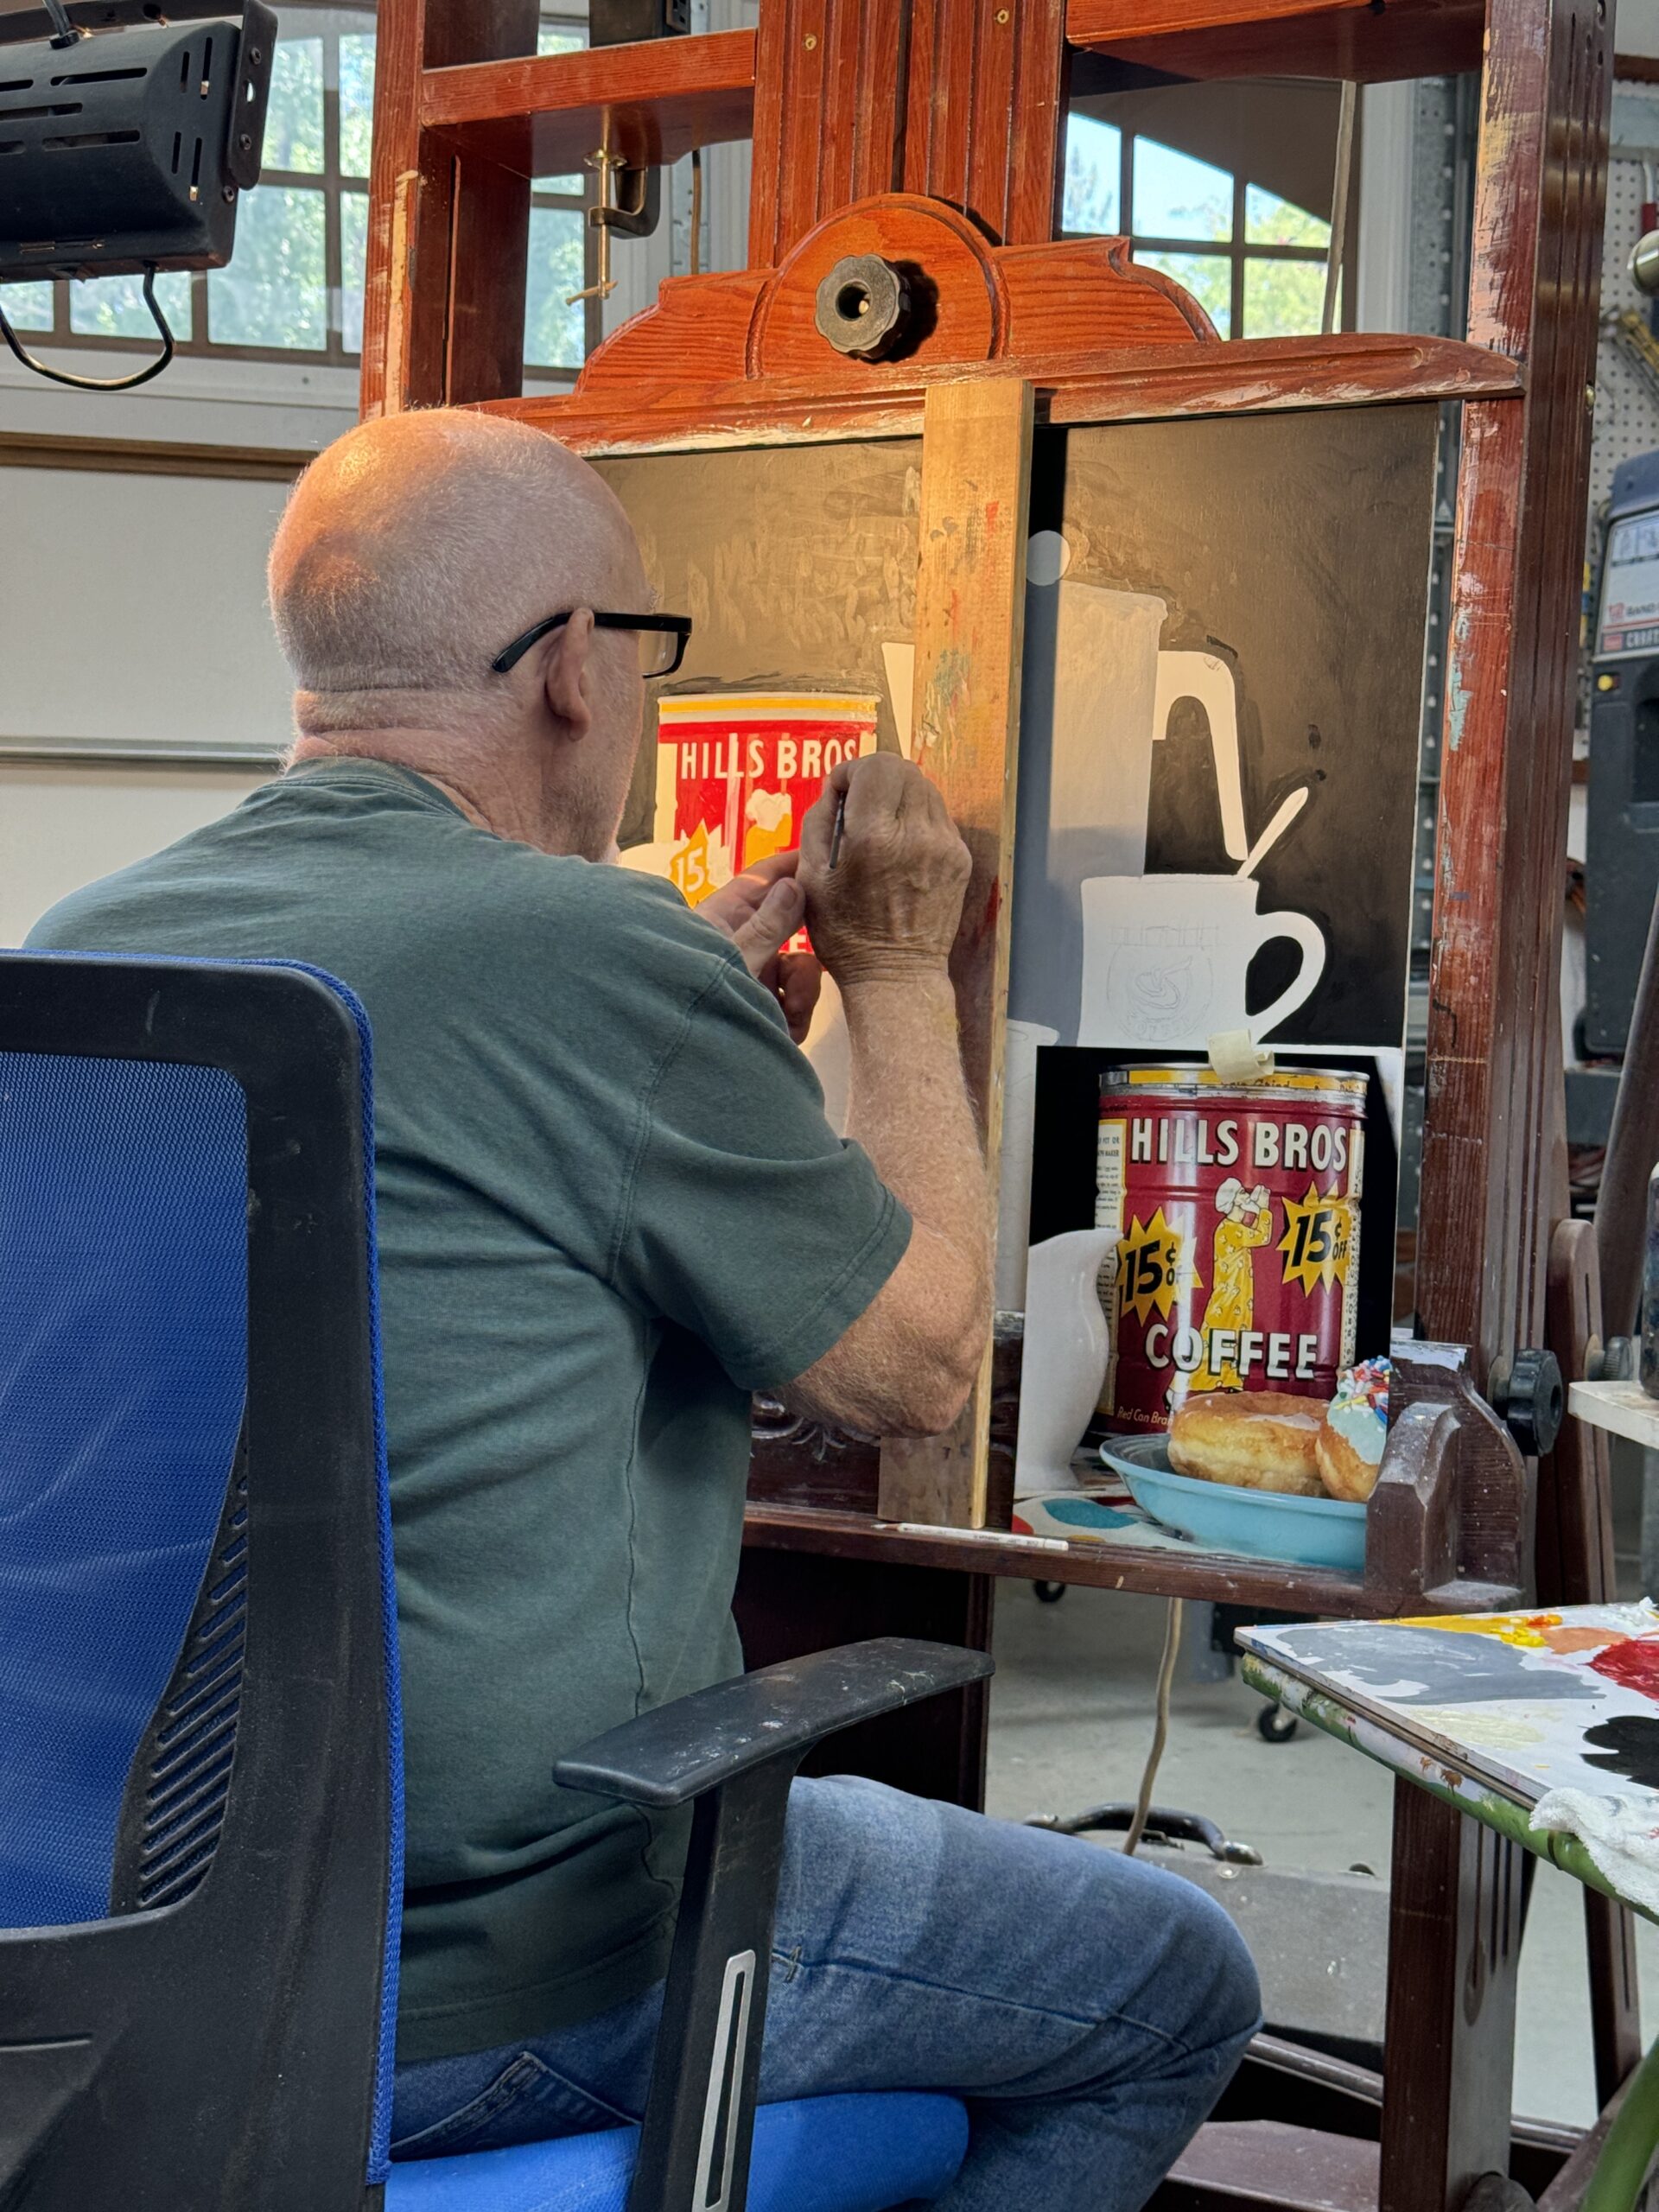
5. Getting to work. Rather than using a maul stick like I did when painting signs, I now use a 1” x 3” board slightly raised off the surface of the painting.
***
6: Additional tool. It’s rare that I use an airbrush, but this time I used it on the coffee pot which is part airbrush and part paintbrush.
***
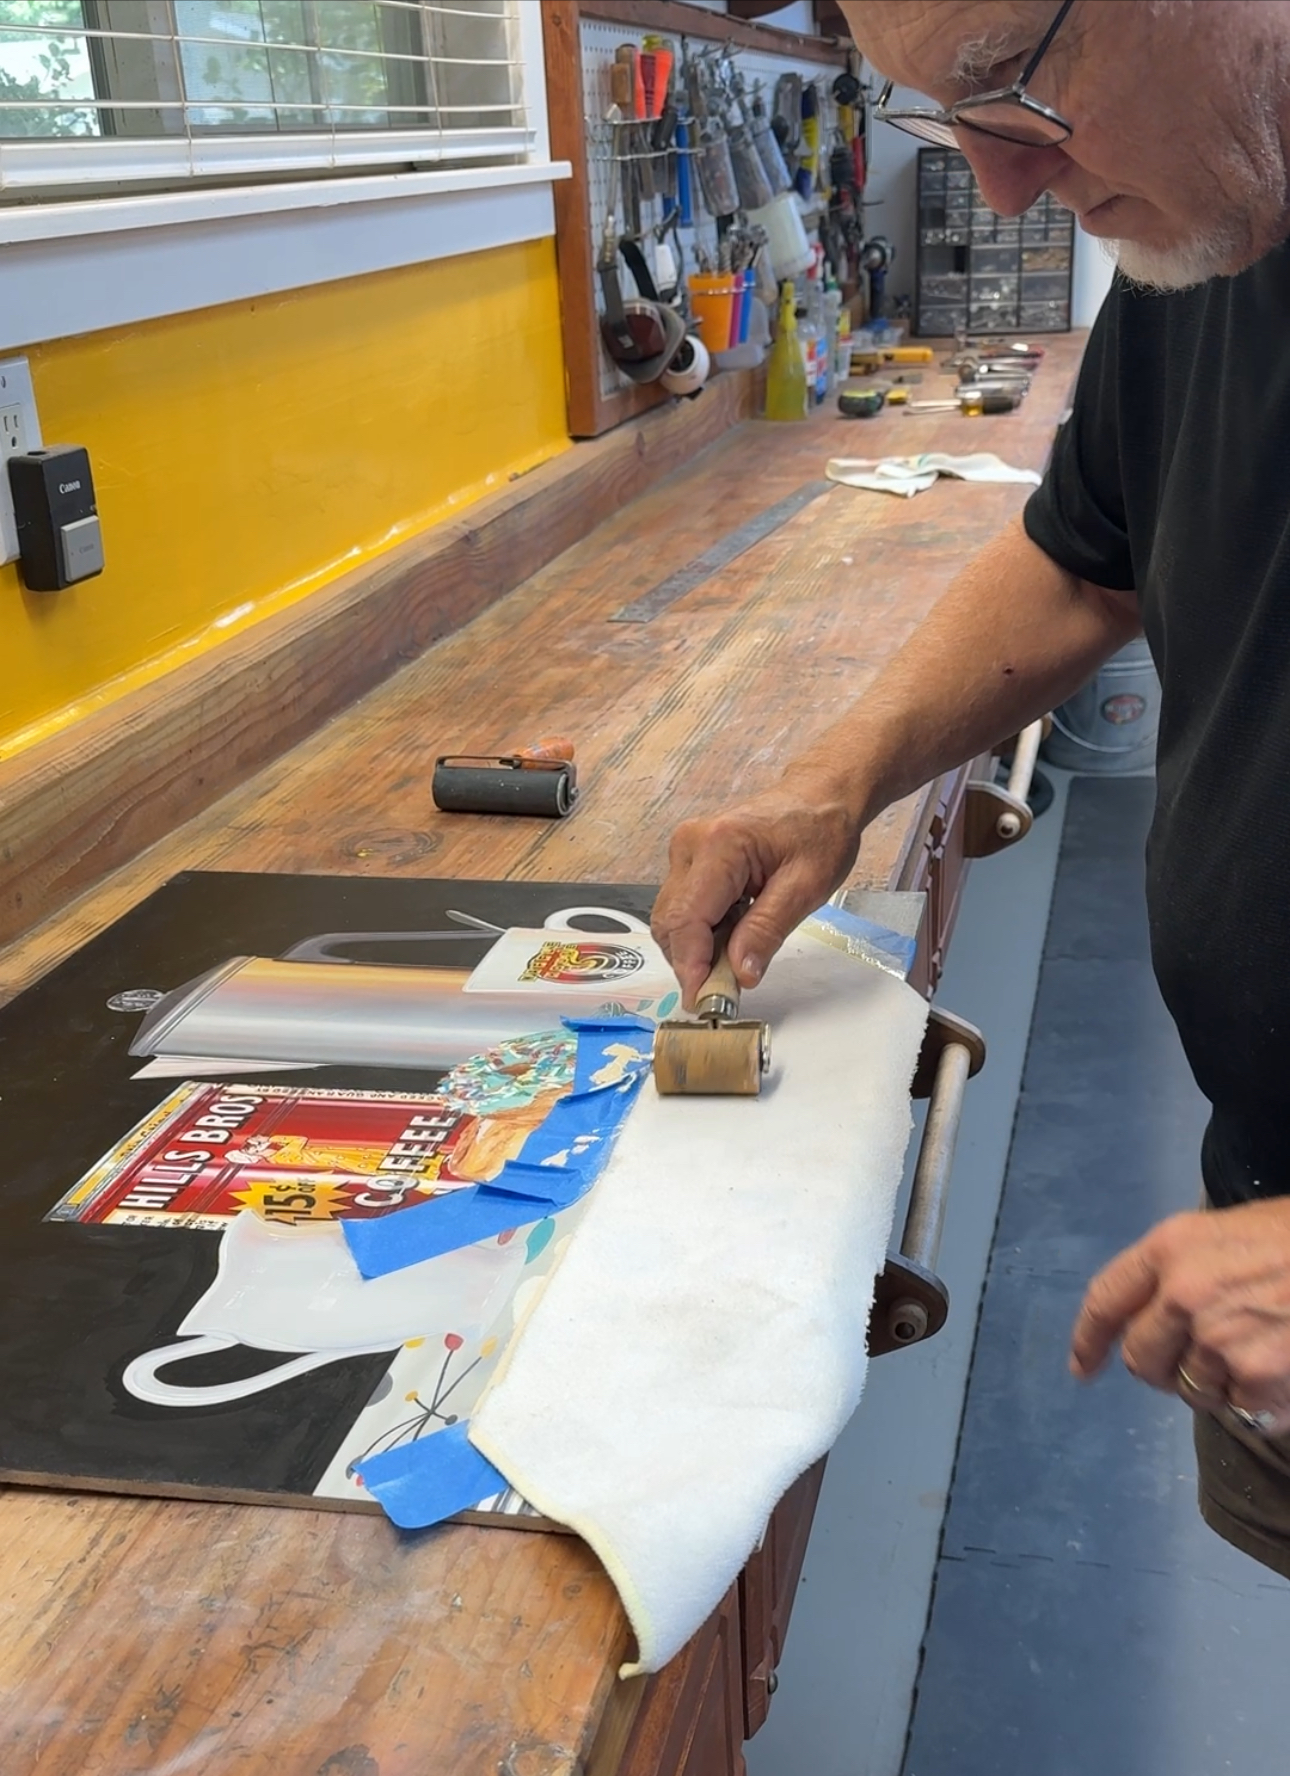
7. Creating patterns. I developed a new method to replicate the fabric weave of the dishtowel I used in the painting. After several tries I discovered the trick was to first apply paint to a separate surface. Then I laid the dishtowel I used for the painting onto the wet surface. Next I lifted it off and carefully laid it onto the painting, which had been base-coated a darker color. Then I used a roller to lightly press the fabric onto the painting’s surface. When I carefully pulled the dishtowel off the painting it left behind a very nice fabric pattern.
***
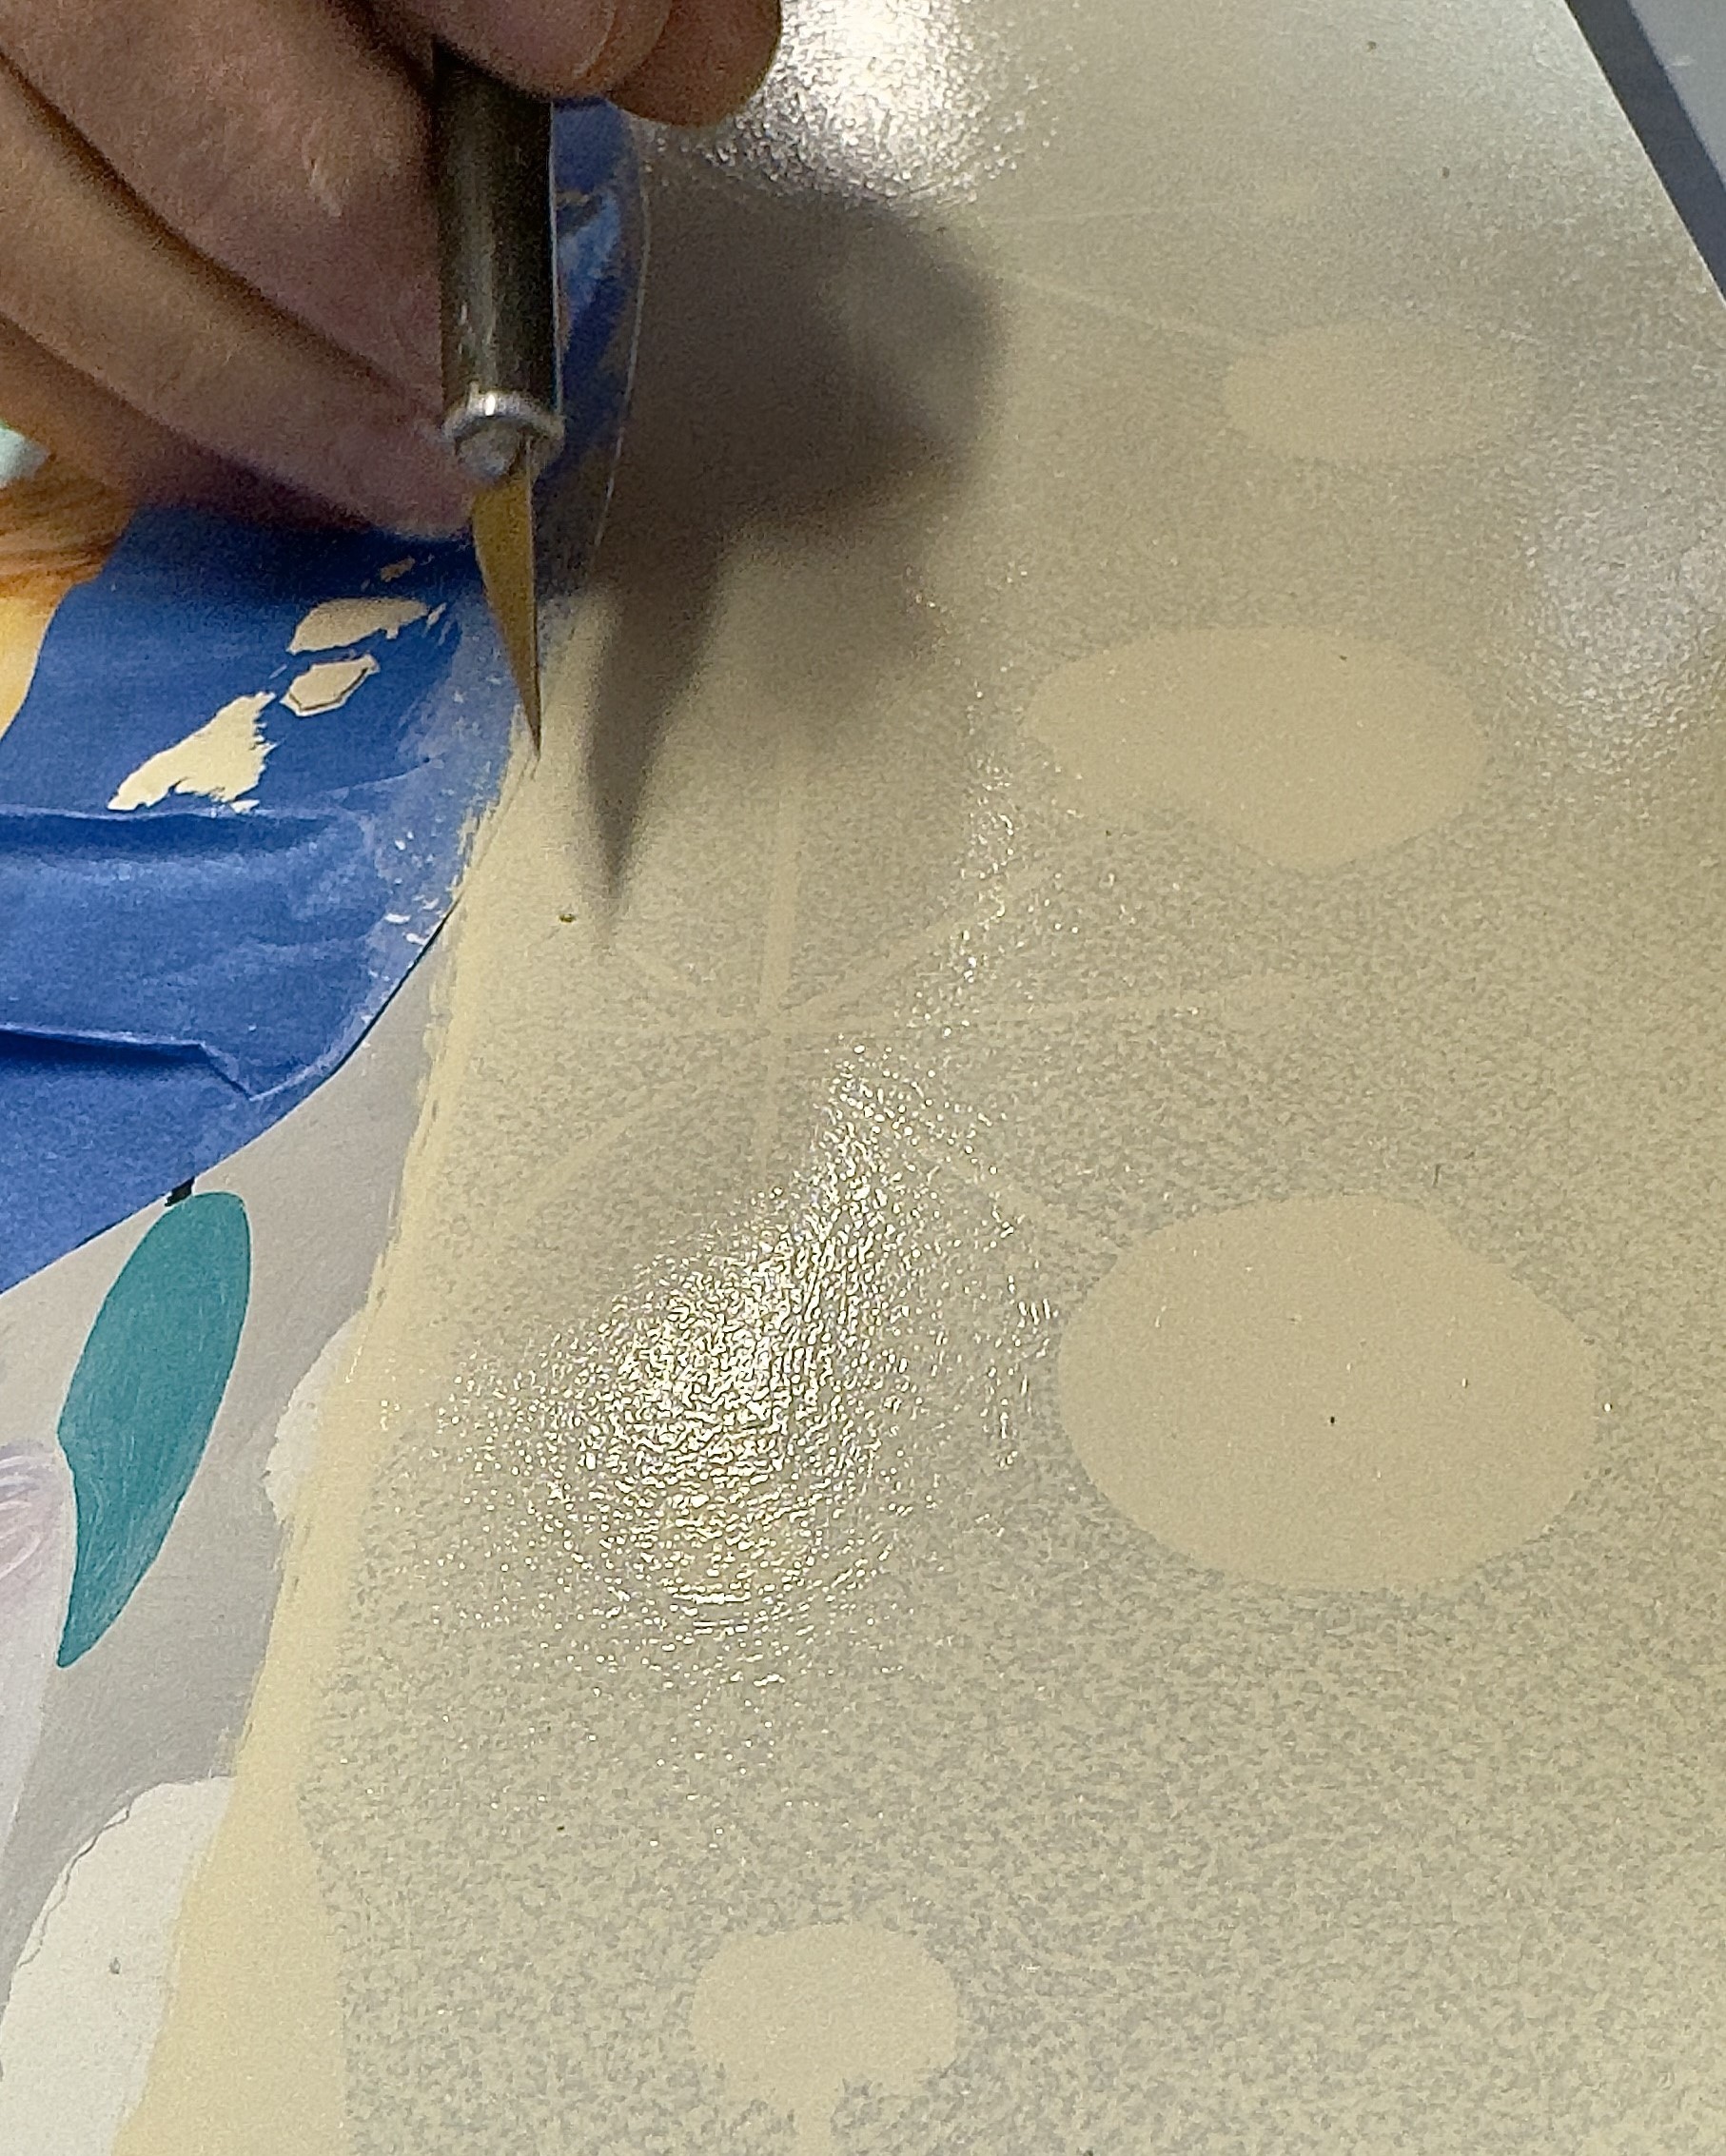
8. Creating texture. I’ve discovered that creating texture on paintings is kind of like being an engineer. You have to invent whatever process or tool necessary to do the job to get the pattern you need. For example, I smash a bristle brush straight up and down repeatedly on a hard surface which is perfect for creating thousands of tiny dots. On large landscape murals I would tape 3 paintbrushes together to quickly create trees off in the distance, and I would also use a rag roll method to create texture on large rocks.
***
9. The final still life. This painting took 4 weeks and about 180 hours to complete.
Connect with the artist at robertbucknell.com.
***
How much time do you typically spend on a realistic painting? Share your answer with us in the comments section below!


)