


Among many achievements and awards, Oliver Sin has had his beautiful, captivating portraits featured on the cover of Time Magazine twice. He also worked for George Lucas as a concept artist before moving on to an incredibly successful teaching career that spanned 20 years. Here, here explains how to create a portrait drawing using vine charcoal.
A Step by Step Portrait Drawing with Vine Charcoal: “Juan”
by Oliver Sin
(Portrait Drawing Simplified)
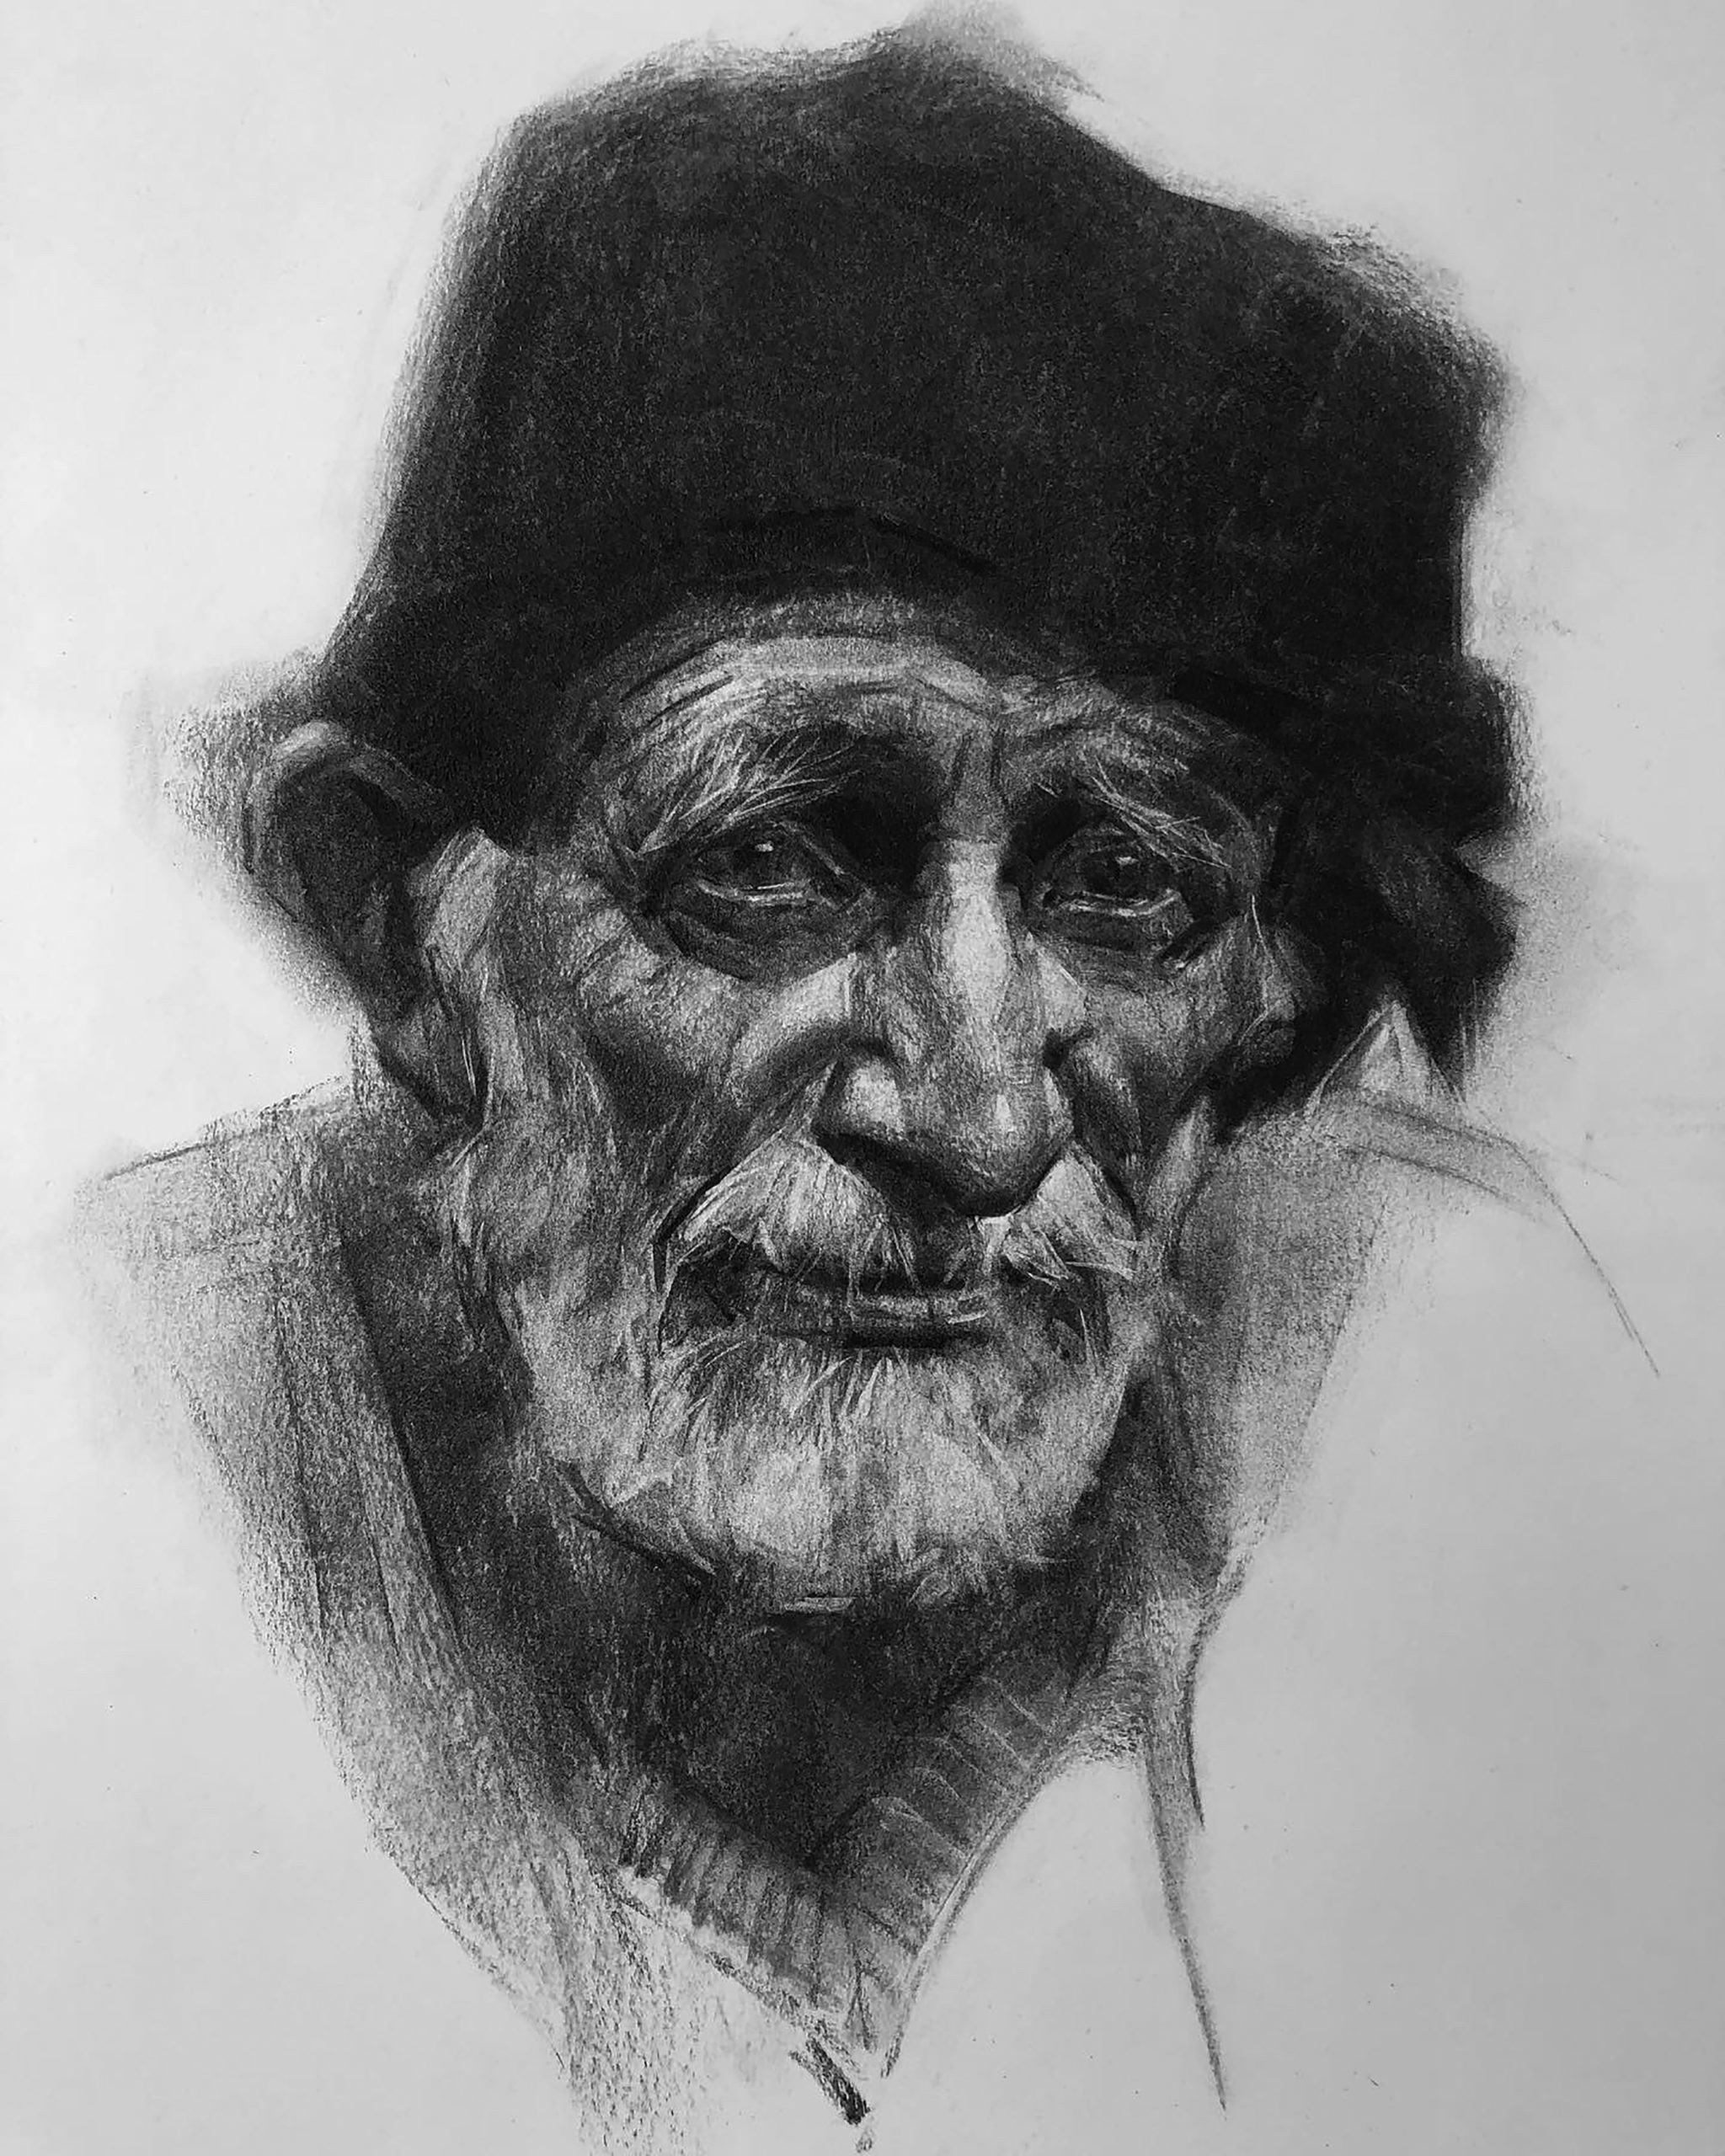
The inspiration for this vine charcoal drawing is Juan, the greatest muse who I met at my Mexico City workshop in June 2021. Juan, who at 80 years young, has a great face with a soulful expression that is framed by his extraordinary mane of white beard, is the motivation of the drawing.
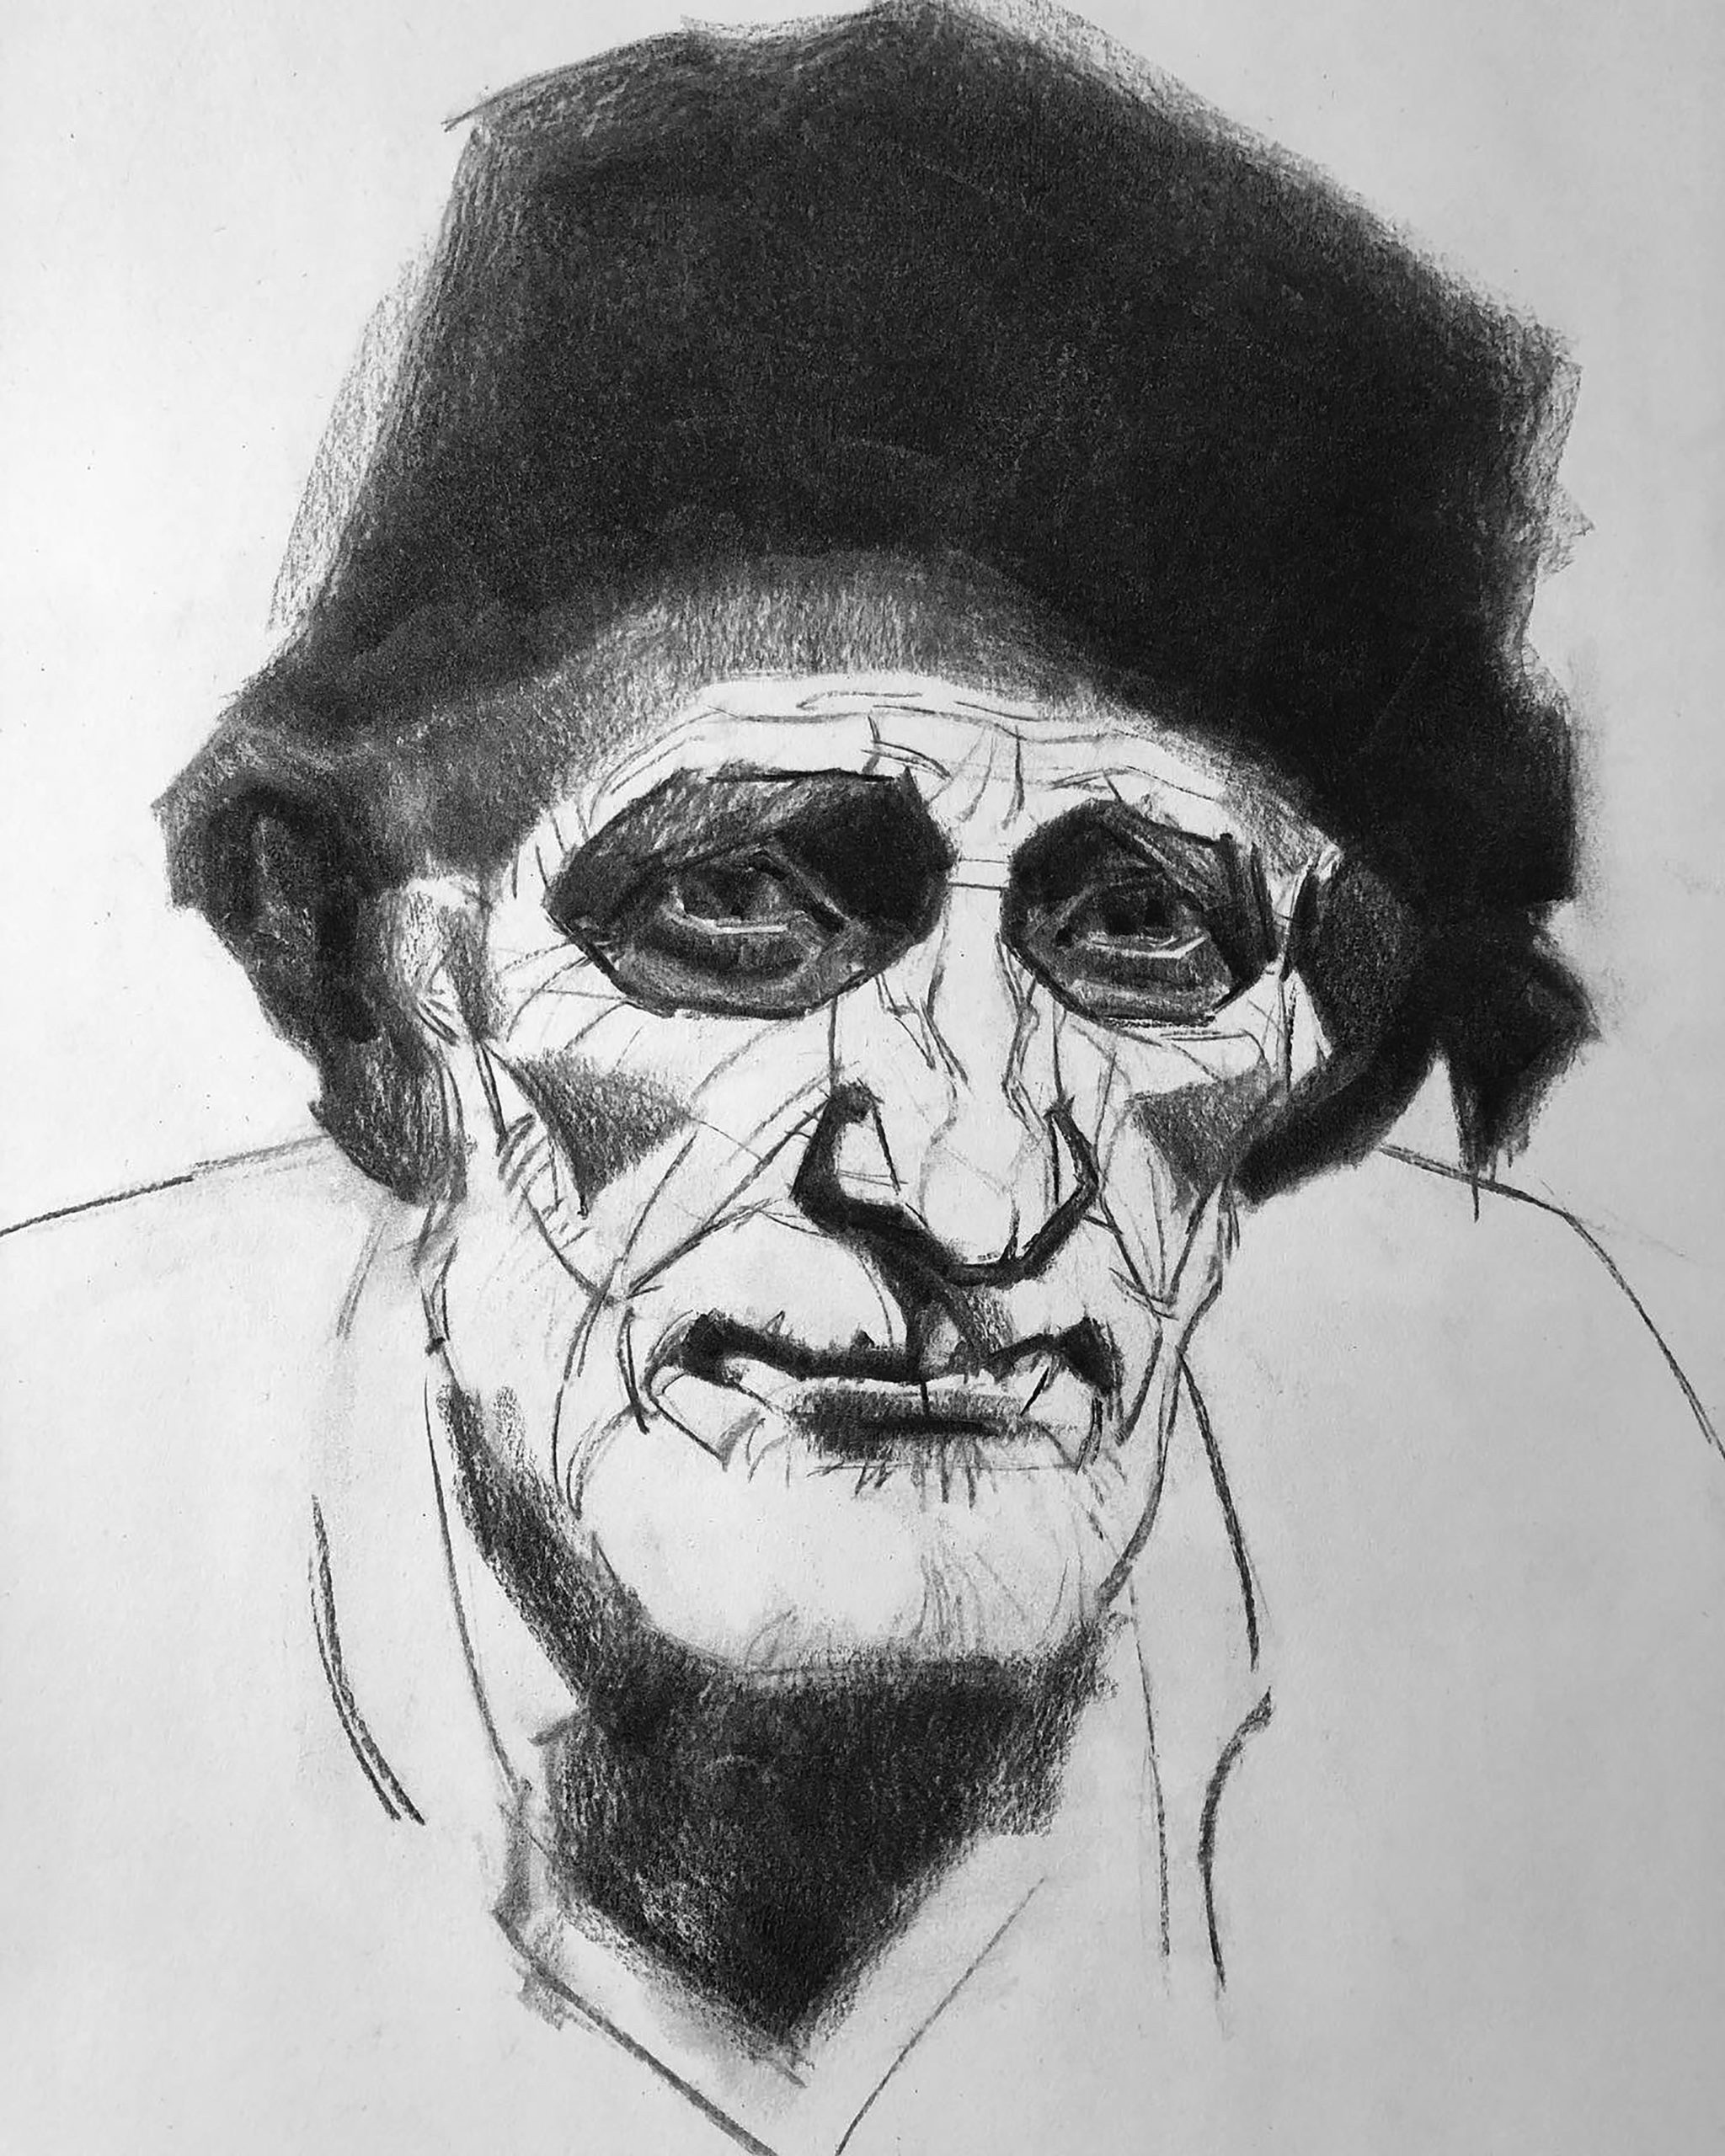
I use Nitram vine charcoal to block in the shapes and plane changes of the head. Pay attention to the proportions of different shapes, re-define the height, width, and length of shapes and re-examine the symmetry and relationships. The gesture of the head can establish the attitude of an entire figure and hint at the person’s emotion. I recommend students spend at least 40-60 minutes on this stage.

***
All objects have light, middle, and dark values when exposed to light. Blocking in builds the structure of the head. Darken the shadow shapes by using the broad side of vine charcoal, rather than the tip, to apply value to the drawing paper, and you will automatically create a soft edge.
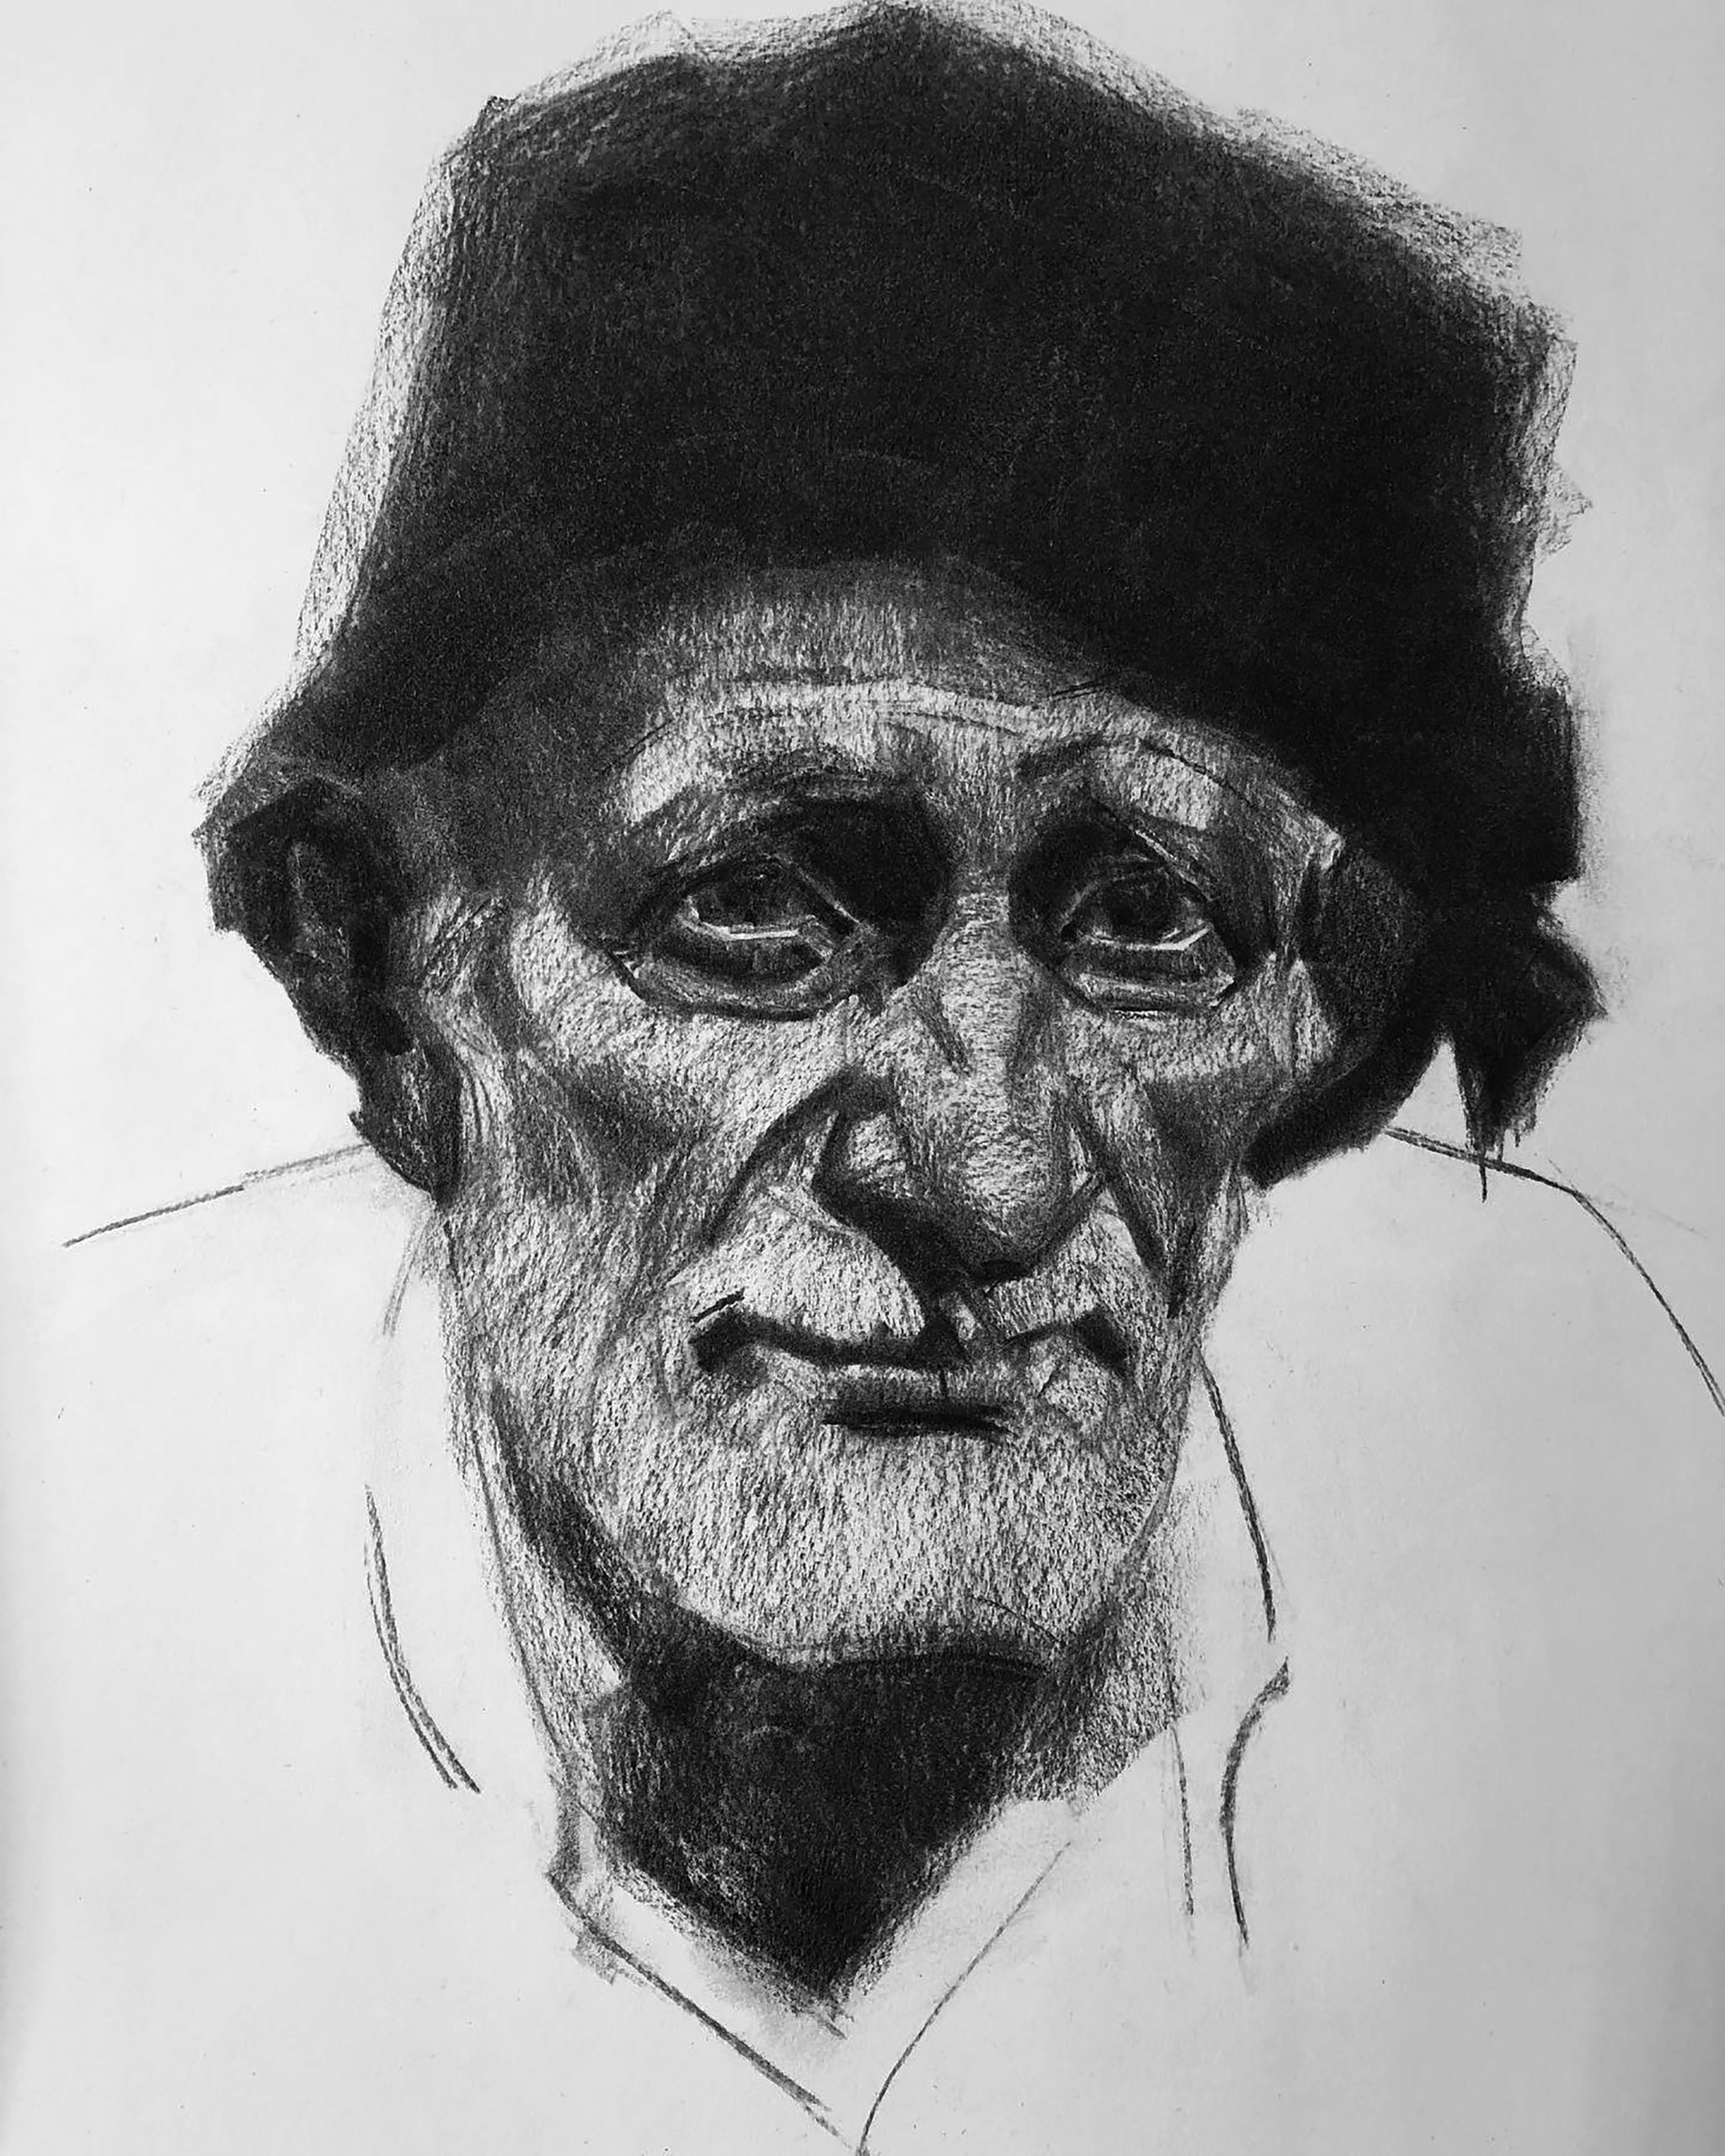
There are only three values: light, middle tone, and shadow. Remember that the paper appears as a light value between light and shadow, so leave the paper value as the light part of the face. Most students always have a hard time figuring out what’s light and shadow on the face. Squinting your eyes helps to see “light” and “shadow” on the face and eliminates the details.
***
To darken the shadow shapes even more, I’d recommend applying cross-hatching, which builds up the layers of the vine charcoal. In this portrait drawing, I hatched the entire shape of the hat, and ignored the details. I applied the light layer of vine charcoal on the light part of the face, and now there is no paper value left.
***
Add the shadow value on the light part of the face, for example on the side planes of the nose and the shadow of the mustache, using the scribbling lines to show the form of the facial hair and wrinkles as the focal point. Train your eyes to see that hair has no definable edge, like smoke. Treat the hair as a mass of light and shadow.
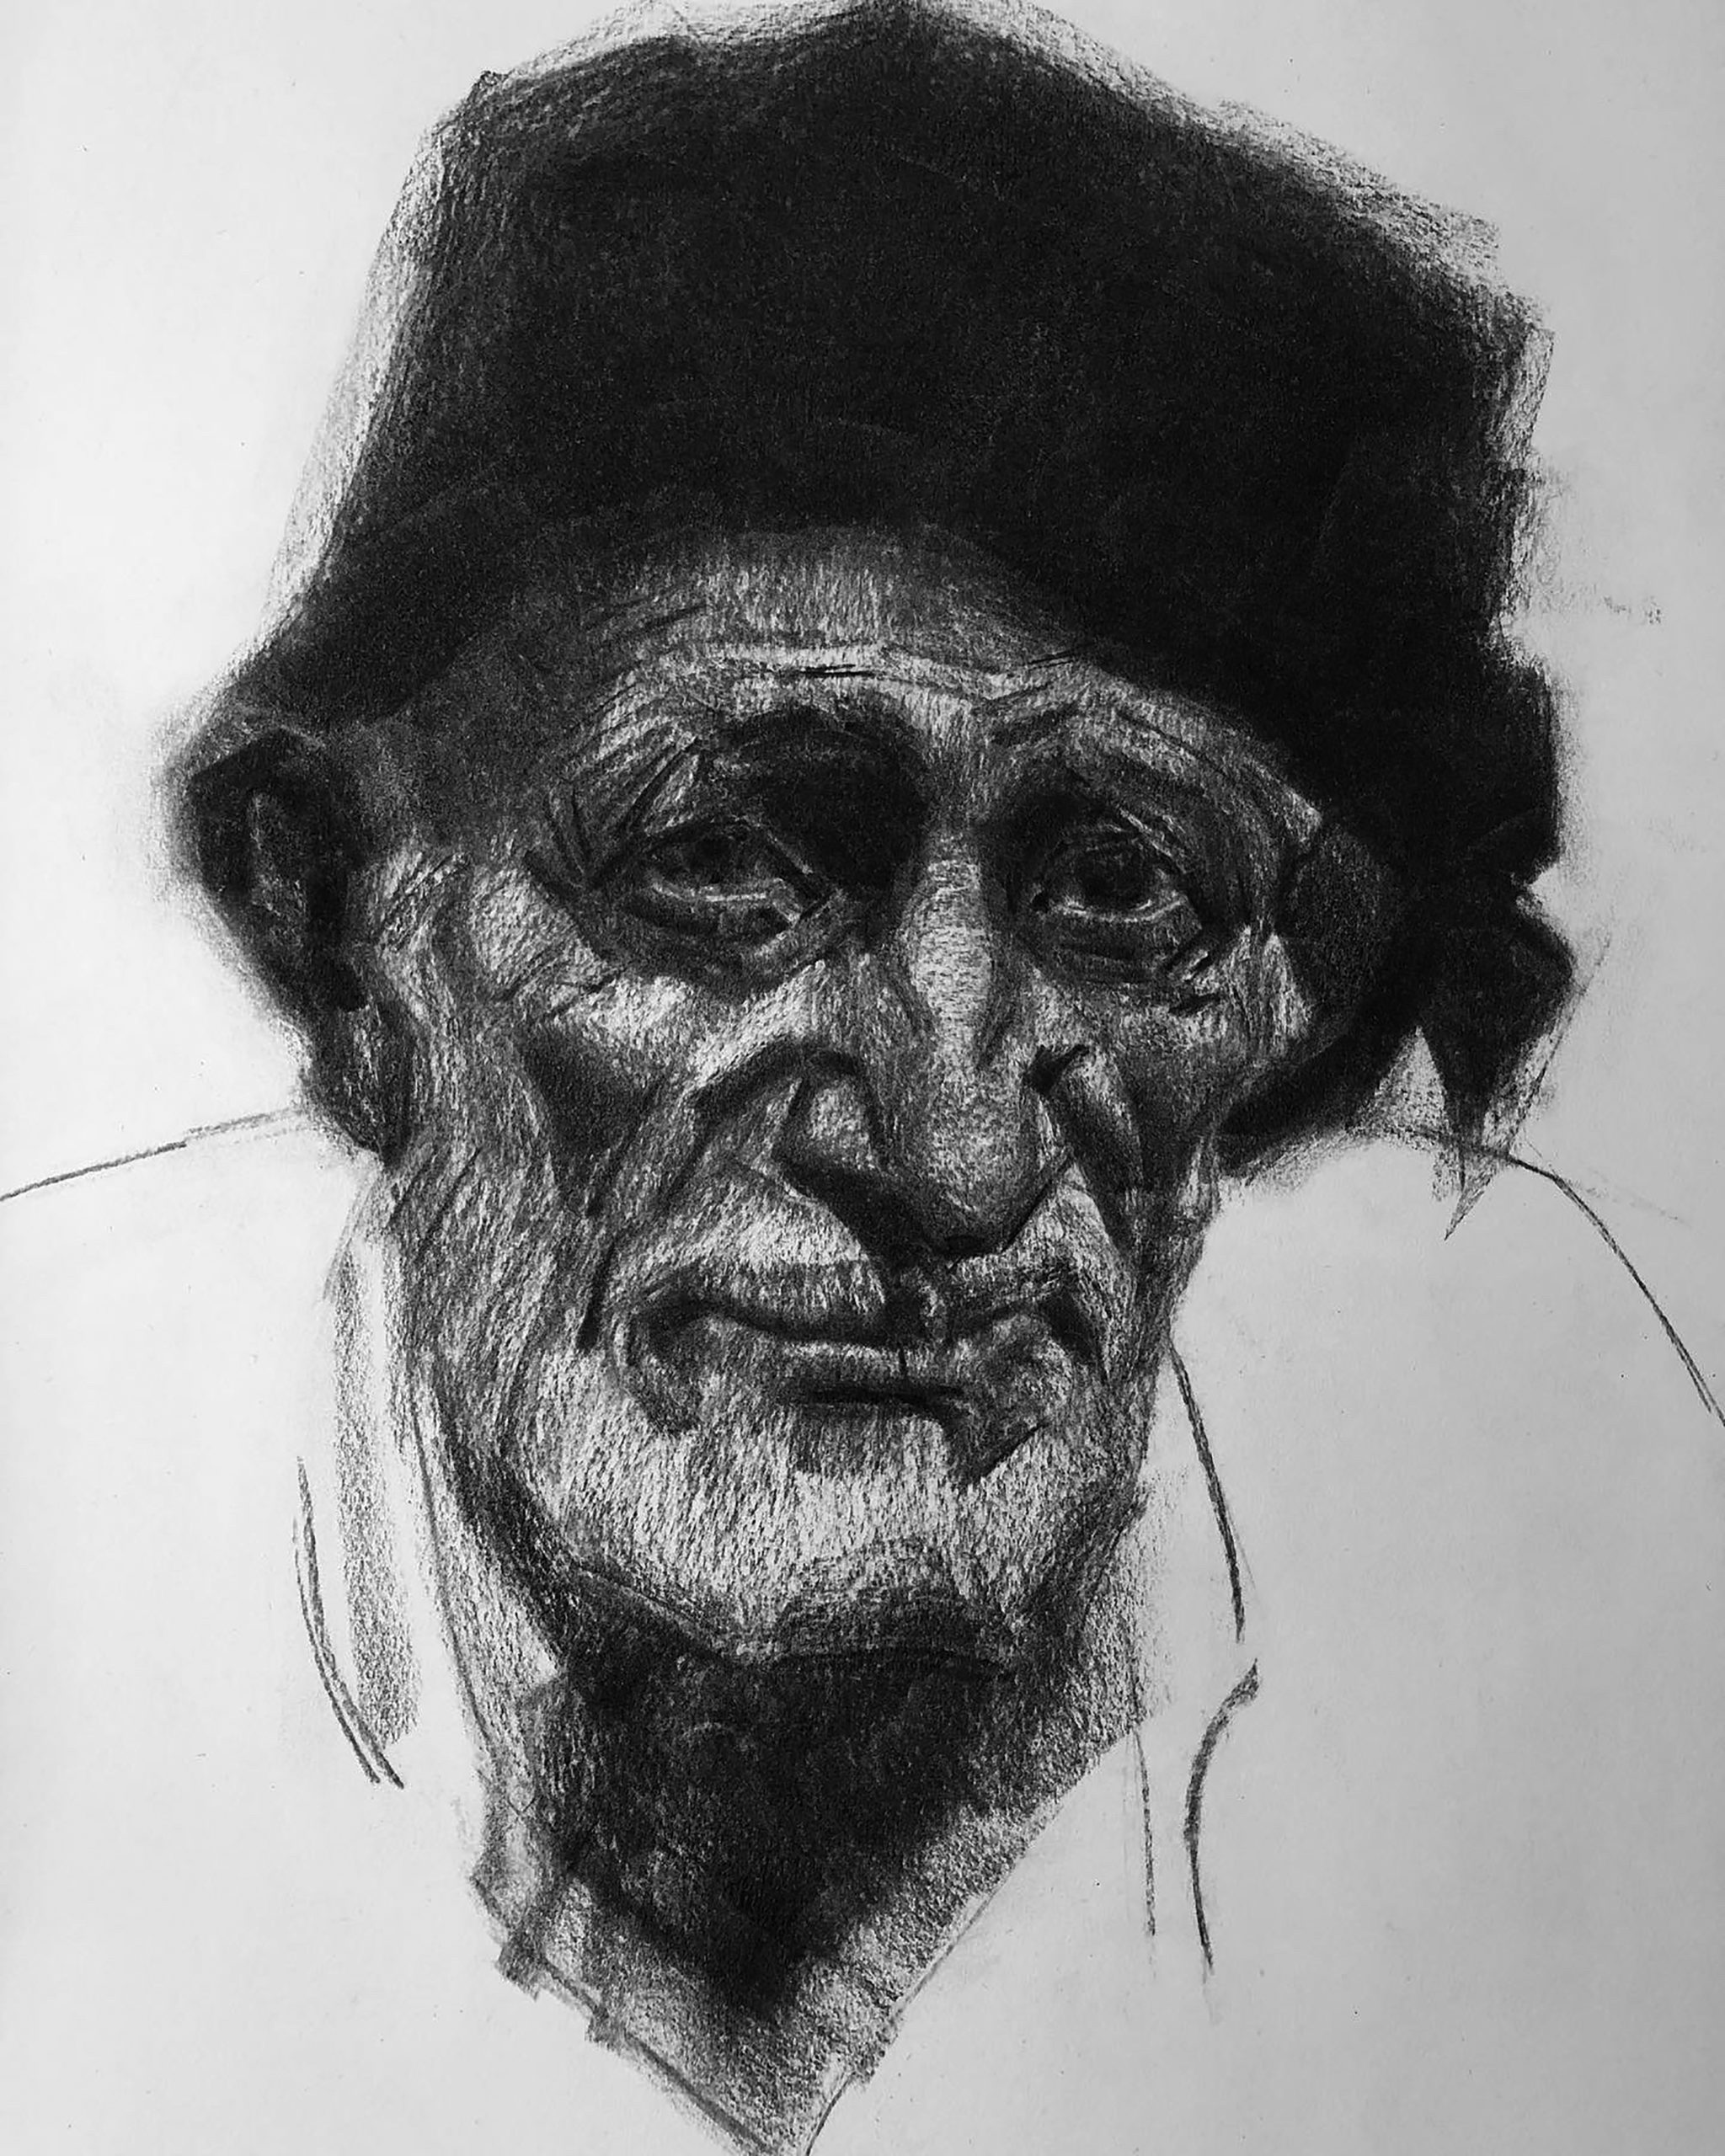
***
Use a kneaded eraser to erase the highlights on the face, which are on the top of the nose, the top planes of the lower eyelid, the eye-balls, the top planes of the face, and the top planes of the mustache. Reinforce the light areas.
***
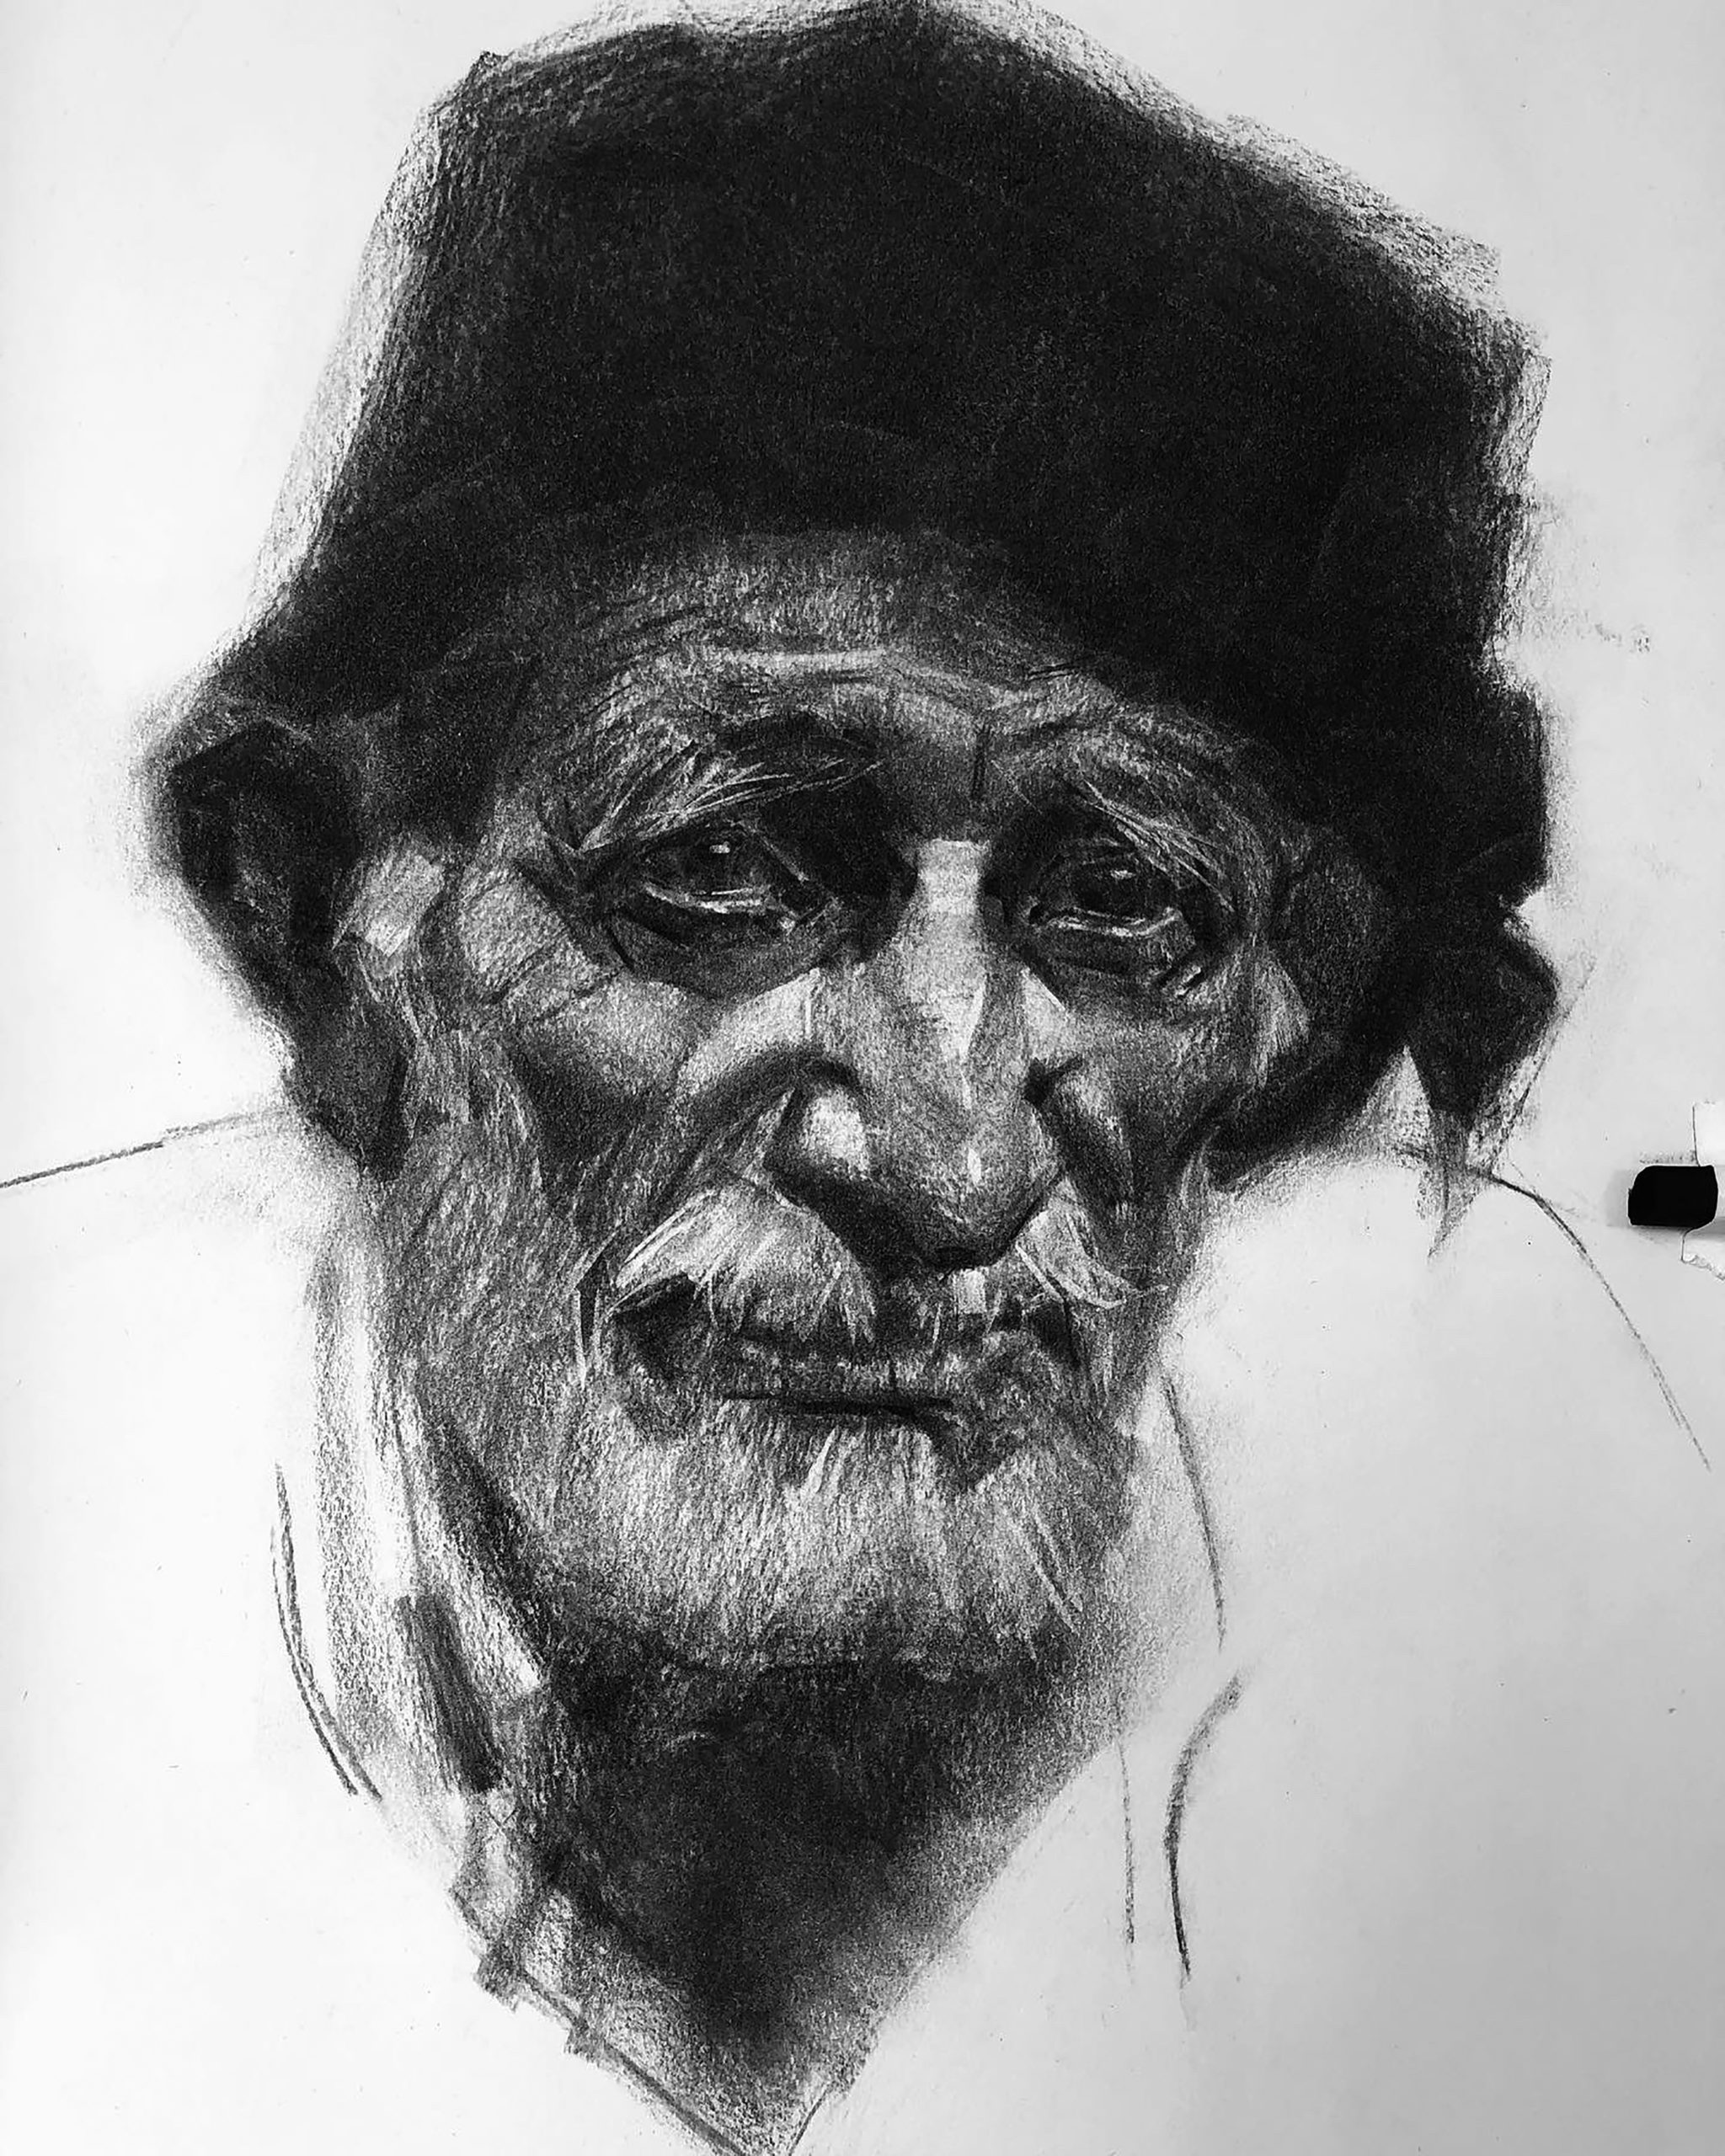
Define the details. You may sometimes be overly meticulous and forego broad strokes. Add simple light and shadow values on the shoulders.
Sometimes I purposely sabotage some of the finished areas slightly, as I worry the drawing is too identical to the subject and therefore will lose the aesthetic value, the interesting part of the drawing.
***
Observe the drawing by squinting; feel the rhythms in the details and then translate them to a variety of strokes to bring the work to life. As eyes are the window to the soul, create the darkest dark accents on the inner corners and pupils. Reinforce the shadow areas and examine the drawing as a whole with a critical eye. Simplify the unnecessary details in the shadow a bit more.
A drawing will never be exactly like the subject, and it doesn’t need to be. It is a drawing, after all, with feelings perhaps!
Related Article: Vine Charcoal Drawings by Oliver Sin


”")