


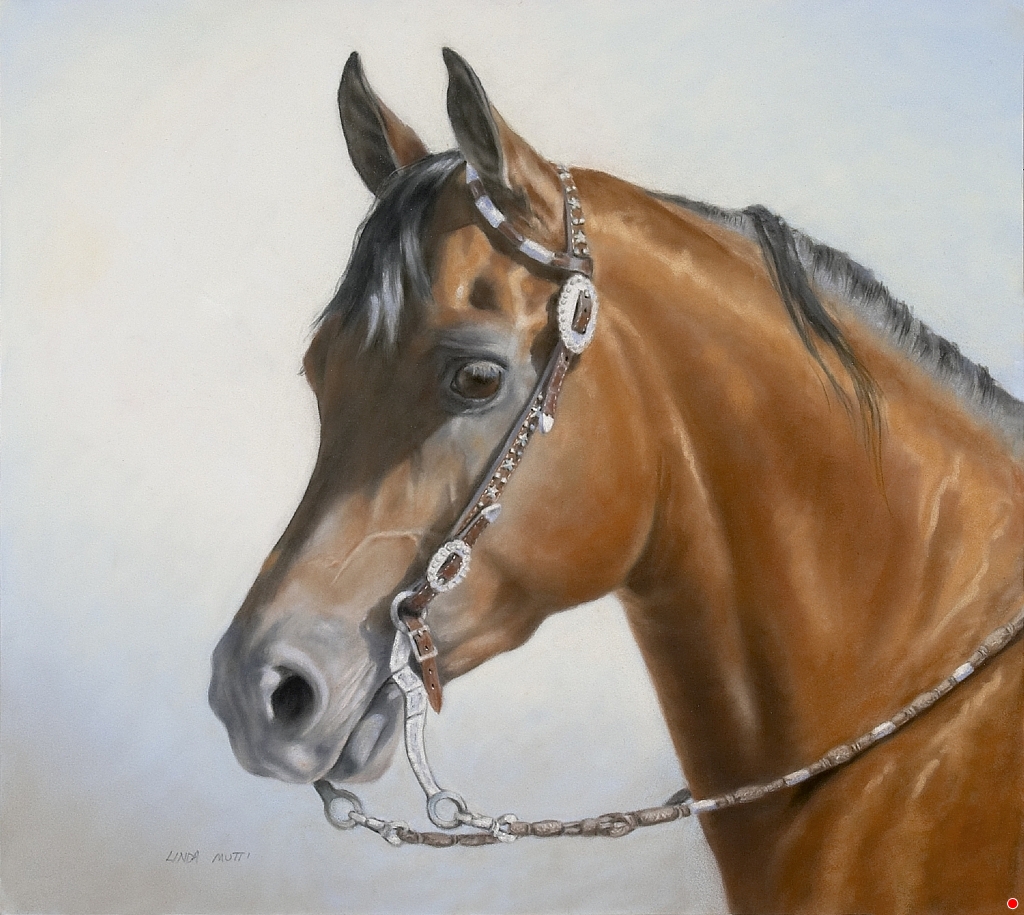
In this episode of Art School Live with Eric Rhoads featuring Linda Mutti on pastel painting, learn about pastel types, layering, textures, and unique techniques to boost your skills and confidence.
Exploring the vibrant world of pastels can be an exciting and fulfilling journey for artists of all levels. Whether you’re a beginner hesitant to pick up a pastel stick or an experienced painter looking to refresh and expand your technique, learning the fundamentals of pastel painting can open up a whole new realm of creative expression. In this episode of Art School Live, we’ll walk you through essential pastel techniques, from basic mark-making to creating rich textures, broken color effects, and building confidence in your art practice.
Watch here:
Why Pastels Are a Great Starting Point for Painters
Many people shy away from painting because they think they lack talent or fear the complexity of mixing colors and mastering brushes. However, pastels offer a uniquely accessible entry into painting. Unlike chalk, pastels are pigment sticks bound with a minimal amount of binder, making them the purest form of pigment available in stick form. This purity gives pastel paintings a luminous vibrancy that is difficult to achieve with other mediums.
Linda emphasizes that pastels are easy to start with because you don’t need to learn complex color mixing. You can pick up a pastel stick and immediately apply color to your work. This immediacy makes pastels an excellent medium for beginners to gain confidence and for seasoned artists to experiment freely.
Understanding Pastels: Types and Techniques
Hard vs. Soft Pastels
One common question among pastel artists is about the difference between hard and soft pastels. The hardness of a pastel depends on how much binder it contains. Hard pastels have more binder and produce lighter, less vibrant marks, while soft pastels have less binder and deliver richer, more vibrant colors.
While some artists suggest starting with hard pastels and layering softer ones on top, Linda encourages choosing pastels based on color preference rather than hardness. Experimenting with both can help you discover your personal style and what works best for your painting approach.
How to Use Pastels Effectively
Pastels can be used in various ways to create different effects:
- Drawing and Coloring: Use the tip of the pastel stick for fine lines and details.
- Broad Strokes: Remove the paper wrapper from the pastel stick to expose more surface area and use the broad edge for covering larger areas quickly.
- Organic Lines: Tip the pastel stick on its side or roll it to create natural, varied lines, perfect for painting grass or tree branches.
- Impasto Effects: Press hard to deposit thick, textured color, useful for flowers or textured surfaces.
Linda also shares a fun and unconventional technique: using a toothbrush dipped in alcohol to splatter pastel pigment onto the paper, creating organic textures like spray on waves or flower fields. This method adds a spontaneous and lively element to your artwork.
Building Texture and Depth with Pastels
Texture plays a crucial role in making a pastel painting come alive. Linda loves working with sanded paper, which has a gritty surface that grabs the pastel pigment and allows for multiple layers. This gritty texture not only holds more pigment but also adds a sparkling quality to the painting when light hits the raised particles.
An innovative technique Linda uses involves applying a pastel ground mixed with texture paste over a watercolor underpainting. This combination adds physical texture to the painting surface, which interacts with the pastel layers to create shadows and depth naturally, especially effective for depicting natural elements like rabbit brush or woody understructures.
Layering and Broken Color
One of the most exciting aspects of pastel painting is layering colors to achieve richness and vibrancy. Instead of blending colors into a flat tone, Linda encourages using “broken color” — layering different hues of the same value that your eye will optically mix. For example, a sky might include blues, yellows, pinks, and greens layered together to create a dynamic and lively effect.
When you don’t have the exact color you want, layering complementary or nearby colors can neutralize or enrich the color. For example, dragging a muted green over a bright red sunset sky can soften it without dulling the vibrancy underneath.
Starting Your Pastel Painting: Preparation and Approach
Linda’s process often begins with a watercolor underpainting, which she uses to establish form and a tonal foundation. This step helps prevent the intimidating blank white paper feeling and provides a guide to work against as you build your pastel layers.
When sketching your composition, Linda draws a boundary line inside the edges of the paper to ensure important elements don’t get lost under the frame. This simple step helps maintain a balanced composition.
Remember, the initial pastel layers are often a block-in stage where you loosely mask shapes and colors. You don’t need to finesse details immediately. Building up the painting gradually allows for adjustments and refinements later.
Color Harmony and Composition
Maintaining color harmony throughout your painting is essential. Linda suggests repeating colors from one part of the painting in other areas to create a cohesive feel. For example, if you use a pink in the sky, try adding a touch of that pink in the foreground or reflections. This technique ties all elements together and enhances the overall unity of the piece.
Another compositional tip is to place your most detailed and high-contrast areas where dark and light meet, which naturally draws the viewer’s eye. Using tools like a three-sided comb to create texture at these focal points can add interest and energy.
Practical Tips for Working with Pastels
- Remove Paper Wrappers: Taking off the paper from pastel sticks exposes more pigment and allows for broader strokes and better blending.
- Use Gritty Paper: Sanded papers with high grit hold more layers and produce beautiful textures and sparkle.
- Blend Thoughtfully: While blending can soften edges and create smooth transitions, over-blending can dull the crystal-like sparkle of pastels. Use blending sparingly and return with marks to restore vibrancy.
- Layer Neutrals Separately: Keeping neutral and muted colors in a separate area of your palette helps you avoid confusing them and makes it easier to use them effectively.
- Protect Your Work: Linda advises framing pastels without mats and sealing the glass to prevent pastel dust from disturbing the artwork. She avoids fixatives because they can darken colors.
- Embrace Mistakes: Don’t be afraid to make a mess or experiment. Playing freely with pastels is part of the learning process.
Building Confidence Through Practice and Community
Linda’s journey with pastels has been transformative, allowing her to paint with more color and joy. She encourages artists to take risks, try new things, and not be afraid of imperfection. Confidence grows through practice and exploring the medium’s expressive potential.
Participating in events like the Plein Air Convention & Expo or online art workshops such as Pastel Live can provide invaluable learning opportunities and community support. These events offer expert instruction, camaraderie, and inspiration that fuel artistic growth.
“Go out and play. Have fun. Be free to just make a mess. It’s okay.” – Linda Mutti
Exploring New Horizons: Painting Trips and Inspiration
For those looking to deepen their pastel experience, Linda shares her excitement about upcoming painting trips to breathtaking locations such as Switzerland and Lake Como. These trips combine travel, cultural immersion, and daily painting sessions in some of the world’s most picturesque settings.
Painting outdoors, or “plein air,” offers unique challenges and rewards, from capturing changing light to connecting with nature’s rhythms. Linda’s enthusiasm for these trips highlights how painting can be both a personal and shared adventure.
Final Thoughts: Start Your Pastel Journey Today
Pastel painting is a joyful, accessible, and richly rewarding medium that invites artists to explore color, texture, and expression with immediacy and freedom. Whether you’re just beginning or seeking to refine your skills, embracing pastel techniques can revitalize your artistic practice.
So pick up those pastel sticks, remove those paper wrappers, and let your creativity flow. Dive into the world of pastels with confidence and joy — your next masterpiece awaits!
Helpful Links
-
- Connect with Linda Mutti online.
- Register for Pastel Live, including faculty artists Linda Mutti, and many more!
- Browse more articles on pastel painting here at realismtoday.com.


”")
Great tips on pastel techniques, thanks for sharing! Quick question: do you suggest using a specific type of paper to get the best texture with pastels? Also, have you tried the toothbrush splatter method on different paper surfaces? Curious how it works on smoother versus rougher papers.
Comments are closed.