


How to Paint Flowers > The following is part of a series featuring a leader in the art community who will be joining us on the faculty of Realism Live, November 9-11, 2023.
By Pat Fiorello
patfiorello.com
Flowers can be a fun subject to paint. They are uplifting and offer an opportunity for vibrant colors, dynamic movement, and interesting shapes in our paintings. But their complexity can also make them a potentially challenging and even intimidating subject to paint.
Over my many years of painting flowers and teaching, I have found several tips that help me to capture the essence of flowers, in a painterly way, without getting lost in every last petal. I hope sharing these approaches helps you in your flower painting efforts. My photos depict an oil painting example, but these tips are relevant for any medium and can apply to simplifying other complex subjects as well.
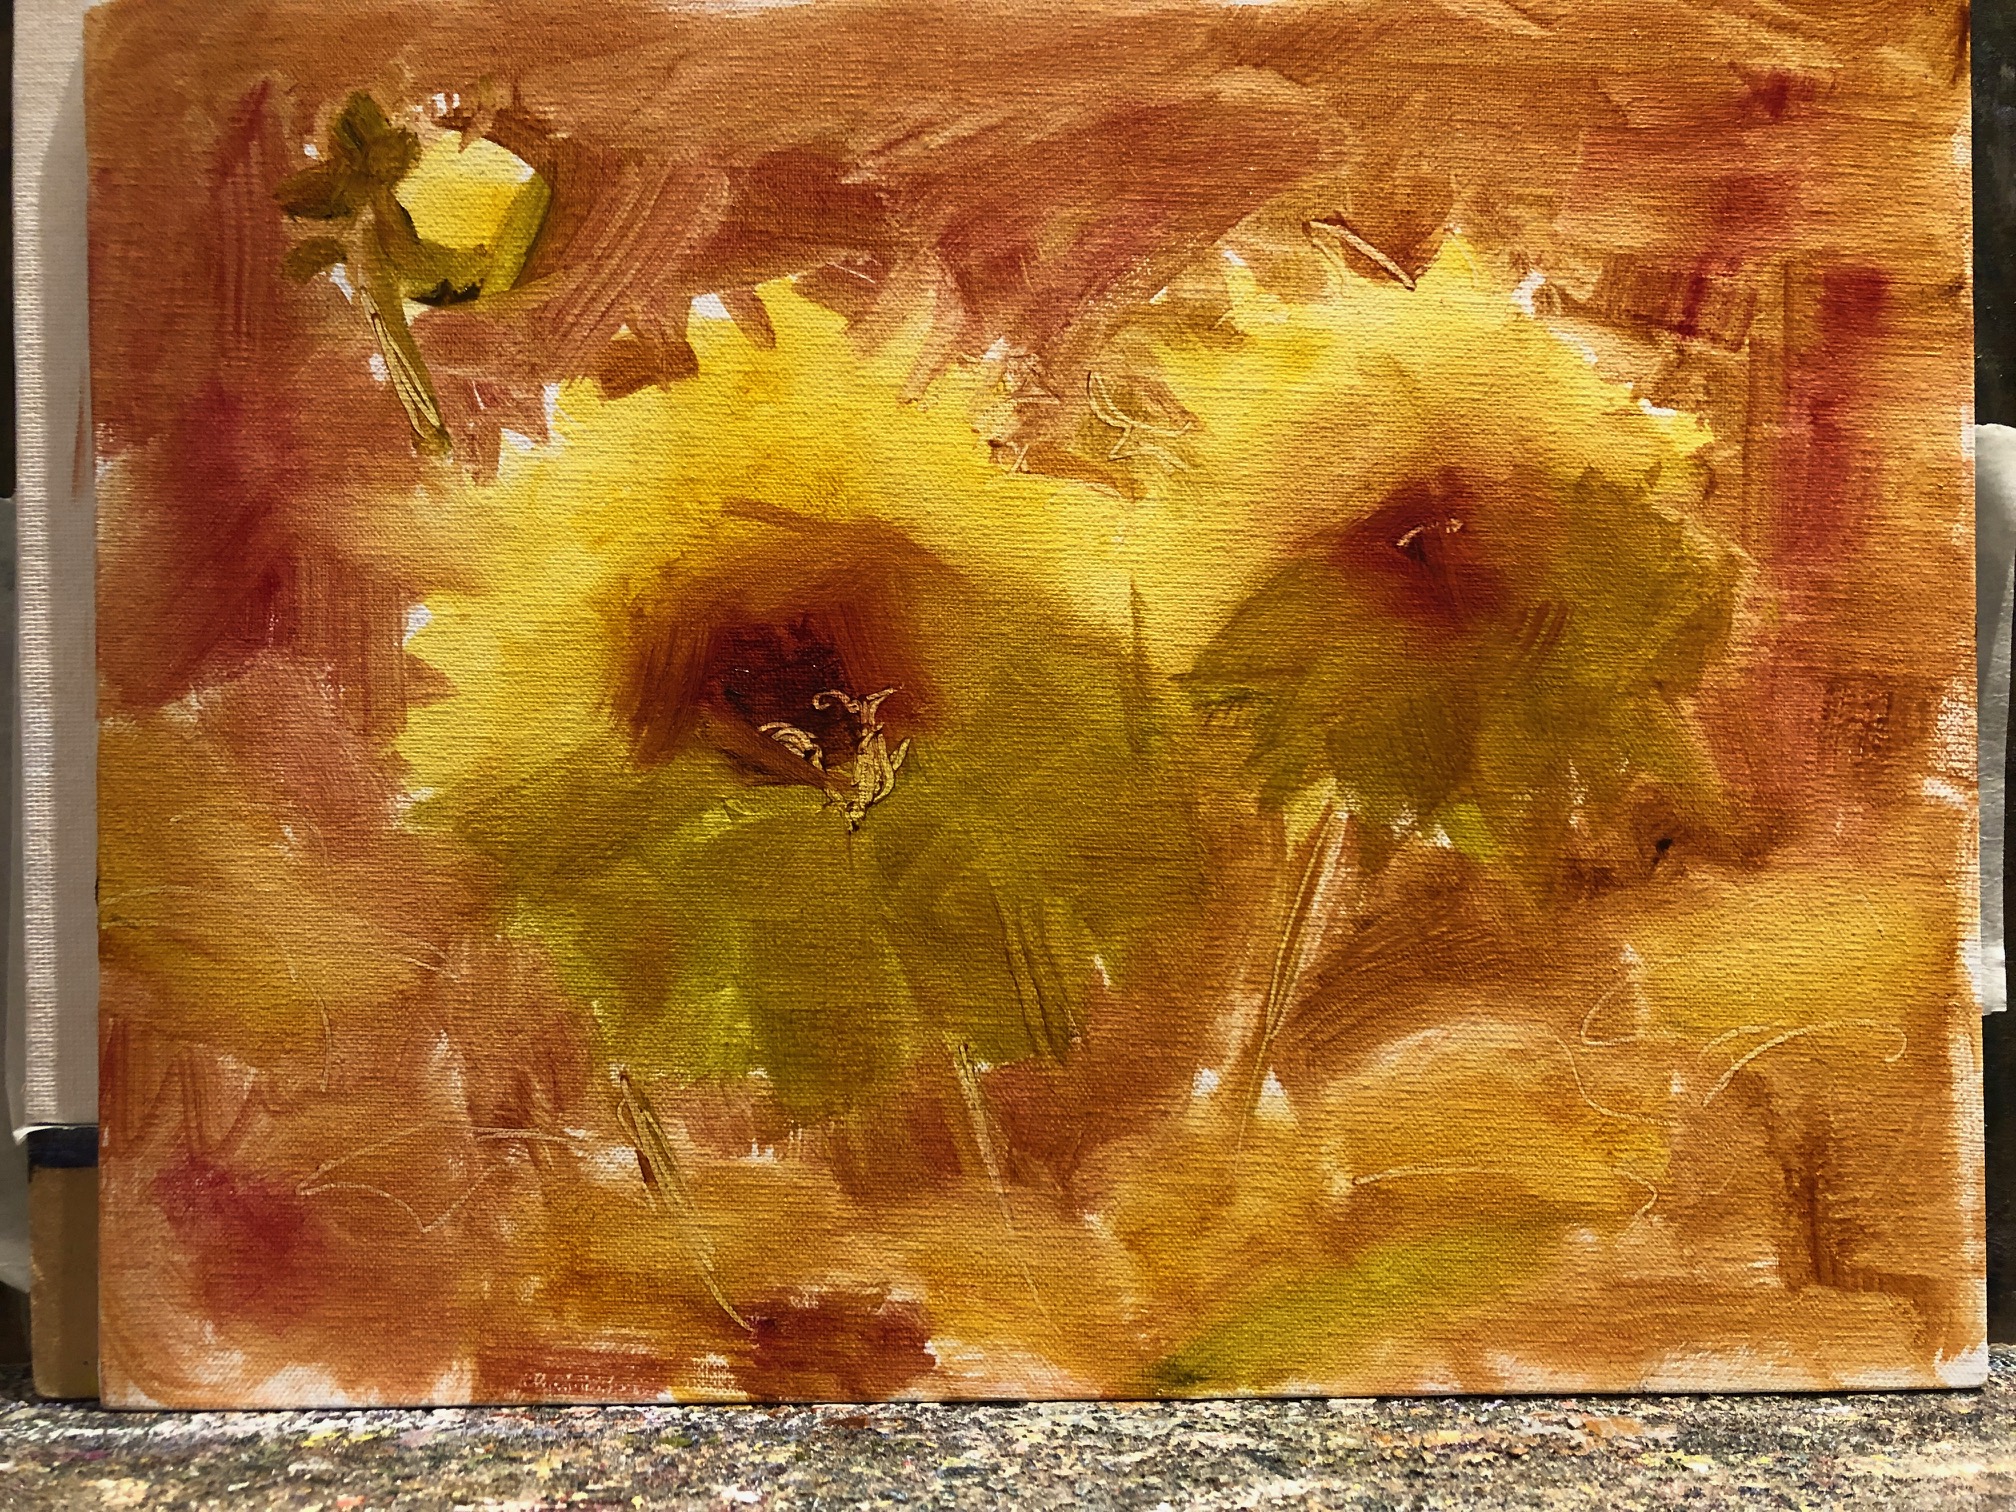
1. Understand and simplify the overall shape of the flower.
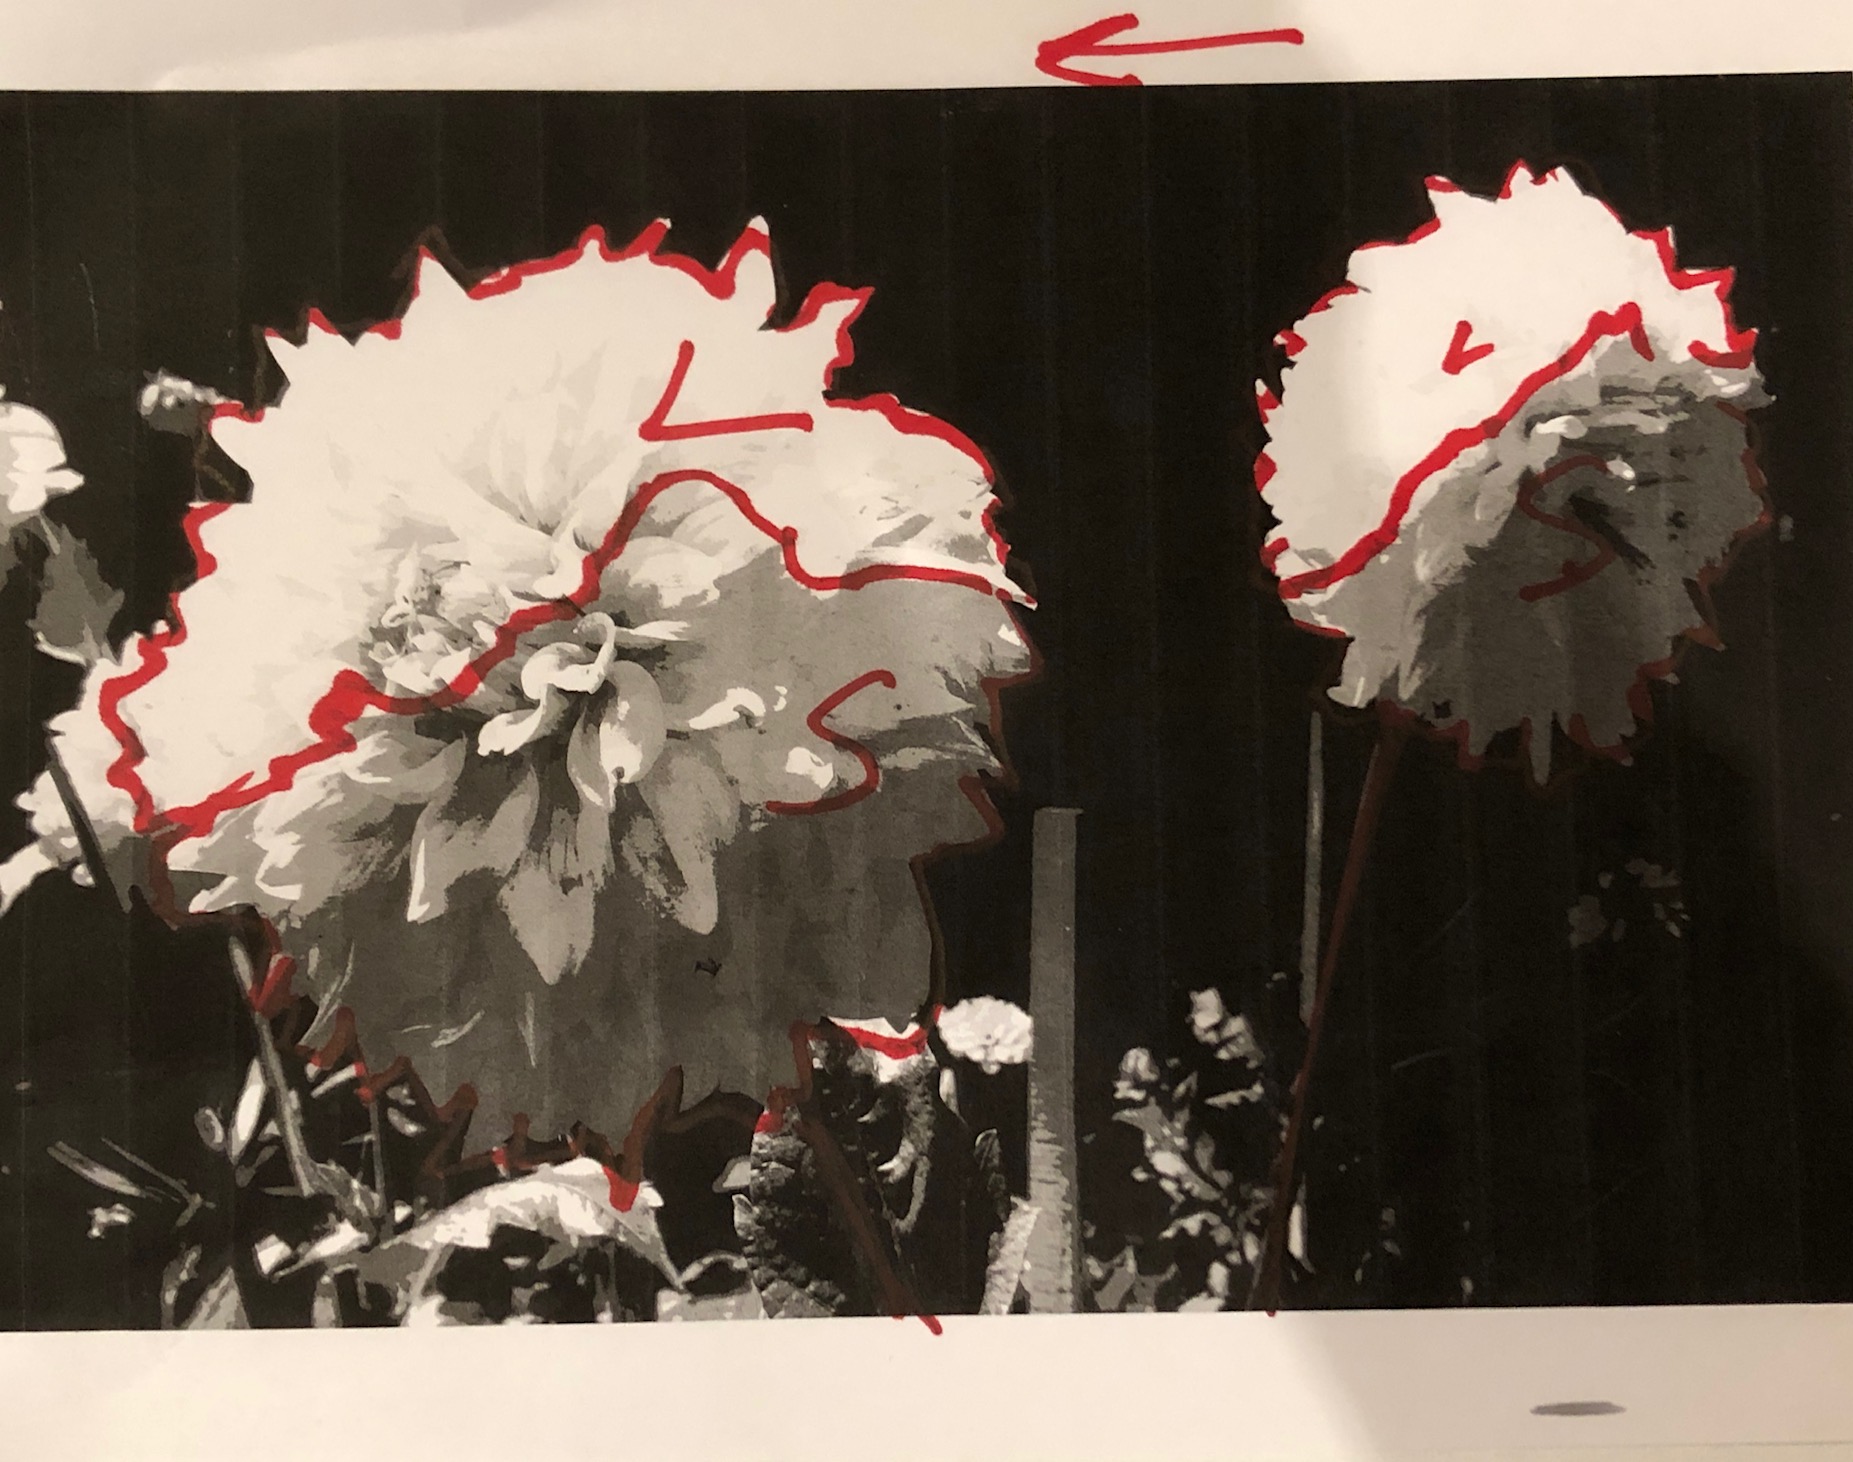
The quantity of petals and small, intricate details in flowers can often steal our attention, causing us to lose the big picture. To simplify, try to relate the overall perimeter shape of the flower to a simpler and more familiar shape. This will give you a clue on where to look for big patterns of light and shadow and ignore the tiny shadow pieces that petals cast upon each other.
For example, a garden rose might be a similar shape to a teacup, a tulip to a wine glass shape, a daisy or other flowers that radiate from the center might be more like a plate, a lily to a trumpet or cone. Thinking about how light would wrap around those simpler shapes will help you understand light and shadow patterns on the overall shape of that particular type of flower.
2. Paint in Sequential Steps – Do not skip this step!
I think of painting in 3 simple steps: 1-2-3.
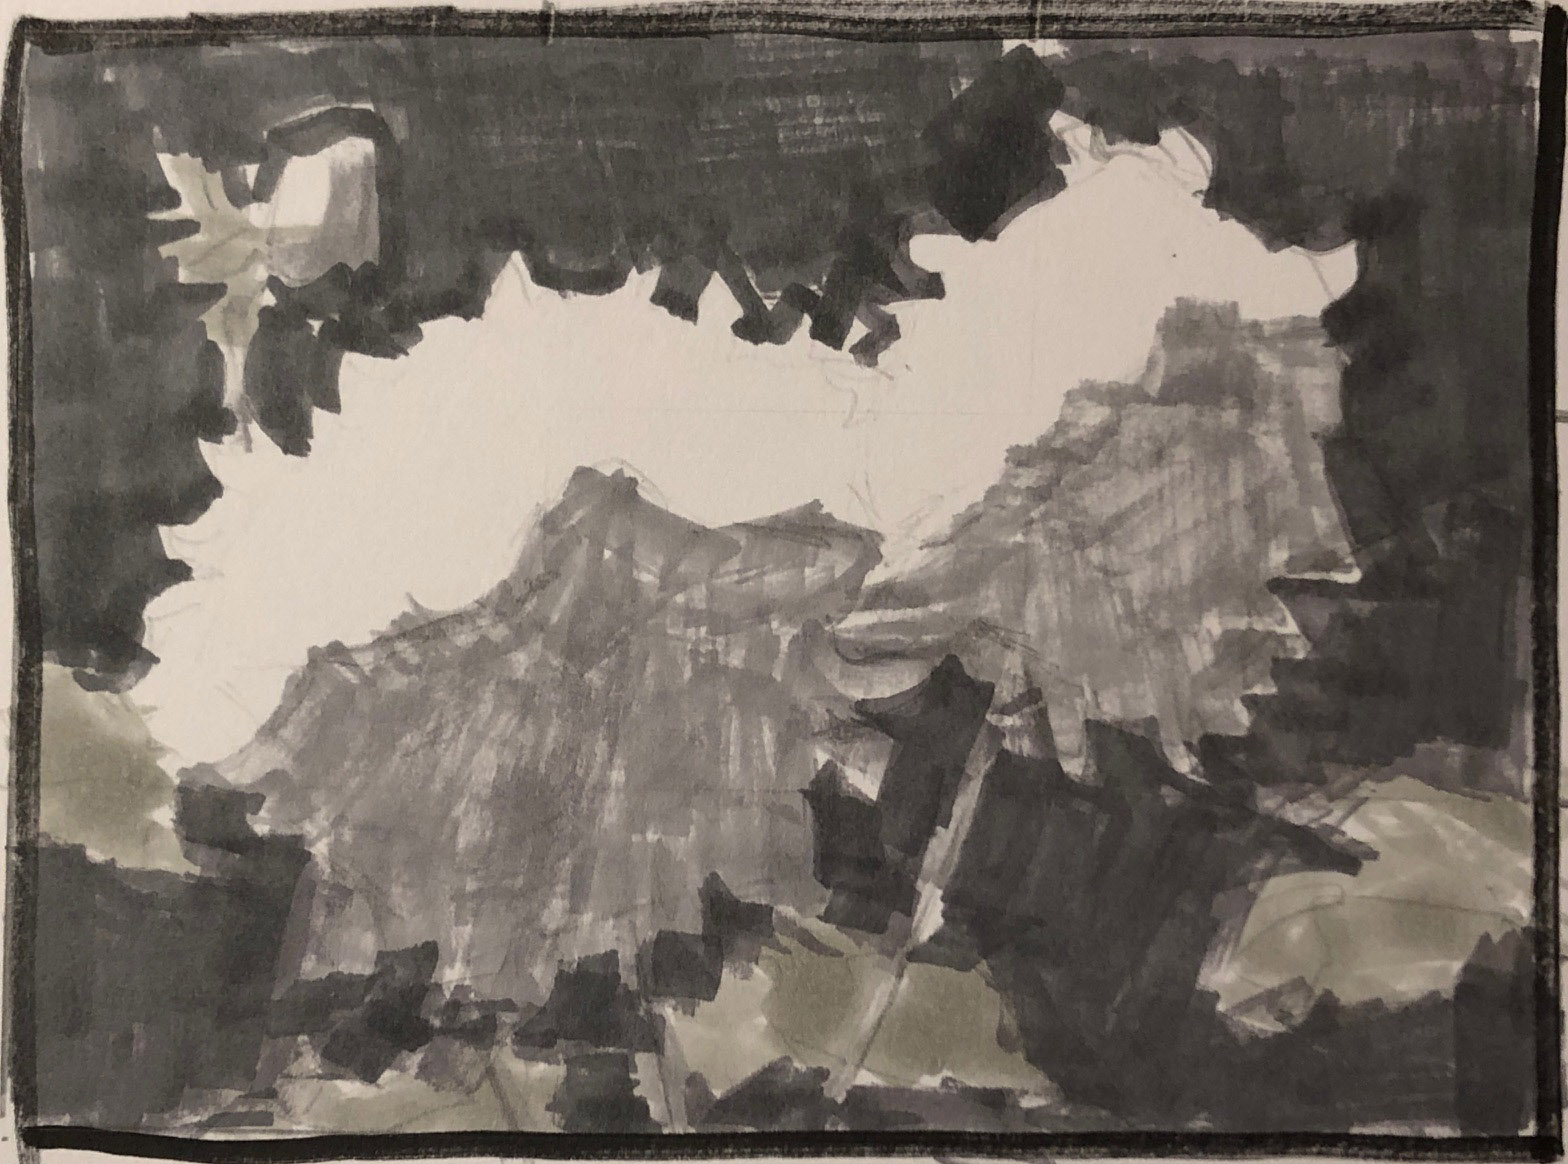
1. First (flat) Shape,
2. Then Form (Light/Shadow)
3. And lastly, Details
Going in this order can simplify the painting process for anything. I find many students can do a good job observing and blocking in the overall shape of the flower, but then get caught up in seeing the petals/texture, so they skip step 2 and go directly to step 3. They keep piling on more and more paint for each separate petal, attempting to describe the petals precisely, but never achieving the depth and sense of realism of the flower since they have not stated the overall light/shadow relationship.
Remember, don’t jump to details before you have the form established. As one of my favorite teachers, Robert Johnson said, “You have to earn your right to paint the petals,” meaning you can’t get to the details before you have the overall shape and form established.
You can’t put birthday candles on a cake before you have baked the cake and frosted it. Jumping to details too early is the same thing. It just doesn’t work. Think about consolidating shapes before separating them. Doing a preliminary value sketch will help you stay focused on the big picture.
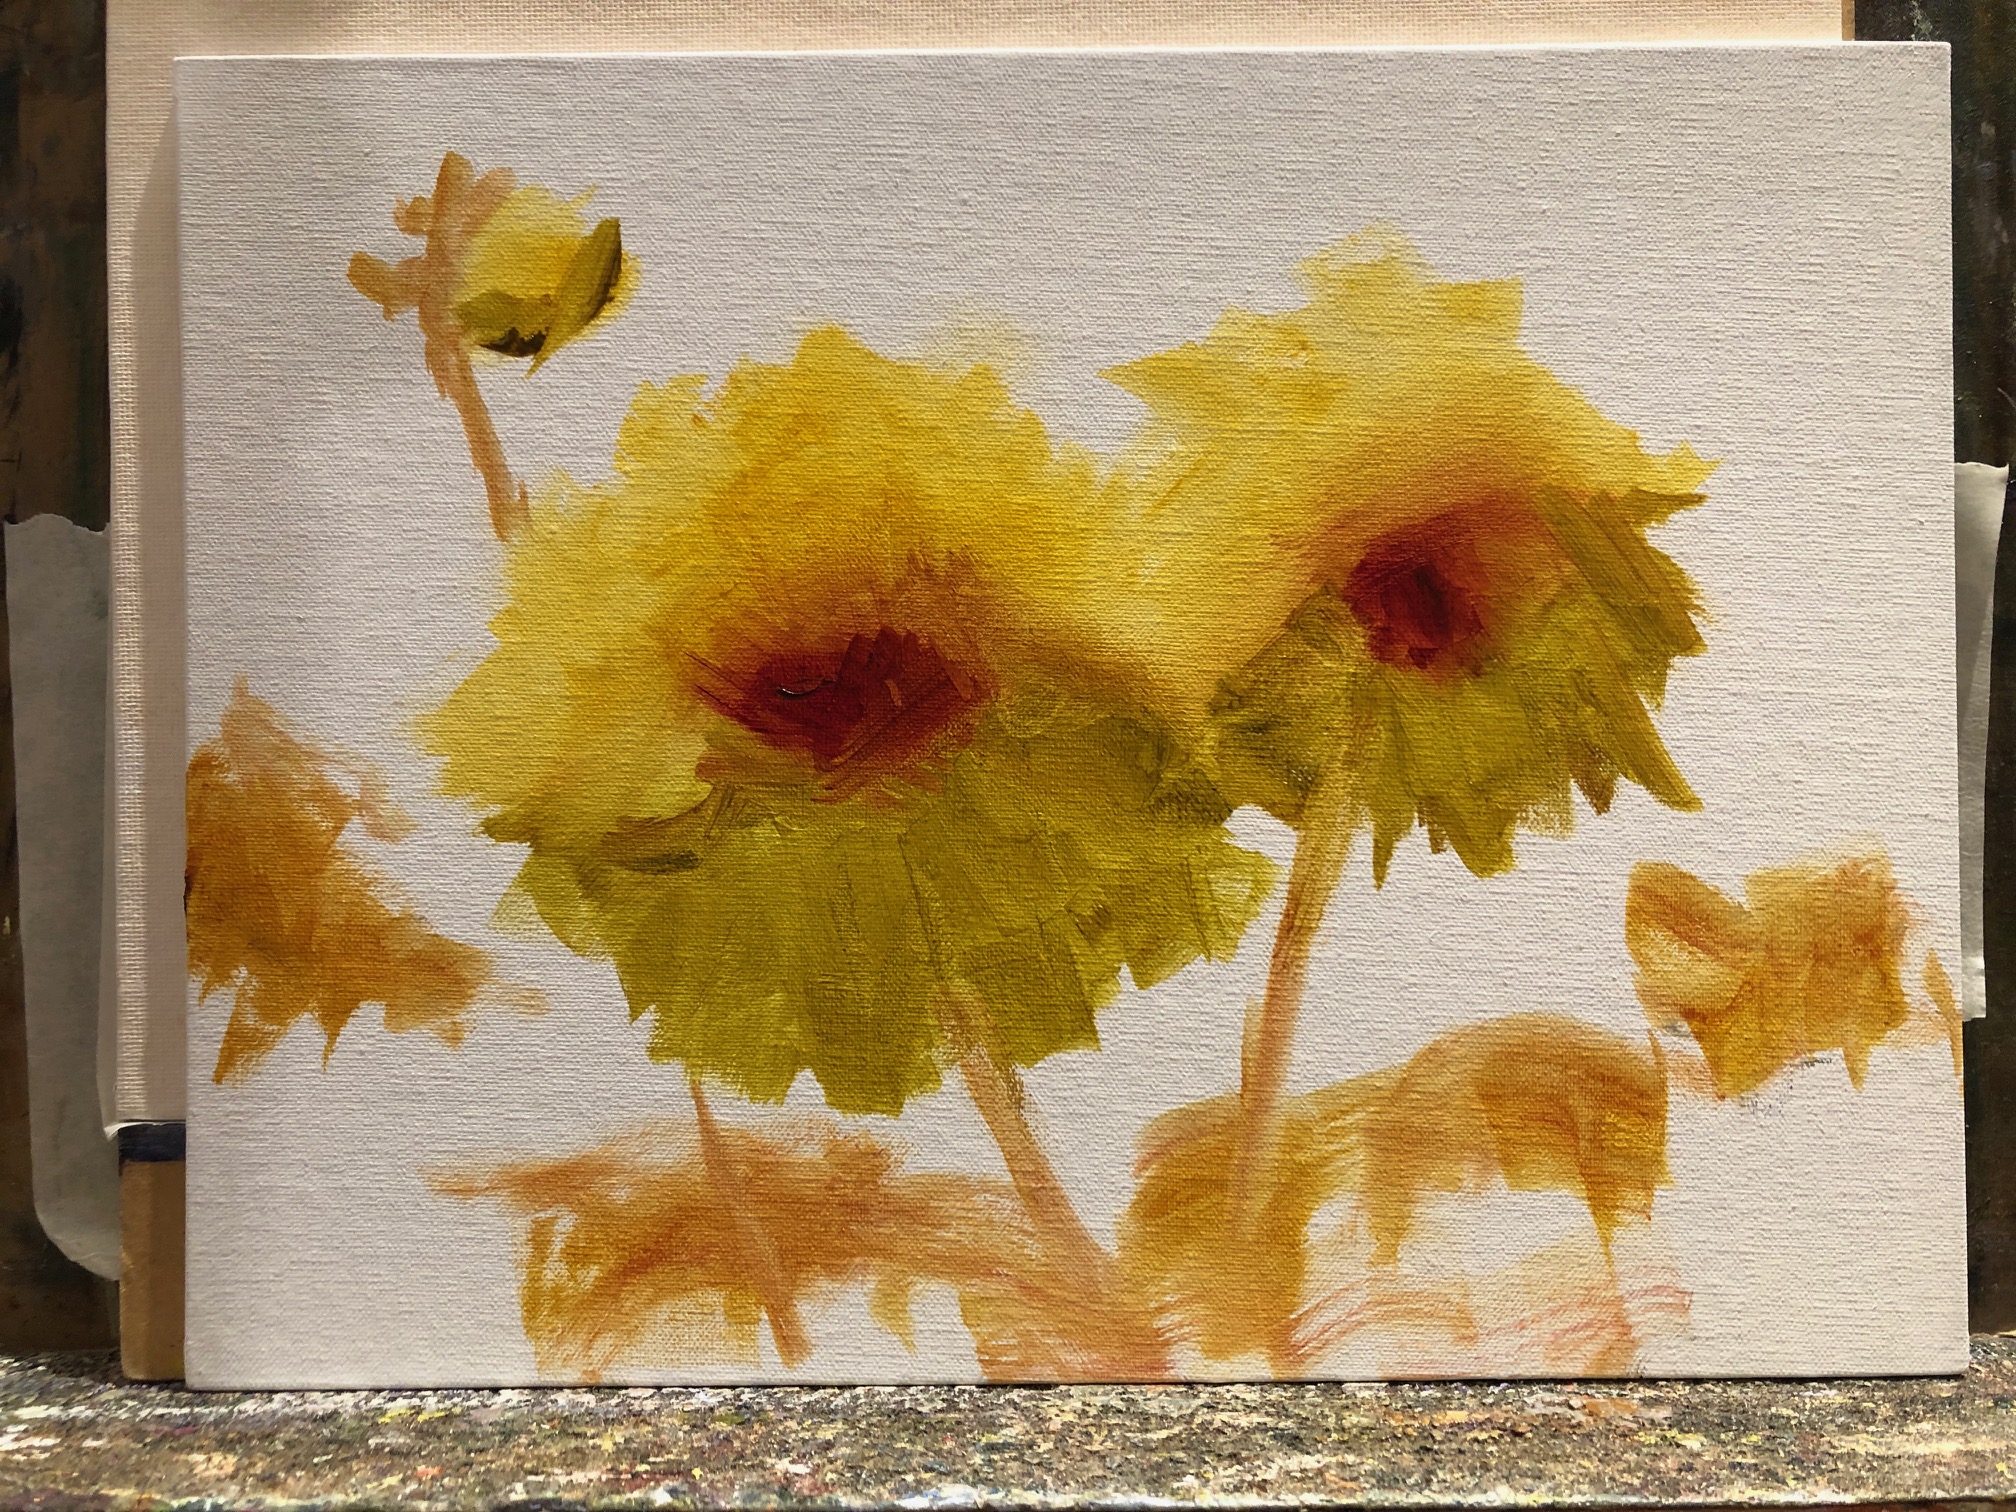
3. Start loose. I begin with a general massing in of shapes with my brushes rather than a line drawing. If you start really tight, rendering in every petal, you have a lot invested in that start and will tend to want to protect the drawing and “color in” the separate petals. If you start loose with a general shape, you can always tighten up along the way, but if you start with a very detailed drawing, you might stay tight till the end.
4. Select and suggest a few specific petals and edges on the main flower(s) / center of interest.
Your center of interest is where you want the most contrast to draw the eye. Here’s the place for crisper edges, more detail (small shapes), thicker paint, and possibly brighter/more contrasting color.
When painting the main flower, I am looking for a FEW details that are characteristic of THAT particular flower. I want a natural feeling, so I will look to the idiosyncrasies of the specific flower I’m looking at to give me some clues. I don’t want a “generic” symbol of a rose or tulip. Just like people have their own gestures, so do individual flowers (and they will change as the day goes on).
I sometimes close my eyes and open them and see where little petals that are being clipped by light pop out. There will be some bits of light in the shadow and some bits of shadow in the light, but you have to show restraint and not describe them all. Show just a few that will suggest what’s going on. If you overdo that, you will end up chopping up your areas of light and shadow and losing the sense of form you initially worked so hard to establish.
5. Subdue details in the shadows and supporting cast.
Don’t tell too much in these areas of the painting. Play them down compared to your center of interest area. If you have an equal treatment of detail in the shadow and light it can be confusing, (How would one see the same amount of detail in the light and shadow?) and you are telling more than the viewer needs to know.
Save the details and contrast for the areas of most importance in your painting, rather than spreading them around all over with equal emphasis.
Bonus Tip: Give yourself permission to be selective. It’s your painting. As artists, we tend to observe more nuances and be enchanted and excited by visual stimuli. But you don’t need to report everything you see! If you are working in a photorealistic or botanical illustration style (which are perfectly valid choices if you prefer that), that’s one thing. But if you want a more painterly feel, you can leave a lot of information out and still communicate your vision or intention to the viewer.
A painting is about creating visual poetry with feeling – not writing an encyclopedia of facts. So, give yourself permission to hold back. See how little you can say and still get your point across. In painting, less can be more.
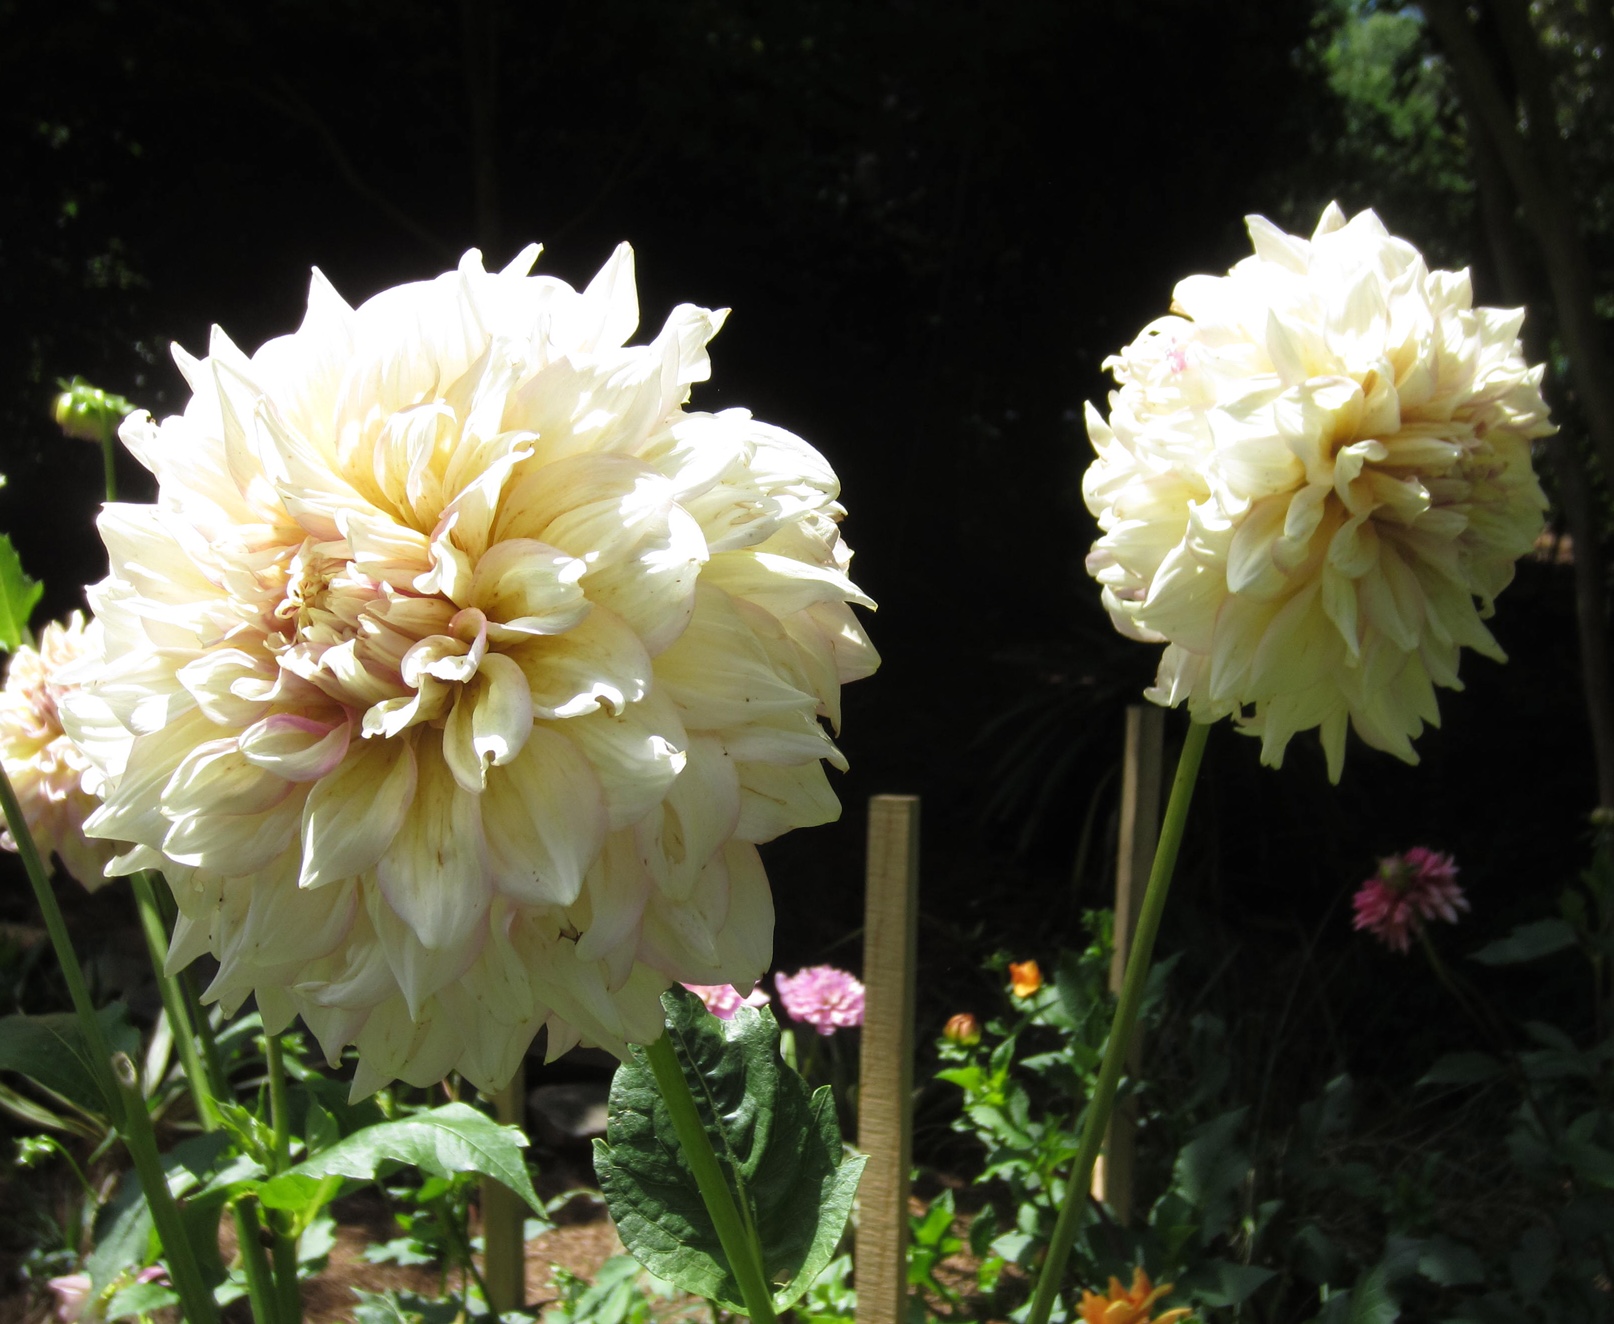
Here’s a recent example. I lost count but there were over 120 petals in the dahlia on the left. I’m not going to try to paint all those – I just want to get the feeling of the dahlia.
P.S.
If you’re curious about how I apply color mixing theory to create my most vibrant paintings, check out my latest video course, Vibrant Flowers – Paint Your Garden. In this course on how to paint flowers, I dive deep into my “T.C.U. Method” and the most common mistake I see artists make — and, of course, I show you how to steer clear of it. If you’ve ever been intimidated by painting flowers, be sure to check it out.
How to Paint Flowers – a Demo
Watch this episode of Art School Live with Eric Rhoads: How to Simplify Complex Flowers with Pat Fiorello, in which Pat shares a painting demo on how to paint flowers >


”")