“There’s an almost mystical gravity to this old material,” says Julio Reyes, on drawing with charcoal. “There’s no denying its seriousness once you’ve placed your first mark to paper. You find that you are, in essence, dealing with the extremes of creation, that most ancient and elemental contrast — dark against light.”
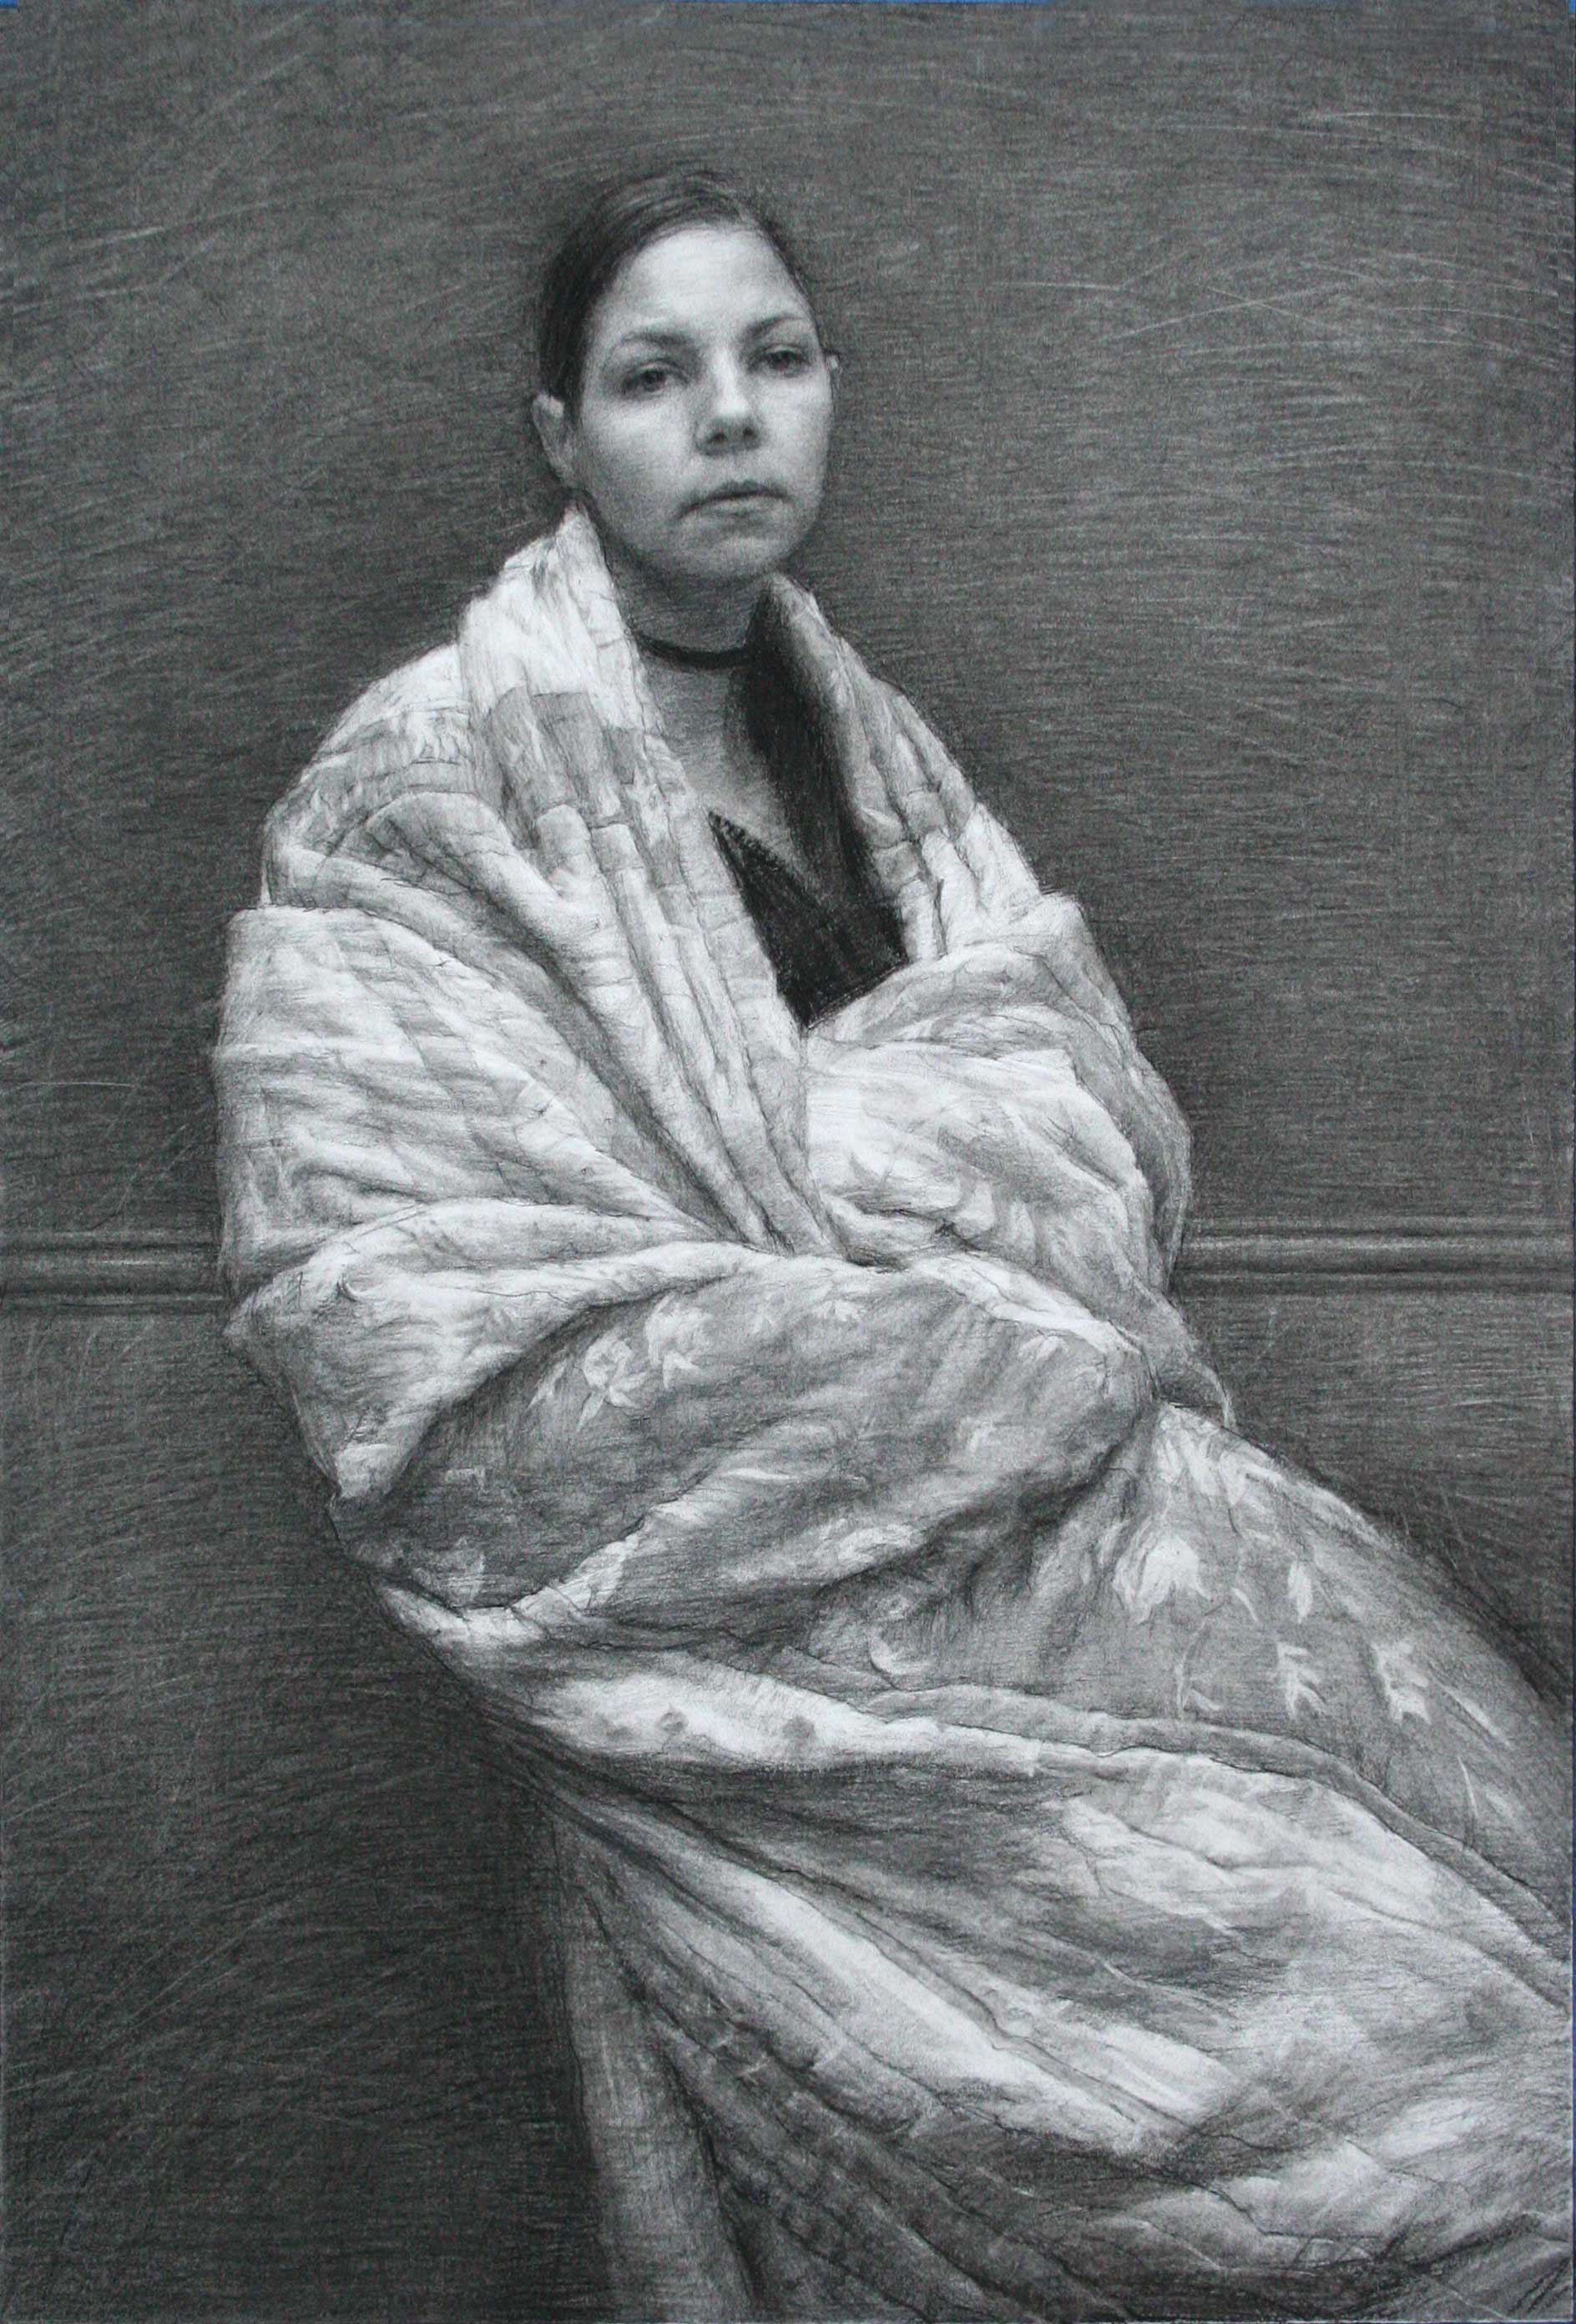
Light & Form & Dust: An Approach to Drawing With Charcoal
By Julio Reyes (www.julioreyes.com)
There’s an almost mystical gravity to this old material. There’s no denying its seriousness once you’ve placed your first mark to paper. You find that you are, in essence, dealing with the extremes of creation, that most ancient and elemental contrast — dark against light.
As a child, I remember watching as my mother made rich black marks with charcoal on a broad sheet of white paper. She enjoyed drawing in charcoal and pastel, and I would watch quietly as she gently worked this velvety soot into the paper’s surface, and like magic, a world of textures and forms began to appear. This was one of my earliest memories, and to this day I am still enchanted by this medium and its capacity to communicate so powerfully. This is perhaps the reason I enjoy the tactile qualities of charcoal so much. I am no minimalist when it comes to drawing implements — I use everything but the kitchen sink, and it all ends up in the final piece in one way or another!
Drawing with charcoal provides that perfect mix of play and precision that I really love. I can move from broad and dynamic mark-making to the most quiet and delicate of passages, all in one piece.
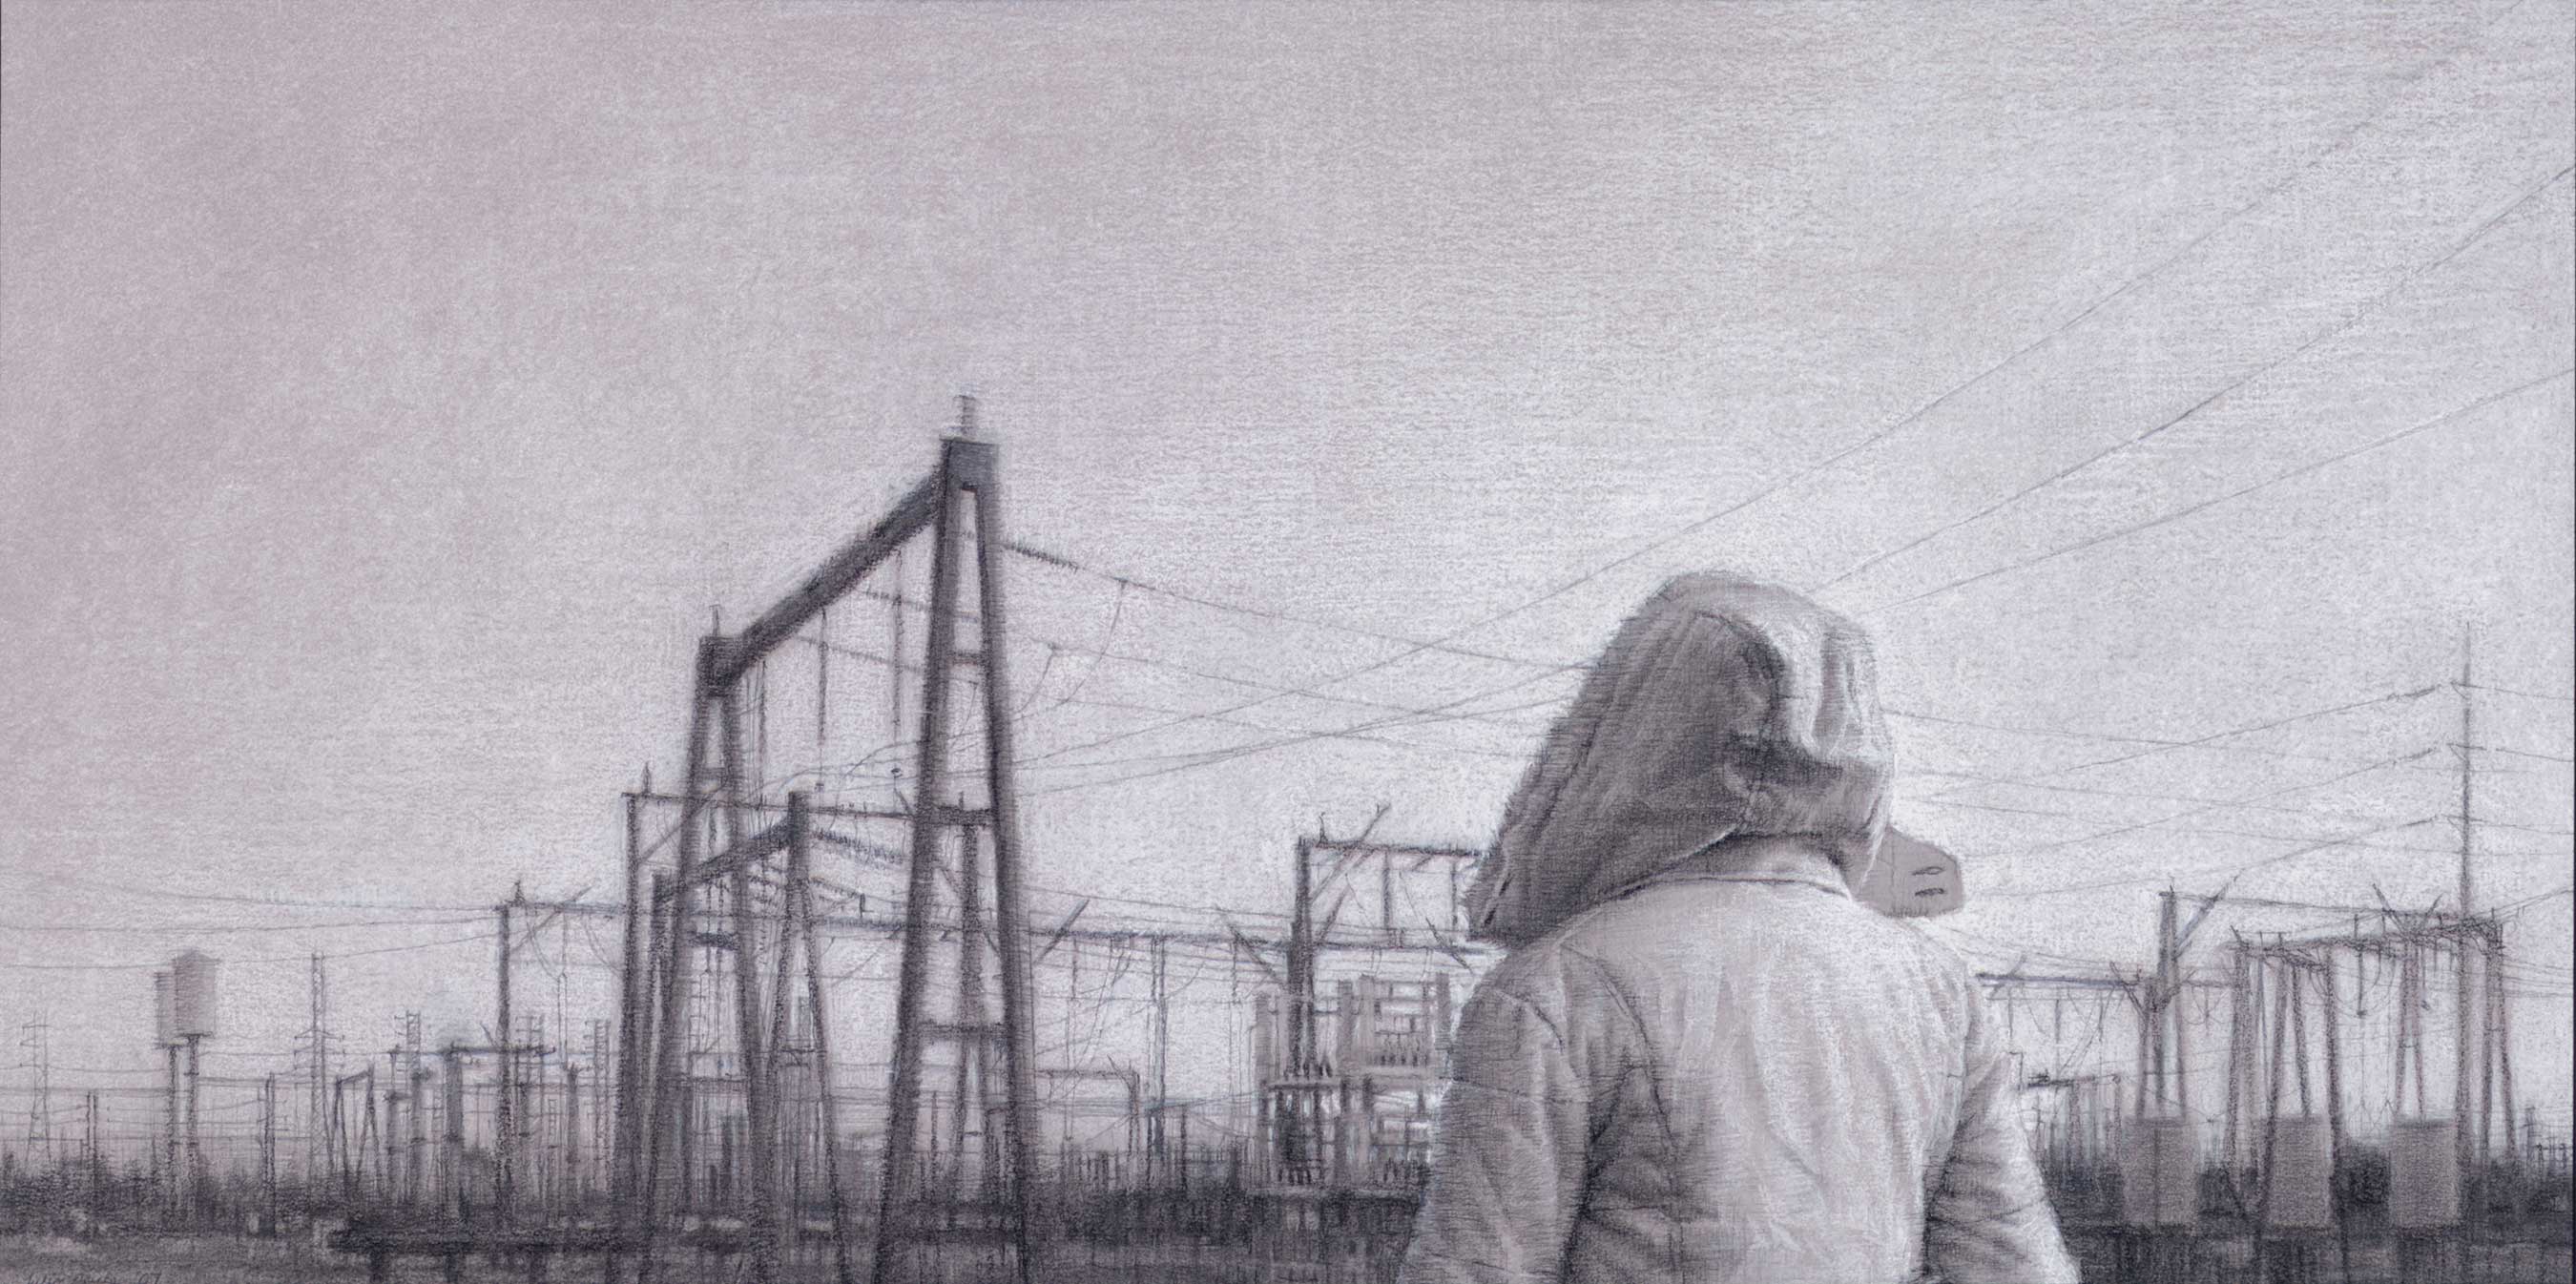
How to Draw with Charcoal
Laying out the initial stages of a charcoal drawing is one of my absolute favorite things to do! A terrific amount of energy and expressive freedom are needed. Your intensity can hit a fever pitch as you push forward in total concentration, anxious and eager to capture what’s in front of you. However, none of this seemingly chaotic activity is truly arbitrary or “wild.” It is, in fact, passionate thinking in action. Often, you’re not after “perfect” objective realism, but a still point between what you see and all that you feel towards a given experience.
To me what matters most in these early stages is to capture — with strength, energy, and boldness — the most vital elements of the whole concept and design. I’m trying to distill these elements to their pictorial essence; not just as a practical foundation for the technical drawing, but also the moment when the expressive heart of the piece is established. I cannot overstate the importance of this element. Too often, pictures are rushed along to incidental and infinitesimal details without being properly settled on a strong foundation.
I begin much the same as I would a painting: blocking in the major shapes of light and dark in the composition, being careful to preserve the vivacity and strength of important gestures. Whether the drawing is large or small, this principle remains the same.
Related Article > Pushing Shadows to Create Drama: Charcoal Figure Drawings
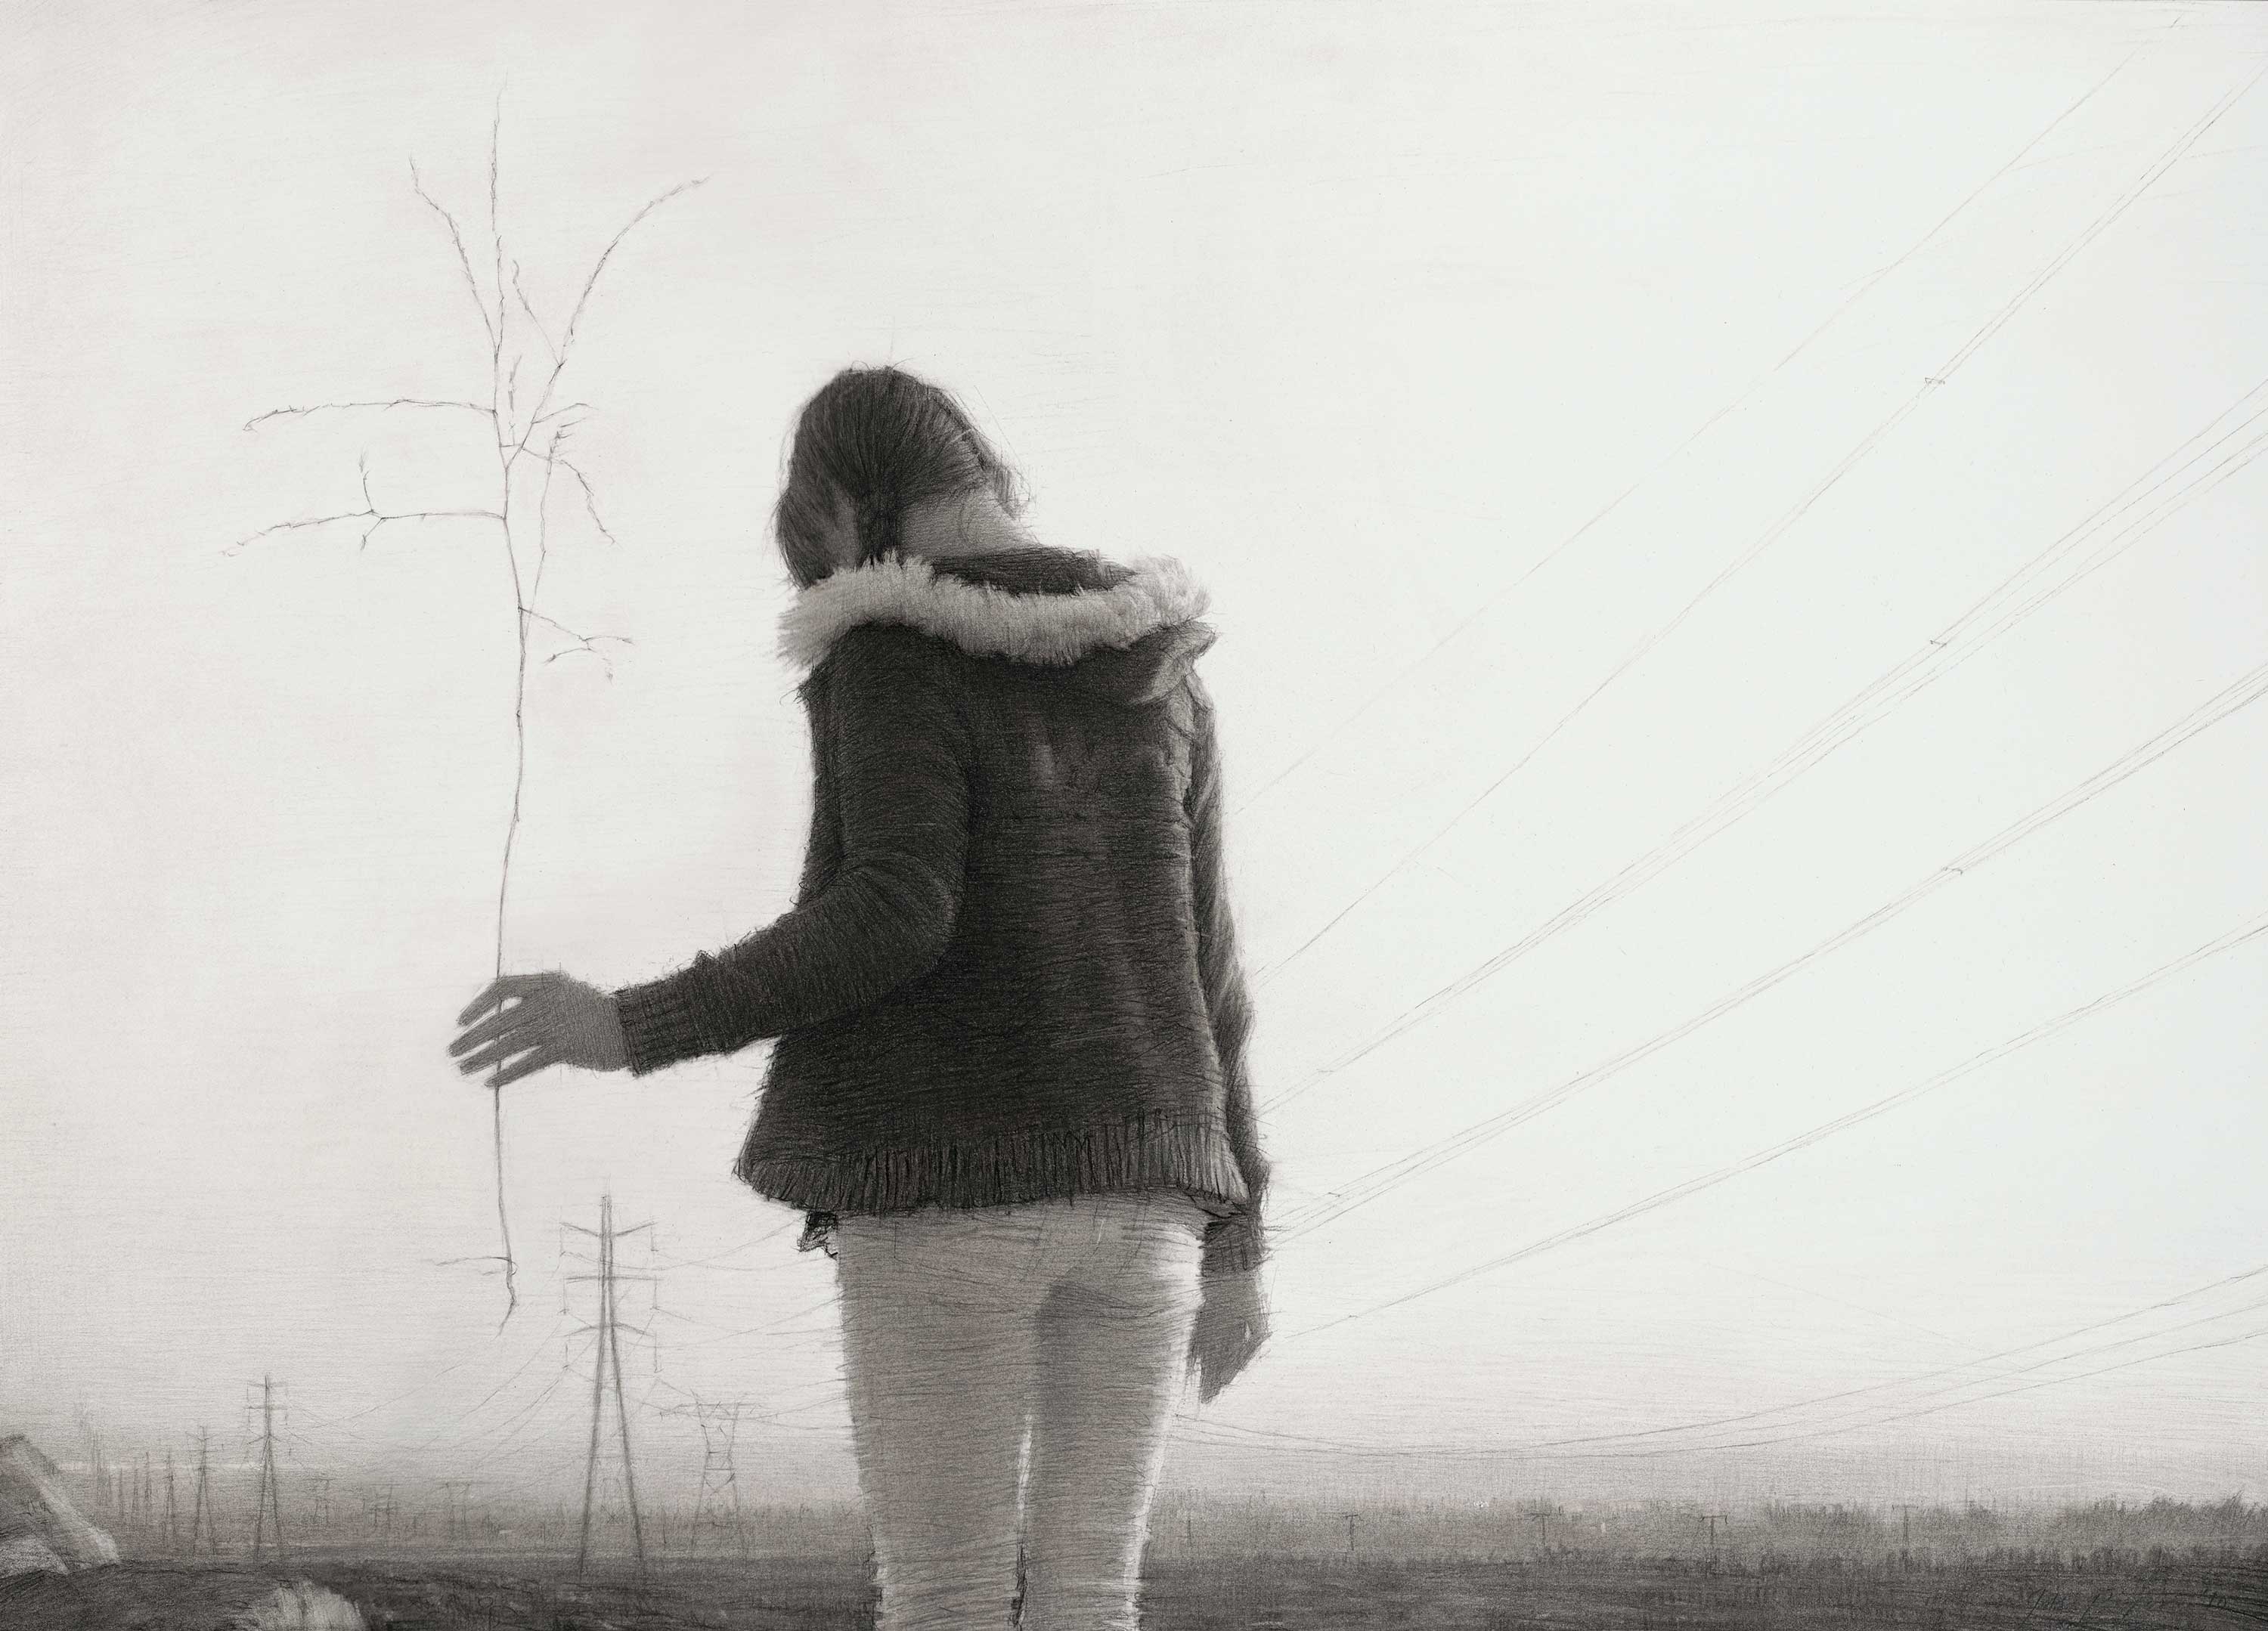
Lately, I’ve been using charcoal powder and a broad brush to establish the larger areas of a drawing more loosely. This can be tricky, but blocking in values with this technique is
fun, very painterly — and very messy! The brush allows me to keep my edges soft and to create mid-tones and transitions in value, which feel lively and natural. At this stage, I’m careful to preserve the white of the paper for my lightest lights. I don’t typically build my lights with white chalk, pastel, conté, or other media. So it’s paramount early on to anticipate the overall design and then judiciously work around the light masses.
Working into darker passages with an eraser can produce some striking effects. Lifting out the lights in this manner can be achieved by means of erasing in order to reveal the white of the paper. I’ll do this mostly with clean kneaded erasers (and the occasional use of charcoal erasers and drafting-type erasers), mostly to further define the lights I’ve already established. To some extent, you’re literally pulling light out of darkness, being sensitive to the direction the light moves across the form.
This way of working is more akin to oil painting than it is to traditional drawing methods — the emphasis is more on form, light, and atmosphere than it is on line, shape, and the calligraphy of mark-making.
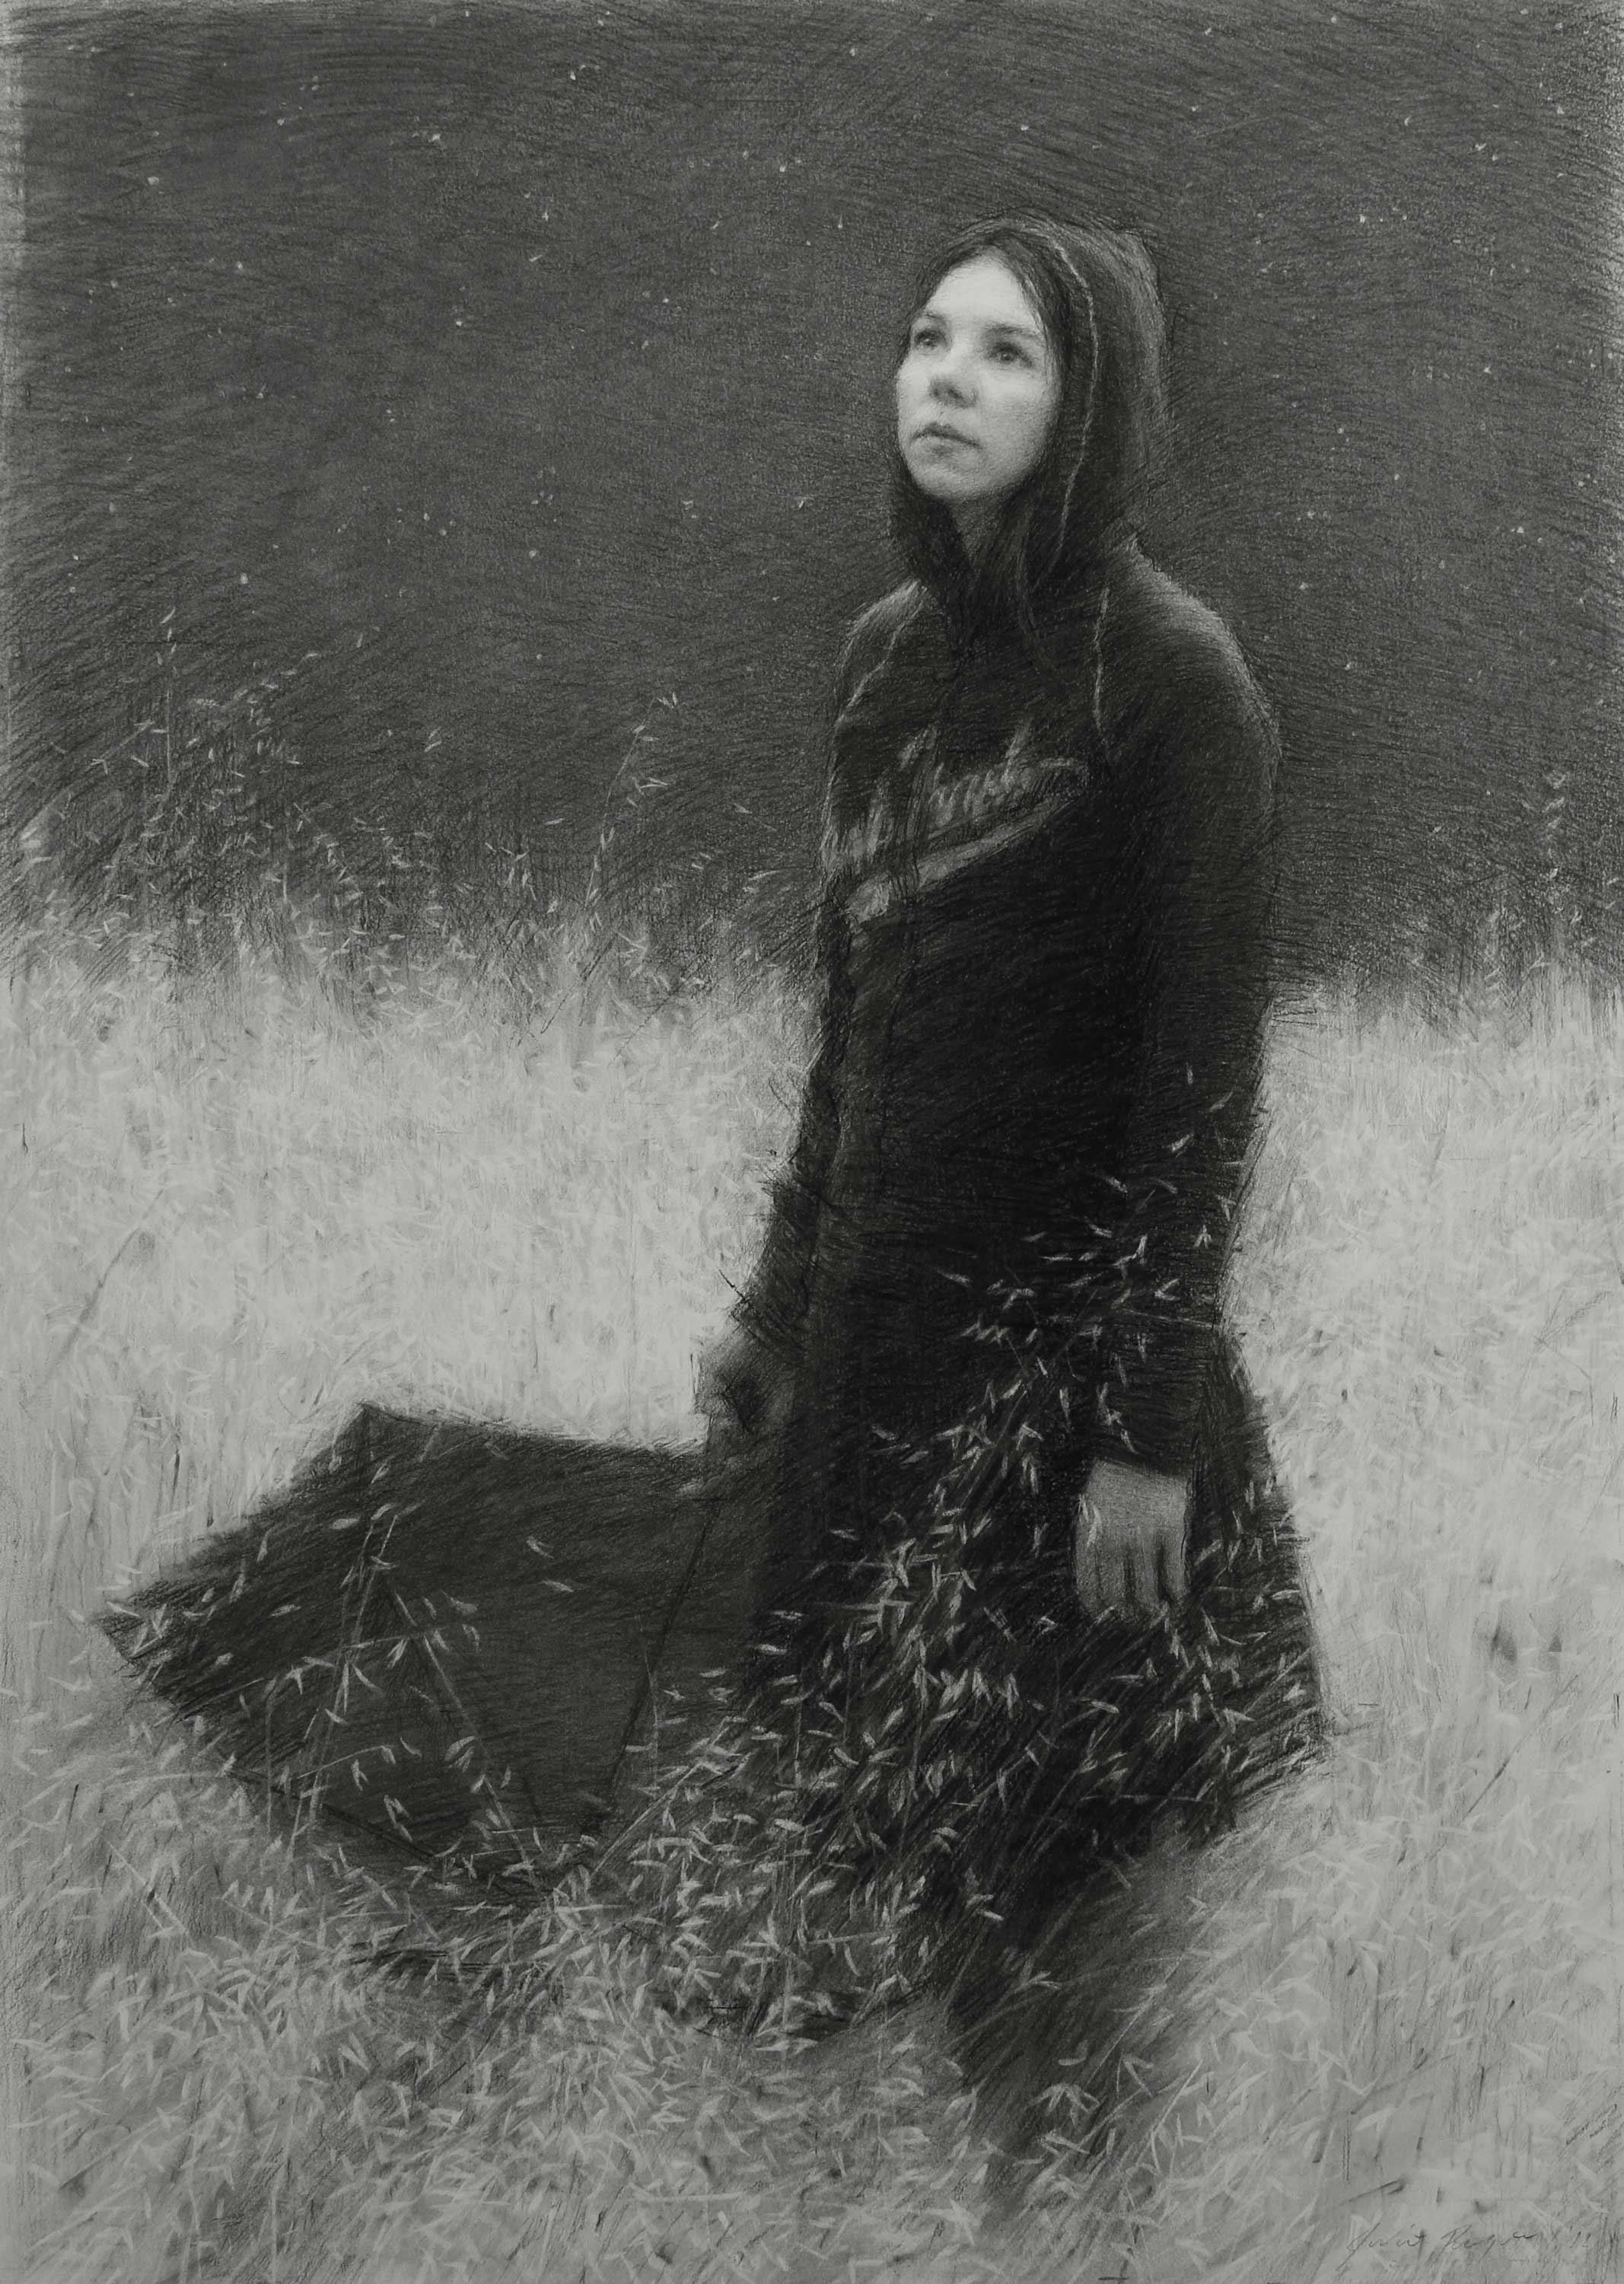
The medium itself has an inherent character and charisma, which I try not to fight. In fact, the working qualities particular to each medium have everything to do with how, and when, I choose to use them. If I’m sensitive enough, I can find which medium best captures the essential qualities of what I’m trying to express in a piece. I think this can be seen in “Stars Above,” where the deep dark of the starry sky simply begged for sumptuous and sooty blacks. I wanted to preserve the graphic power of that tremendous silhouette against the white of the dying grass, and knew instantly that charcoal could deliver.
I’ll give myself light structural indicators to further define forms and/or to accent crucial darks with vine charcoal, paper stumps dipped in charcoal powder, or small brushes (usually discarded oil painting brushes that have been cleaned…flats seem to work best). I try to hold off using the heavier darks of compressed charcoal for later in the process. Vine and Willow charcoal are great at massing in solid velvety tones, and well suited for quickly establishing general structural lines and reference points that are easy to adjust or erase if necessary.
Once the initial block-in is reading strongly, I’ll begin to transition everything about the way I’m working. My breathing slows, and my pace slows as well. Less physical energy is required. Mental and emotional sensitivity become dominant. Everything becomes more deliberate. This transition is, of course, a matter of intuition and becoming familiar with your own way of working. The demarcation is often subtle and gradual—recognizing it comes with time and experience in front of the easel.
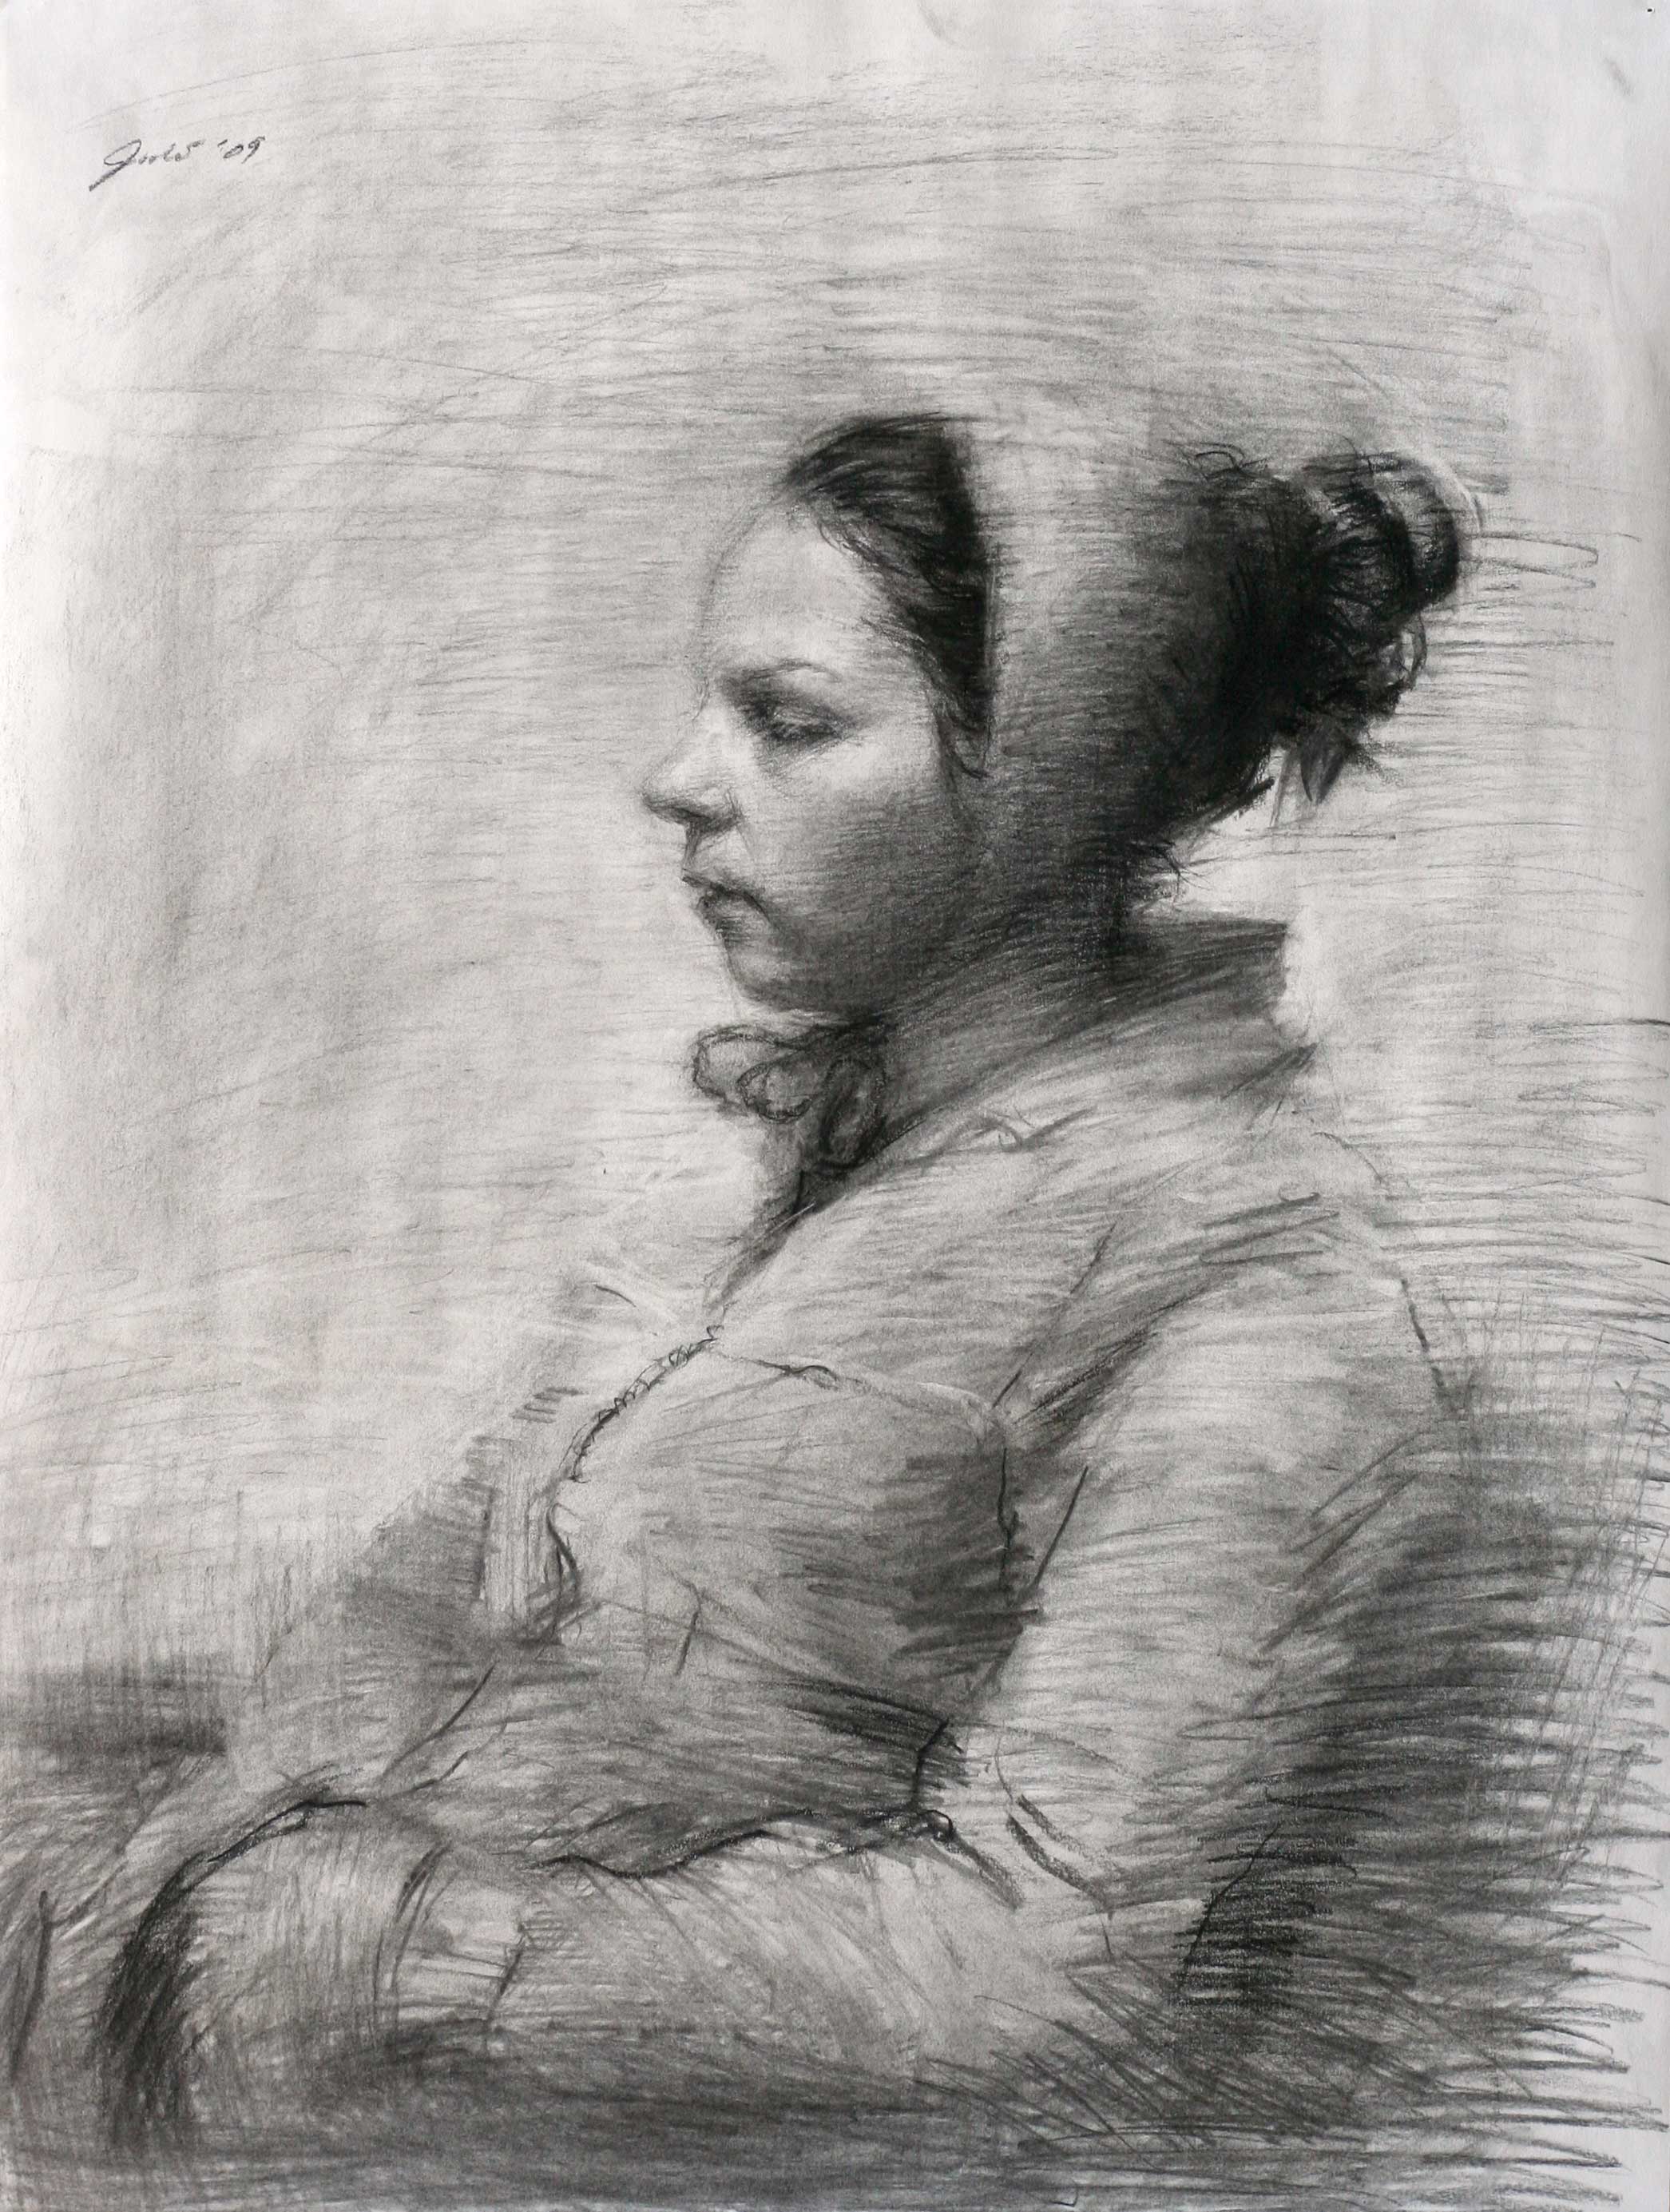
There are many good and practical techniques for checking the strength of the picture’s design, and I use them often throughout the creation of a drawing. Squinting helps me to see the basic shapes of light and dark to assess the accuracy of their relation to one another. Sometimes, viewing the work in a mirror is helpful in spotting structural errors as well as revealing negative shapes that I might not have seen before. Also, looking at the piece from across the room, upside down or in different light can give new information to me. I am always trying to be sensitive to how the values and basic shapes might look in any circumstance.
To further the piece, I carefully begin pushing the value of my deeper darks in the areas with the least amount of light, making sure to keep my shadow masses simple without extraneous detail. I try to be especially careful with the mid-tones at this stage and the transitions from light to shadow. Here a variety of chamois (dirty, clean, old, and new) come in handy, along with a good selection of paper drawing stumps in various sizes; and most importantly, all ten fingers! Along with kneaded erasers, these all work marvelously for manipulating textures and creating hard and soft transitions on the edges of form.
As I near the end of my process, I’ll reassess my darkest darks and freshly state new darks where necessary. For broader passages I’ll use compressed charcoal to achieve very rich blacks, and well-sharpened charcoal pencils for some of the finer work. A combination of every charcoal drawing implement I own goes into refining the light masses and the mid-tone transitions. I’ll diffuse edges by smudging with paper stumps, lightly blending with brushes or fingers, and/or gentle licks of a chamois. I work mostly with a kneaded eraser to pull out those final highlights, as in the tall grasses in “Stars Above.” There the grass was accomplished by first establishing a broad even tone of value, then carefully erasing into it using a kneaded eraser. This worked quite effectively and allowed me to accent some of the darks in the grass with a combination of small brushes, paper stumps, and charcoal powder.
As I approach the finish, the work moves along much more slowly, and each mark is made carefully and contemplatively. I’ll usually take breaks more often in order to get “fresh eyes” on the piece and reassess what remains as necessary to the finish.
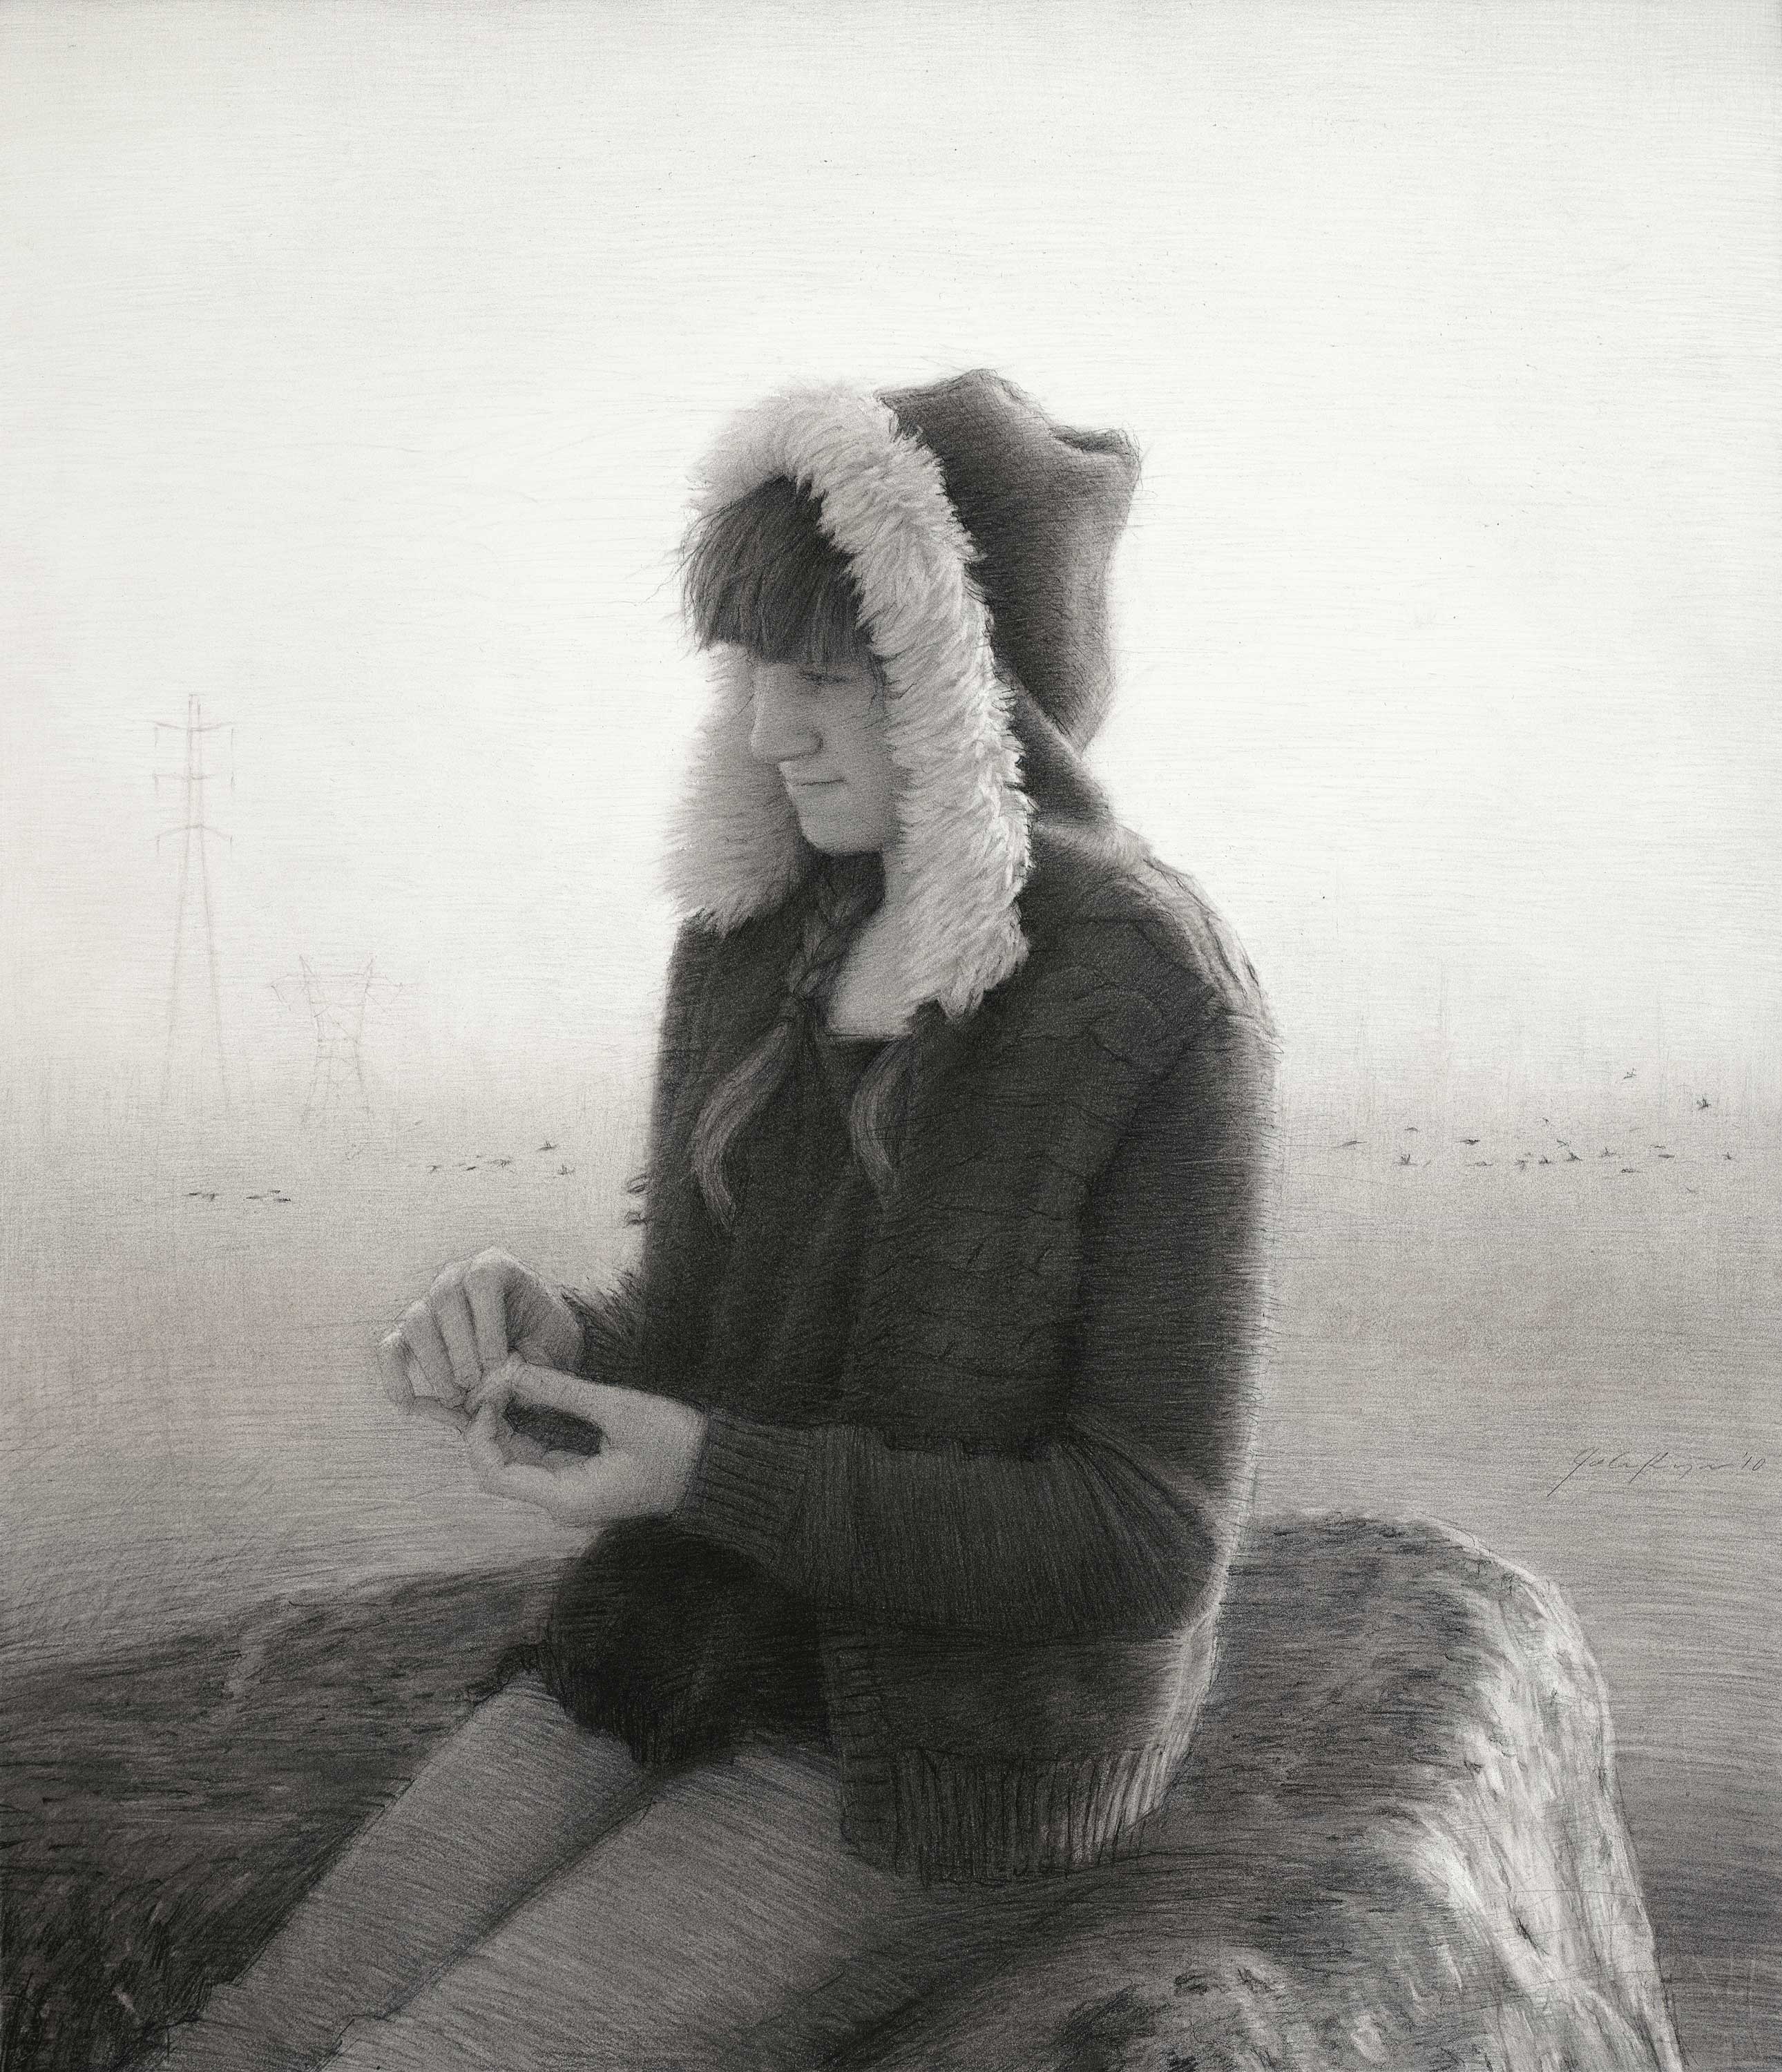
Finishing a drawing is more about wisdom than it is about technique. A drawing will slowly come into focus the more it is worked on, and present its own very unique combination of problems and potential solutions. It becomes more than merely a portrayal of an image; it is also a record of the experiences, feelings, intentions, thoughts, and motivations of the artist who created it. This may sound arcane, and in a way it is. It is at once simple and complex. On the one hand you have only to “be yourself ” and practice your craft “honestly.” Then you find that “being yourself ” is not as easy as it sounds, and that practicing your craft honestly becomes increasingly difficult and complex the deeper you delve into the craft. This is why I rarely speak of “finishing a piece” in terms of following a few predictable steps. Every piece is different, every experience unique, and so the artist’s response should not be borrowed, perfunctory, or unnatural.
Those final touches on a drawing represent a kind of fingerprint of the human soul and psyche. A work of art can reveal as much as it portrays, and what it reveals about the artist’s hand is immensely important to the way the picture is received. I’ll know a work is finished when it begins to hum with a new life; that other larger, stronger, and quieter life begins to emerge, and then I know I’ve got something.
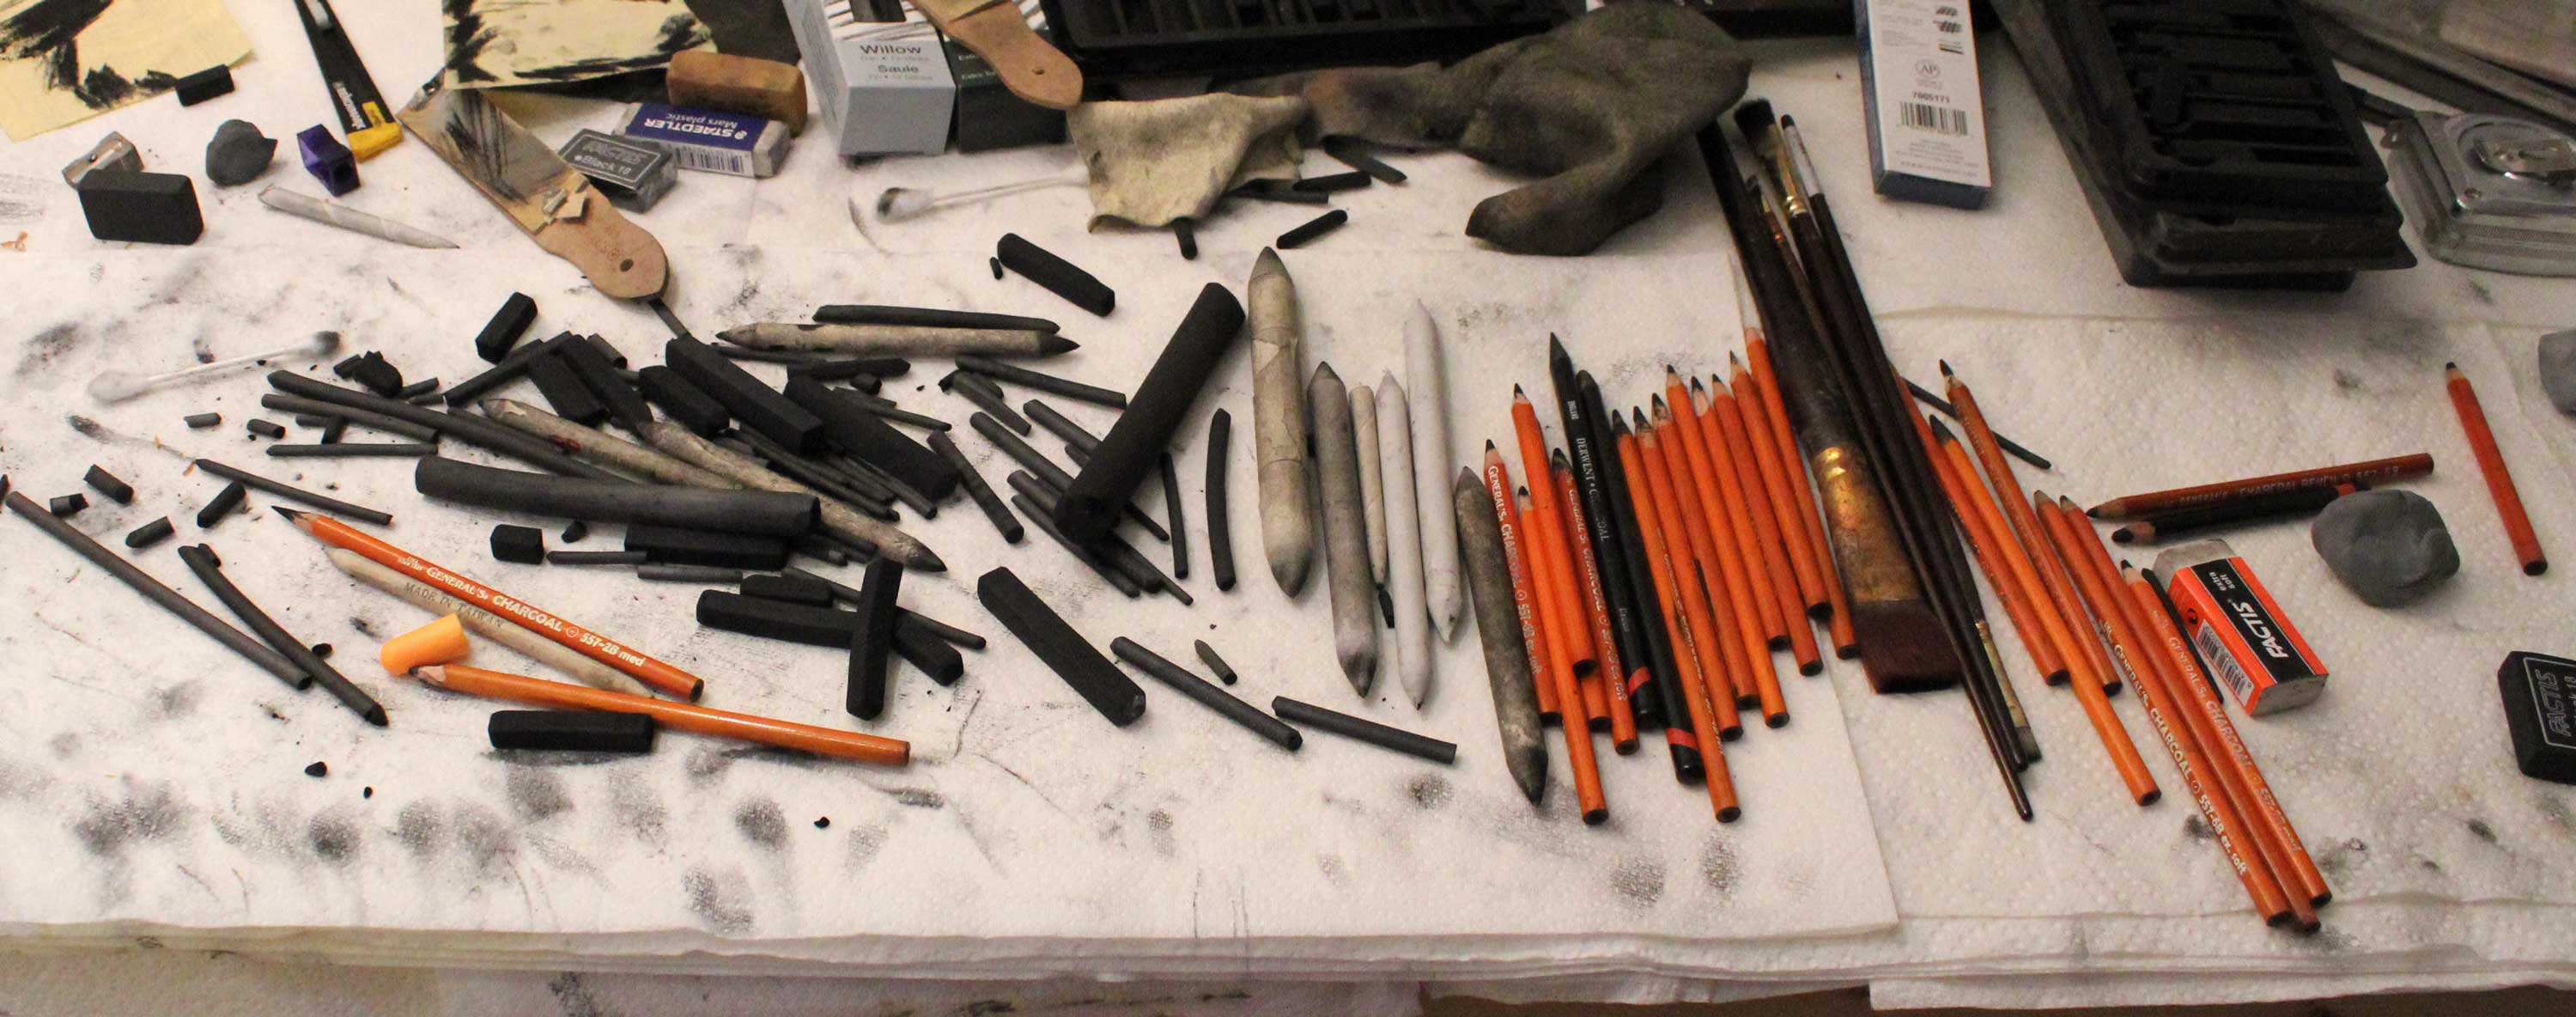
Drawing Materials
When it comes to dry media, I’m not particular about brands. Many of these tools are so simple and elemental that there is little difference between most of the better brands. That being said, I try to have all of these out and within reach during the creative process.
Working in graphite requires graphite pencils in varying degrees of hardness, a mechanical pencil, and graphite sticks (in densities varying from 2H to 8B). I’ll occasionally heighten darks in a drawing with a lithographic crayon. To erase graphite, I’ll use kneaded erasers and some drafting-type erasers. Different values and textures are also attainable with paper stumps (smudge sticks) and clean and/or dirty chamois. The paper I use for graphite drawings has traditionally been Bristol board; however, I’m always looking to try different things with interesting surfaces.
For working in charcoal I use compressed black charcoal, vine and willow charcoal, charcoal pencils in varying densities (mostly 2B-8B), chamois (some clean, some filthy black, depending on the value and texture I’m looking to make), kneaded erasers (sometimes drafting/type erasers and/or special charcoal erasers), and paper stumps of varying sizes. I’ll occasionally also use old paint brushes for some softening of edges. I have used many different types of paper for charcoal. I’m not beholden to a particular brand or type of paper here, as long as it has enough tooth to give me rich blacks, and is tough enough to withstand some rough treatment.
Here are some I’m working with now and enjoying: Stonehenge Paper Natural 90 lb. – I buy these in larger sizes and use for both graphite and charcoal. On occasion (i.e., rarely and on smaller works) I’ll mount the paper to panel using PVA glue in order to apply thin layers of gesso (acrylic primer) to the paper itself. I’ll sand that to a fine finish (220 grit sandpaper). Then I have a surface that will receive stains (either with coffee, tea, watercolor or other), and I don’t have to fuss with stretching the paper or be concerned that the paper might buckle from the application of water-based treatments. I’ll use graphite to draw on the resulting surface.
I also enjoy using the Stonehenge 90 lb paper with charcoal. It has enough tooth to properly receive a rich heavy application, and it’s fine enough for the more delicate passages. It suits me fine for now; but as I said, I’m always on the lookout to try something new.
I have a very workmanlike approach to materials. If they are of decent quality and I have it in front of me, I’ll use it! I like to see what happens and then decide for myself whether it suits my purposes. I suppose we all do that, and the search for new materials is one of the joys—and agonies—of being an artist.
This article was originally published in 2019
 Learn how to draw with charcoal when you go in the studio with Zhaoming Wu’s how-to DVD, “Drawing the Head in Charcoal.”
Video Length: 2 Hours
Zhaoming Wu is a consummate draftsman who can draw in any medium. If you have purchased his book on drawing, you know that he uses the charcoal medium in many different ways to create works that have distinctive looks.
This video shows you how he approaches drawing the head of a beautiful girl whose hair might be a challenge for many.


