


Painting on copper can provide a rewarding experience, add a distinctive look, and expand your repertoire. Here’s how to do it.
Materials and Methods for Painting on Copper
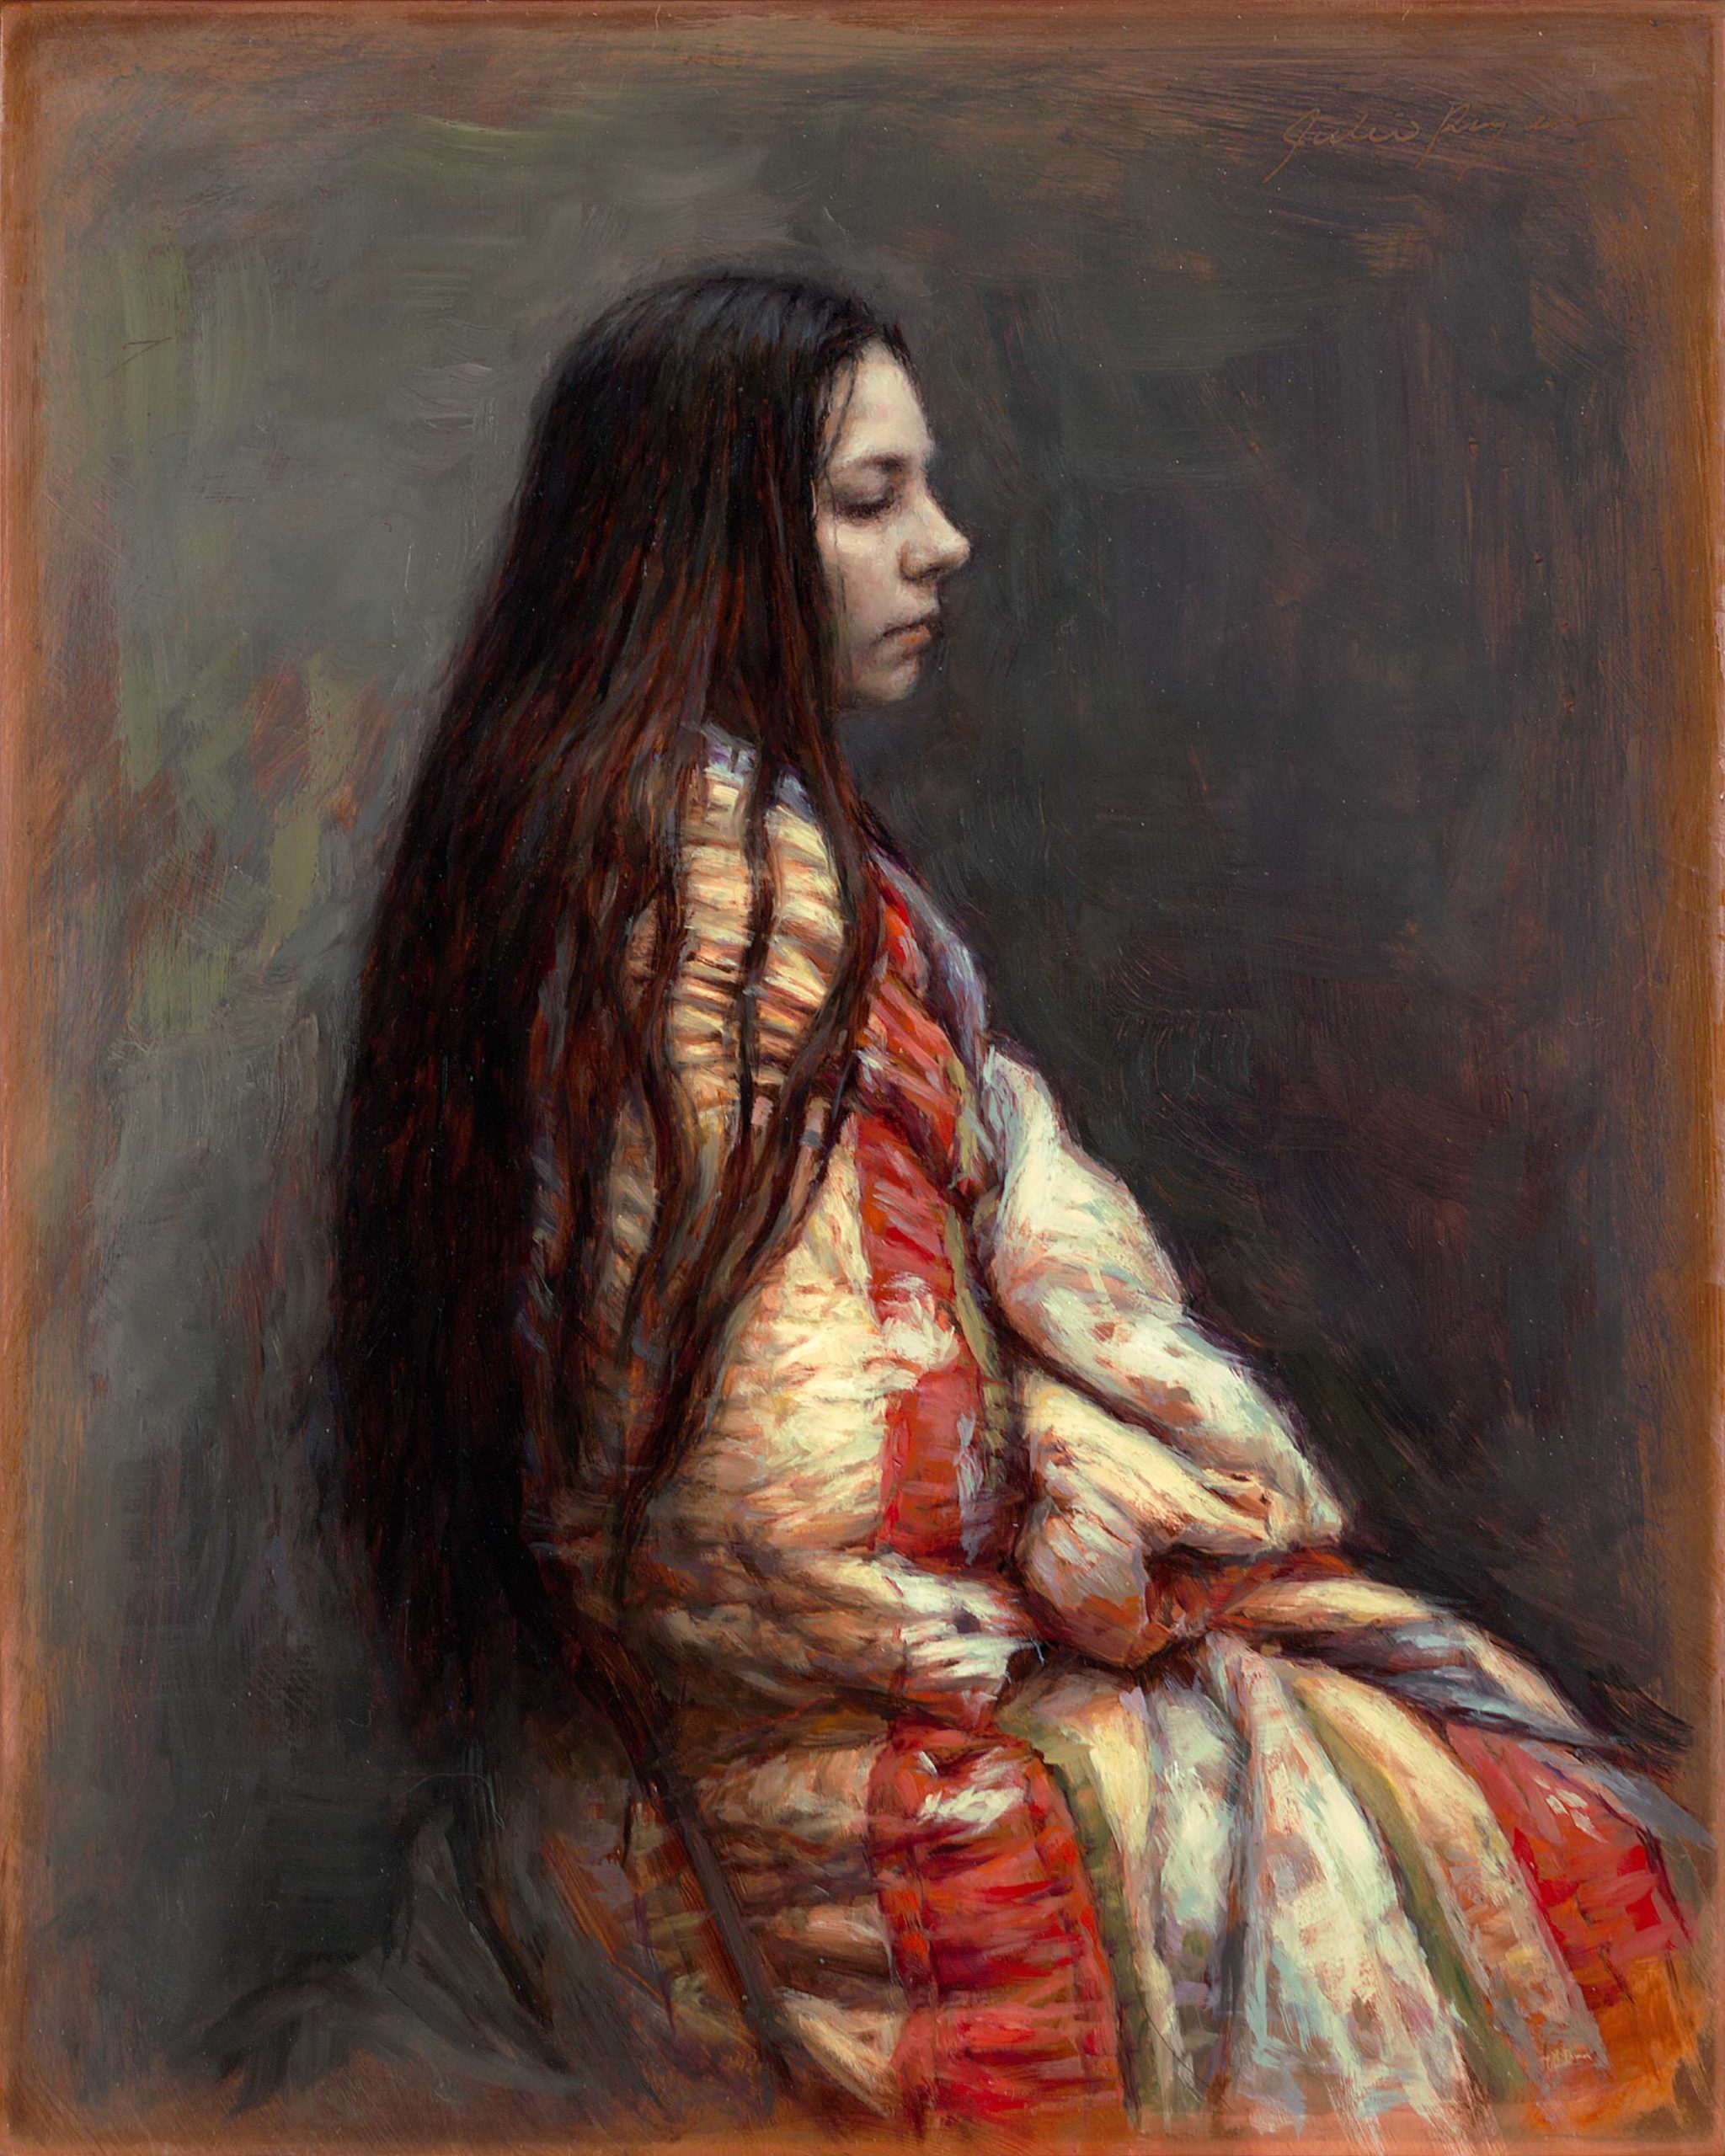
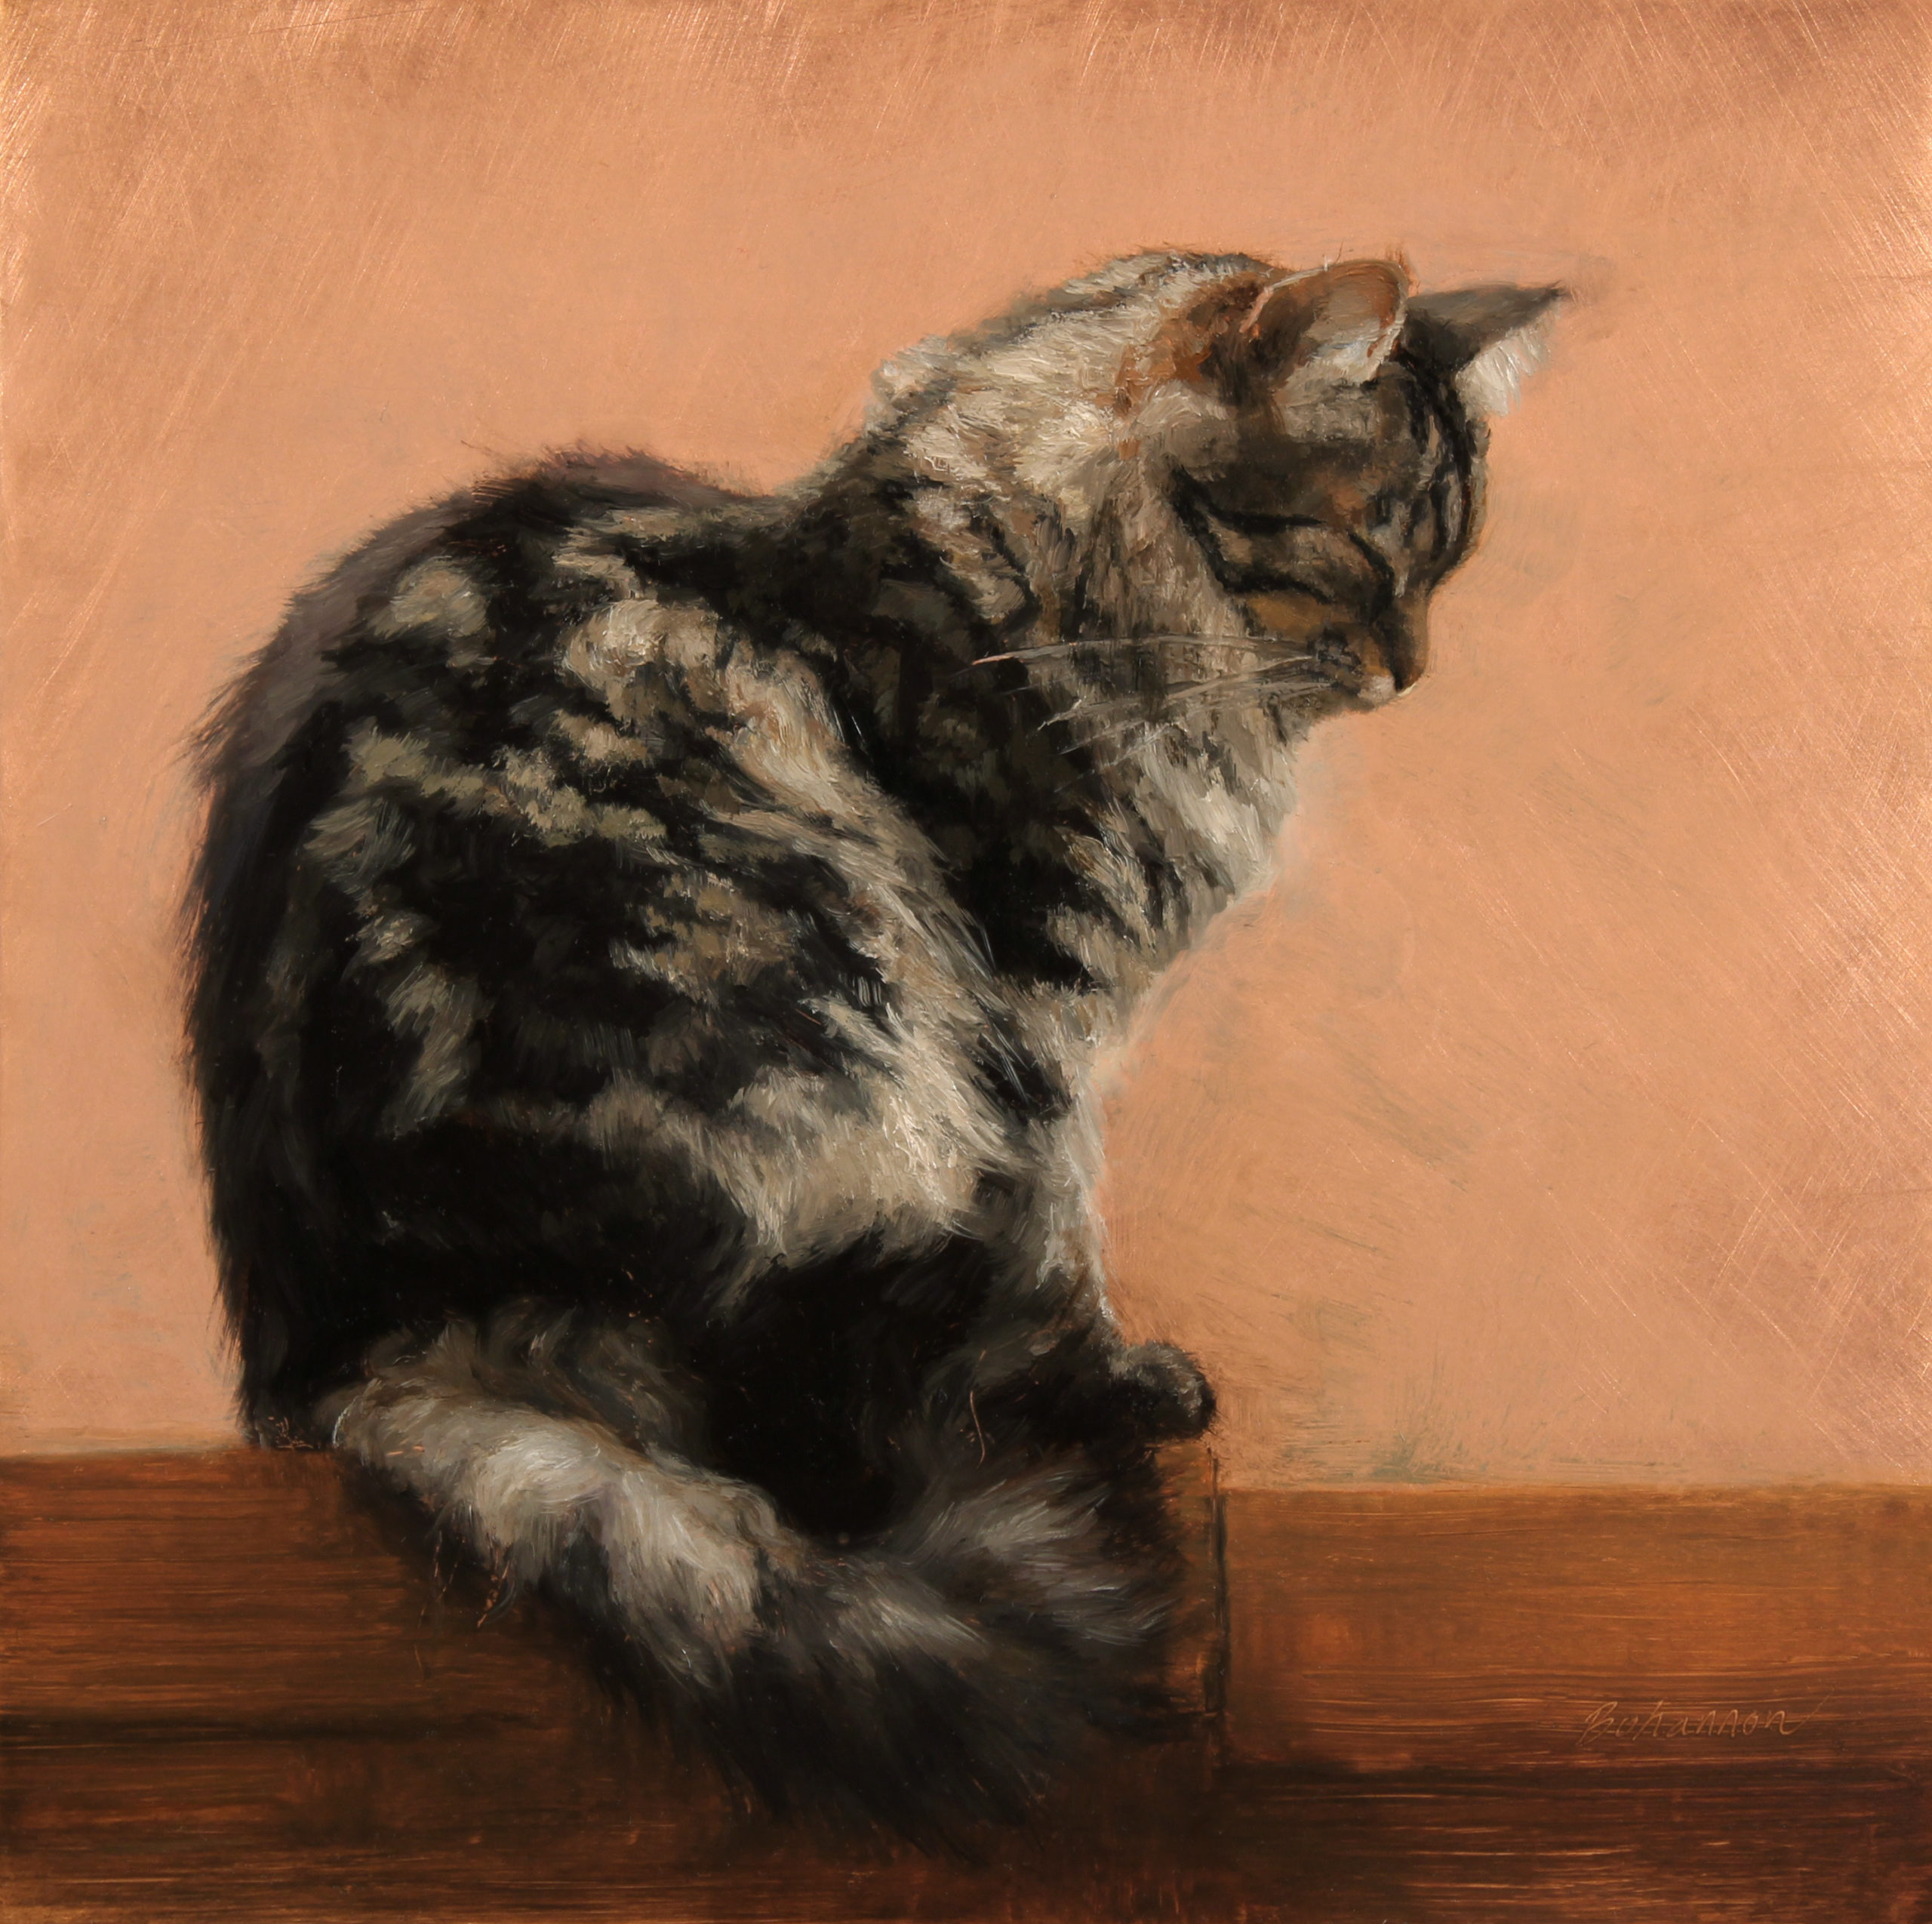
By Julio Reyes and Candice Bohannon
We have often marveled at the beauty of oil paintings on copper in museums across the country, admiring their brilliant colors, the preciousness of their scale and detail, and their immaculate appearance. Many look as if they were painted yesterday, having defied the ravages of time; they remain as remarkable today as the day they were painted. Although not as common with artists throughout history as wooden panels and canvas, copper has been used as a substrate for oil paintings for hundreds of years. The first oils on copper date back to the early sixteenth century, with surviving works from as early as the 1560s.
Many of the works on copper in museums are relatively small, fantastically detailed pictures. They bring to life a world full of vivacity and color, with all the fair joys and folly of mankind and nature at her finest, in a painting typically smaller than a sheet of printer paper. We have admired the conceptual beauty, craftsmanship, and ingenuity of works on copper, and have always felt as though we were gazing at the fine workmanship of a jeweler.
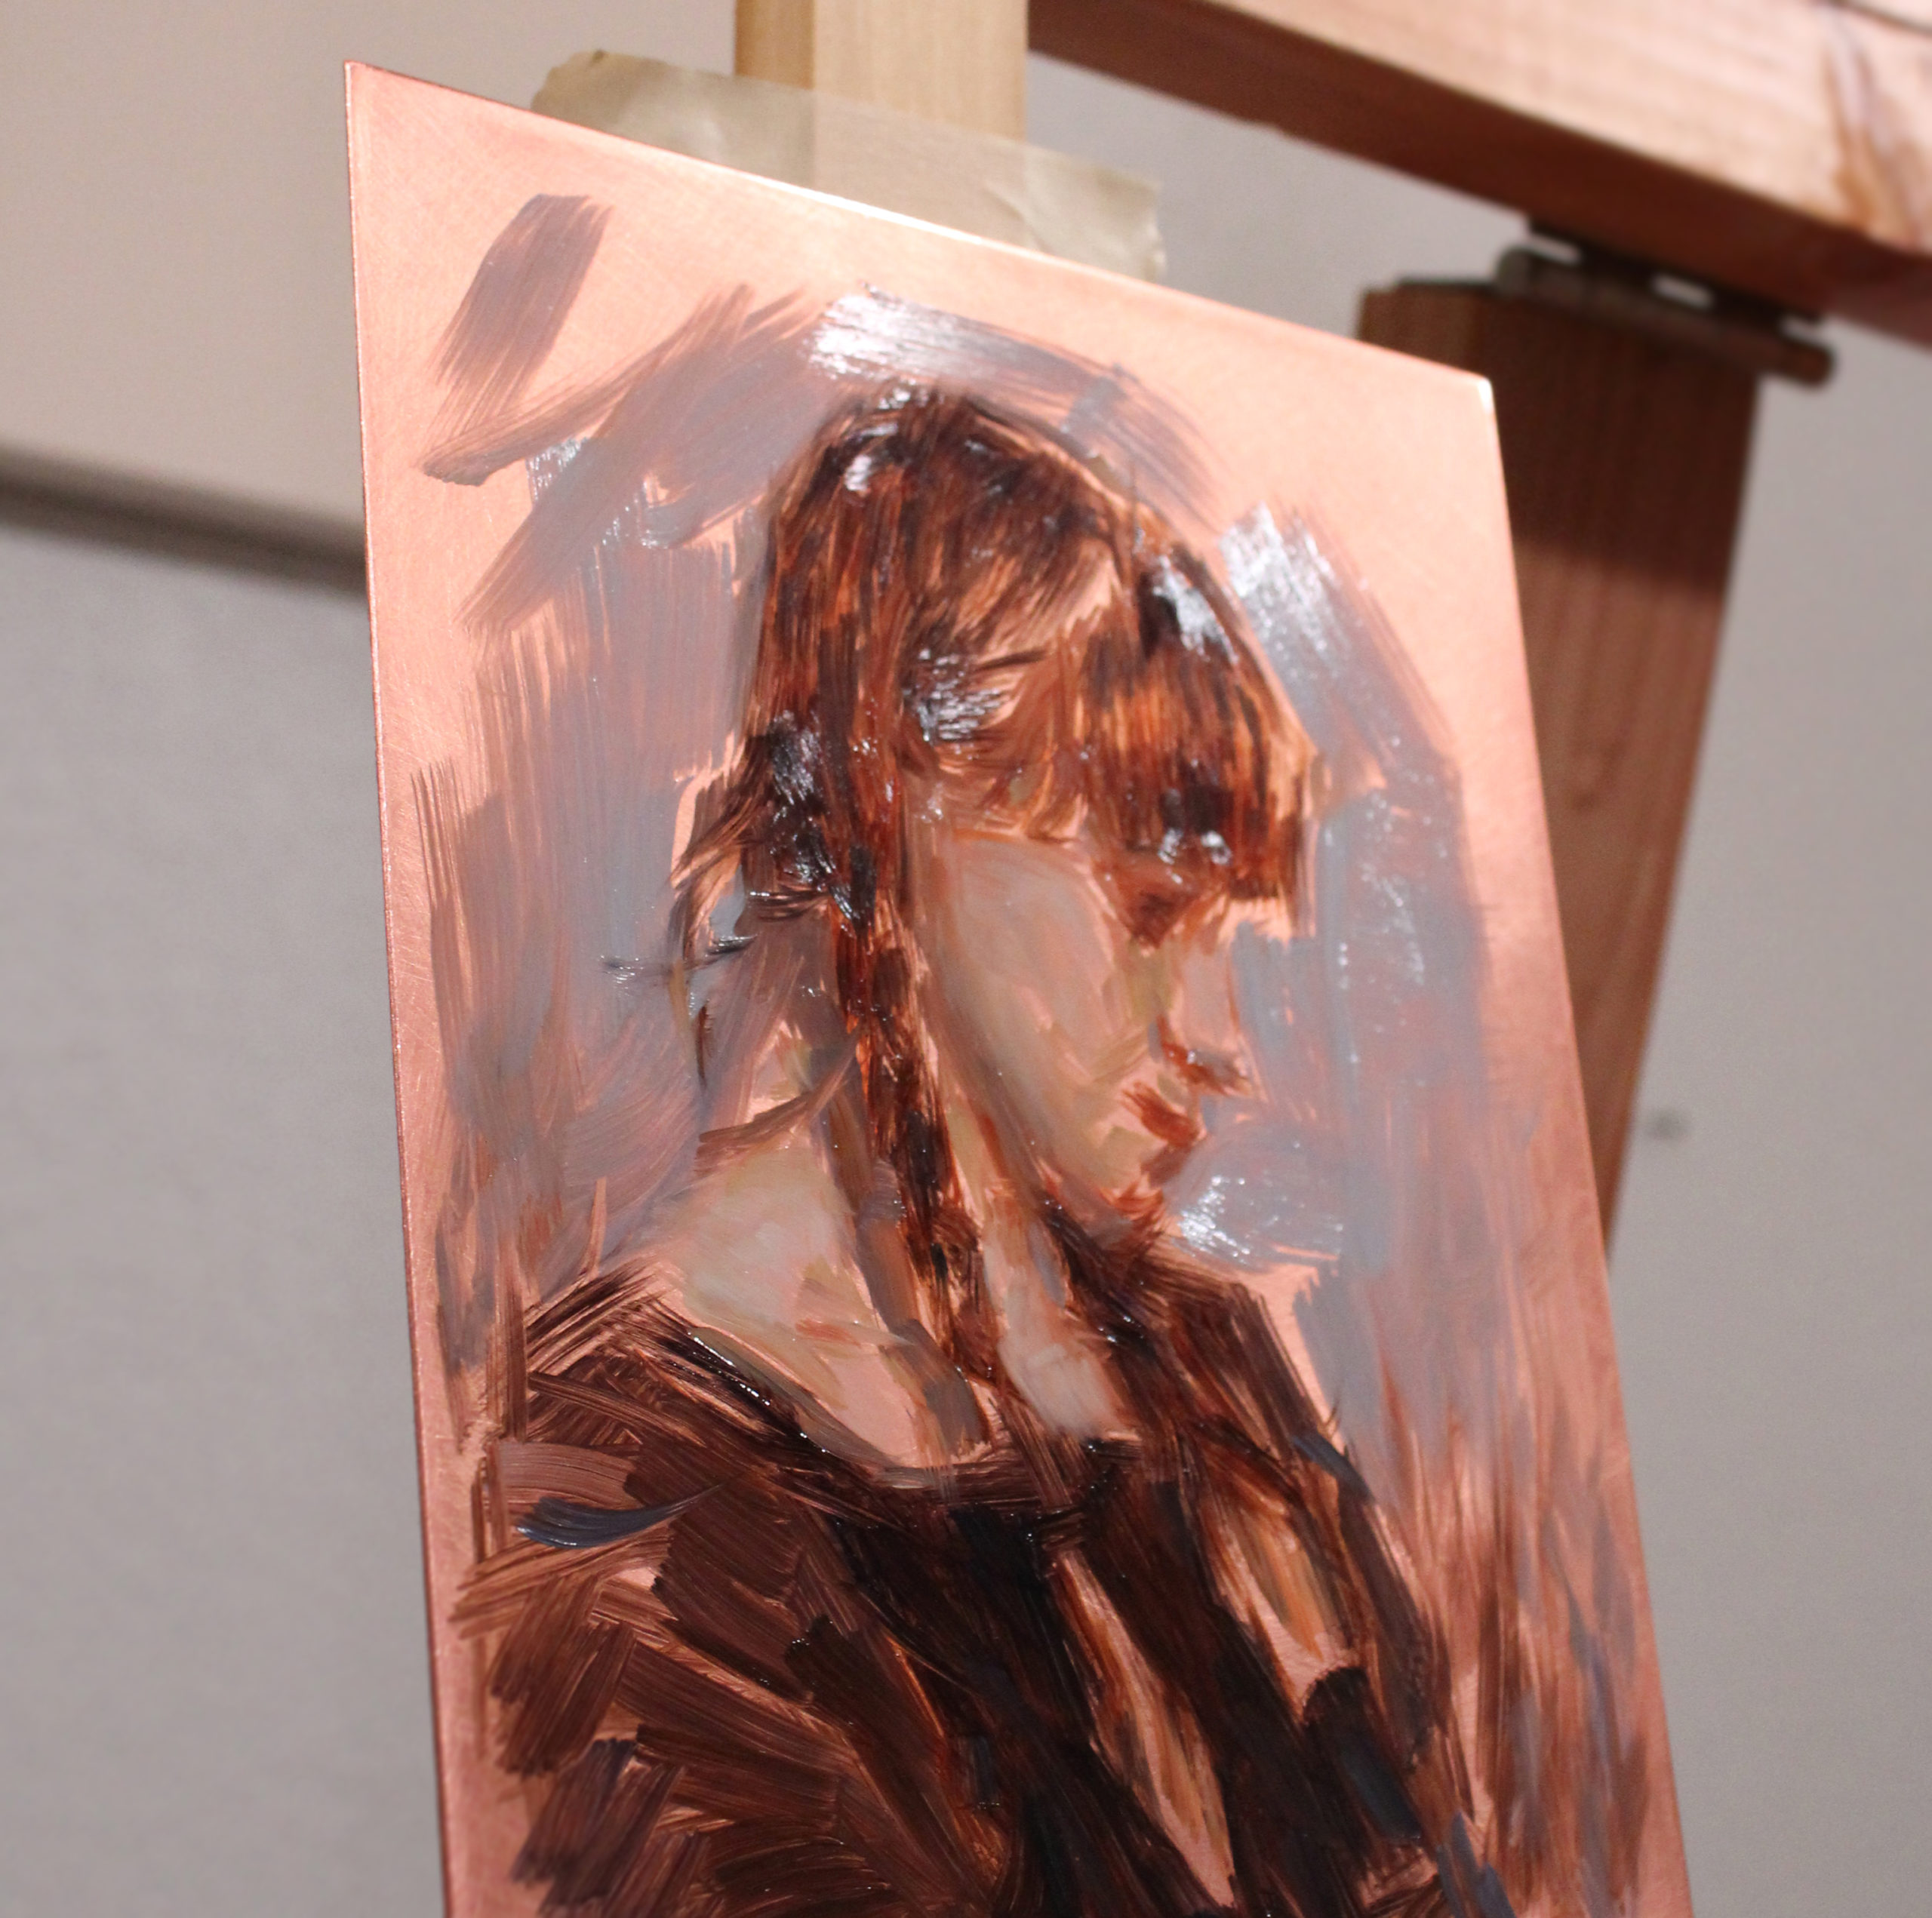
Oil paintings on copper feel precious—small enough to hold in your hands, and meant to be admired up close, they petition the viewer for a more intimate interaction. These works are out of the ordinary, and their rarity reinforces their jewel-like presence. When painted over with a broken surface that allows the copper to shine through, there’s a rich effervescence unlike oil on any other surface.
We can only imagine what the medieval and Renaissance mind must have felt when it first saw these little marvels. They were not so removed as we are from the origins of things—they knew well the value of the precious metal in the copper plates, the crushed rare gems required to make the pigments, and the sultry oils necessary to make paint. The opulence and combined overall effect must have seemed otherworldly. Perhaps they saw most clearly just how jewel-like and truly remarkable oil on copper is.
We are often asked why we would choose to paint on copper rather than on panel or canvas. Although it is not the right choice of substrate for many of our works, it is a rich option we consider when painting a work small in scale that demands great attention to the finer details.
Painting on copper inspires precise, deliberate brushwork. Copper plates are non-absorbent—paint sits on top of the silky surface without sinking in as it does with thirsty primed panels and canvas. This results in paint layers that are oil rich or medium rich, which is perhaps why copper paintings give the appearance of having more saturated colors, a wider range in values, and an “inner glow.” We often (but not always) paint with a broken surface so that the raw copper is allowed to peek through unpainted passages of a painting, creating a glimmer of warm, mid-tone metal, which acts as a lively color, changing appearance in different lighting scenarios and viewing angles.
The choice of painting on copper is one an artist can make whether they plan to paint thickly or thinly, with alluring detail or minimalistic elegance. It can be a versatile substrate to fit the artist’s varied and unique desires, and history offers us many beautiful examples from which we can take inspiration.
Preparing Copper for Oil Painting
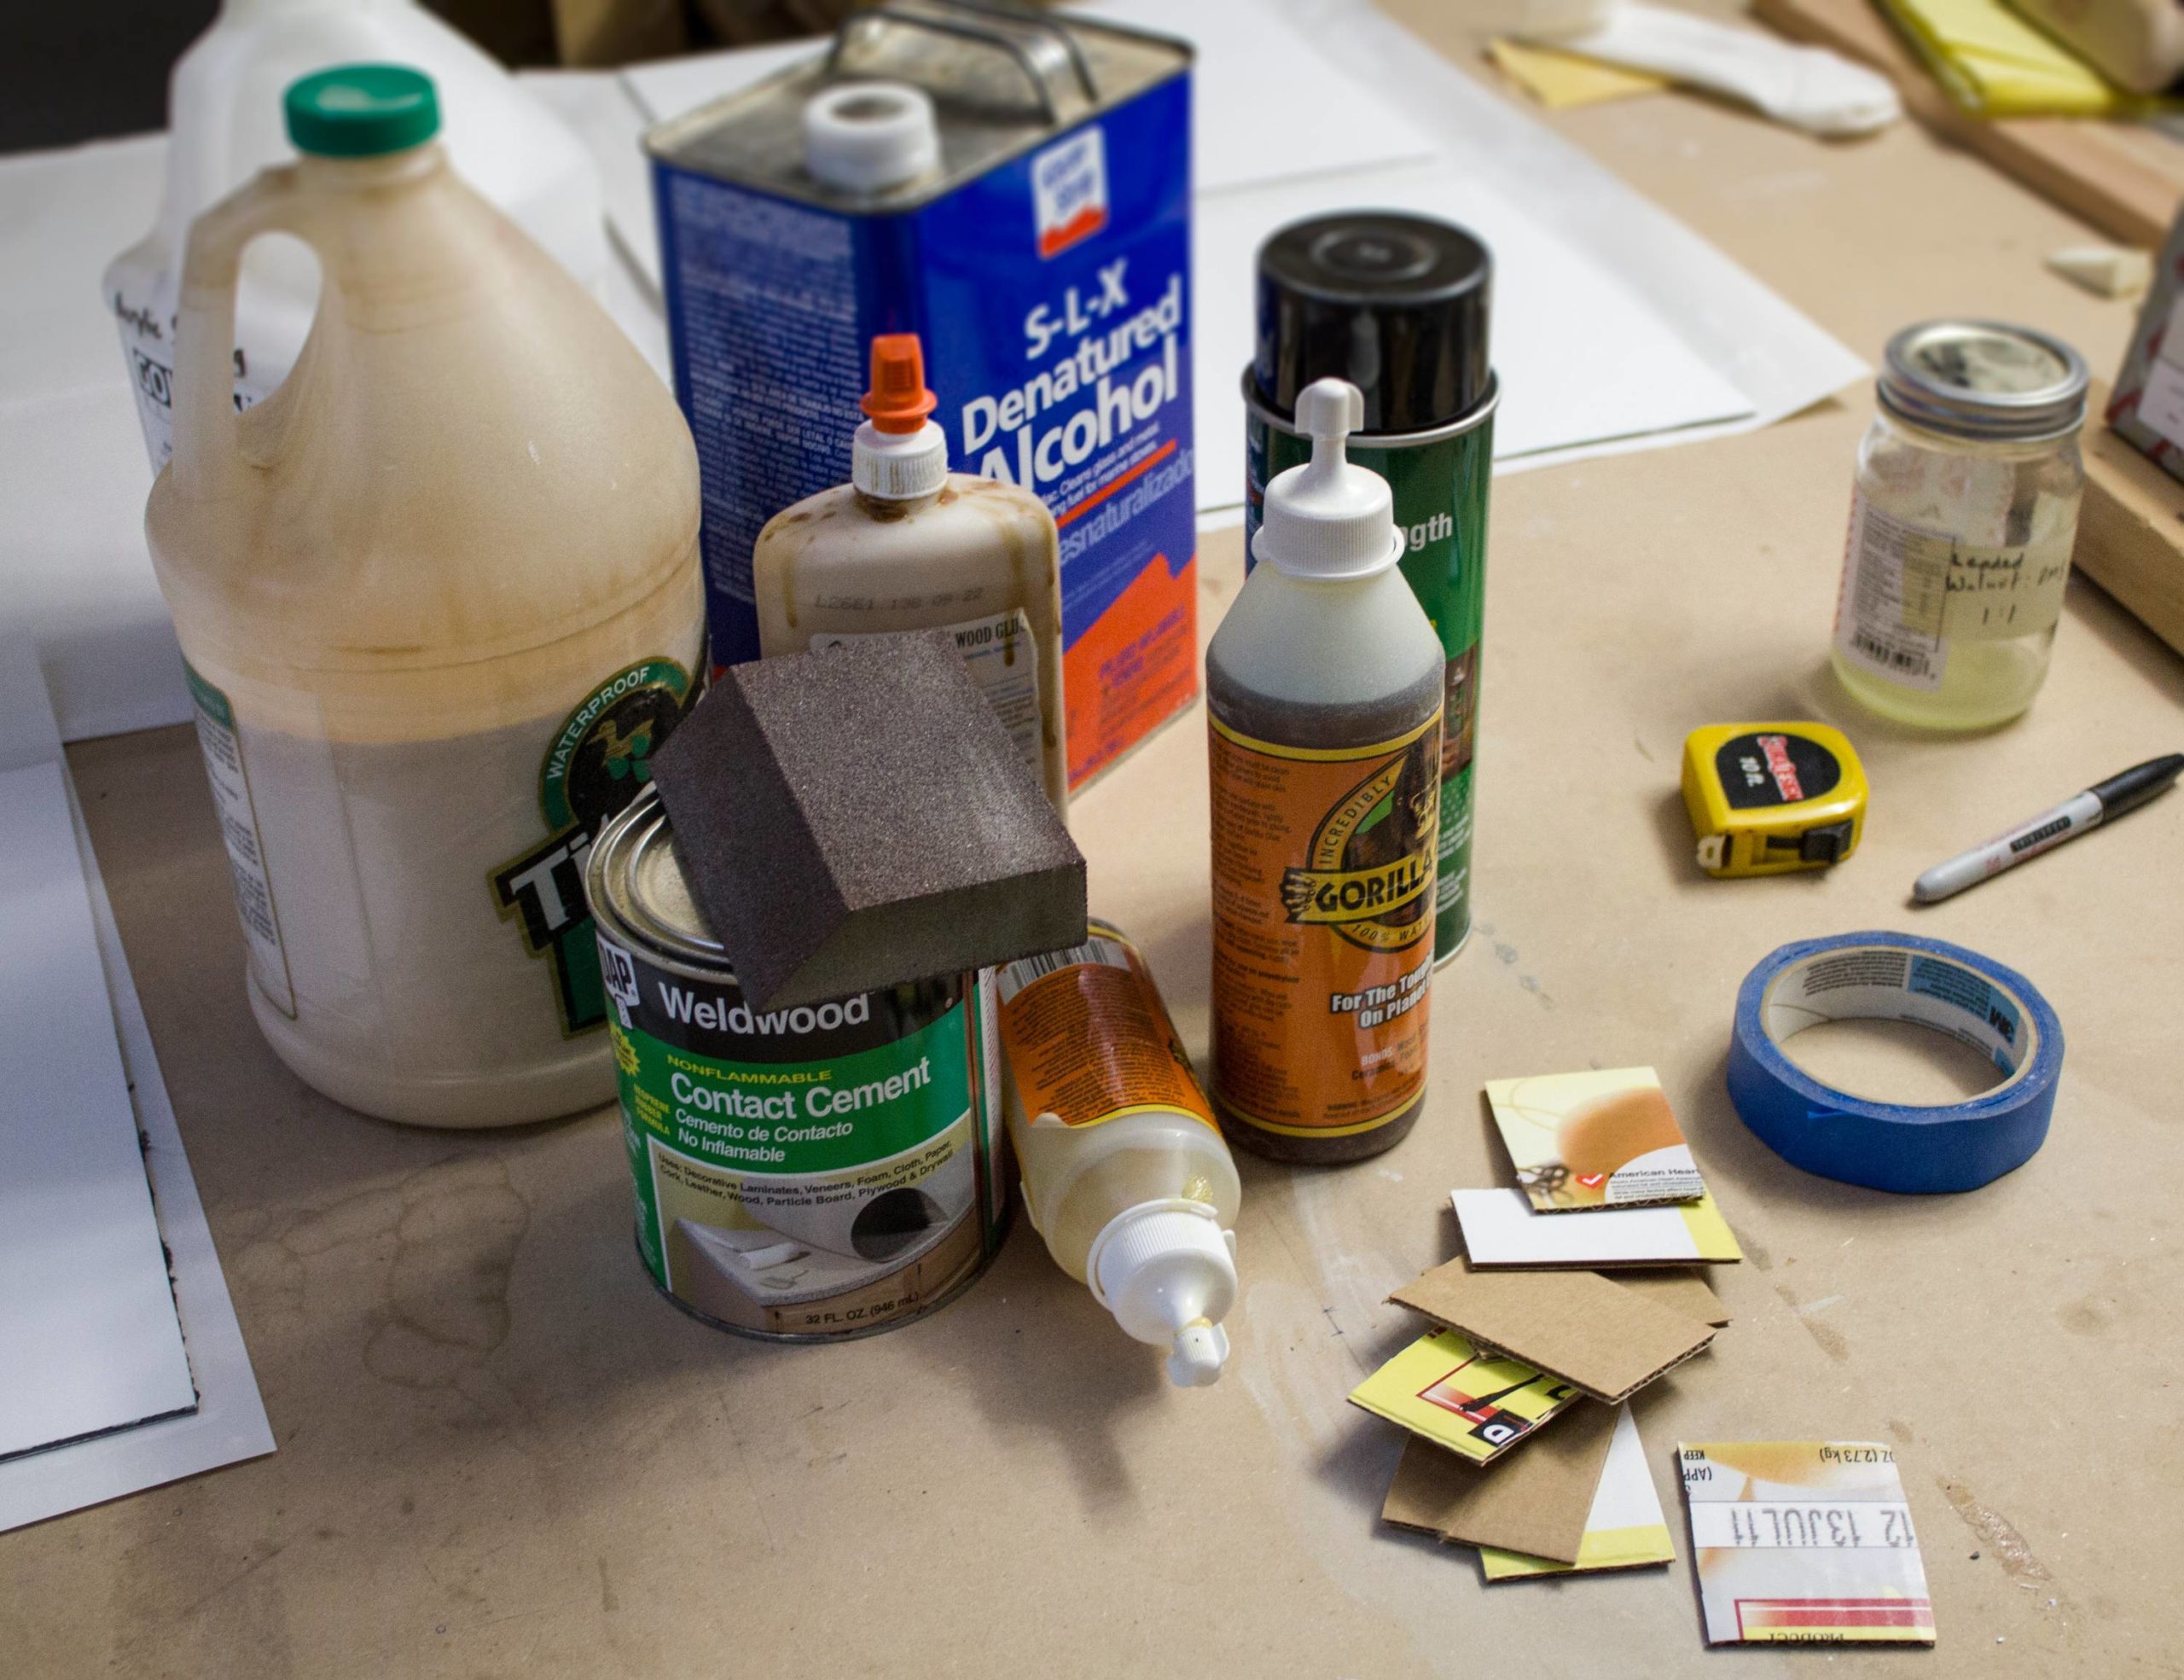
We purchase our copper plates from printmaking supply stores that offer plates in a variety of thicknesses and sizes. They are reliably smooth, and free from any bends or scratches. Copper can be expensive, and there are several types of vendors that offer quality copper, so you’ll have to shop around before buying in large quantities from one vendor. The thickness of your typical printmaker’s plate is more than adequate for the purposes of oil painting, and a 16 or 18 gauge will be perfect.
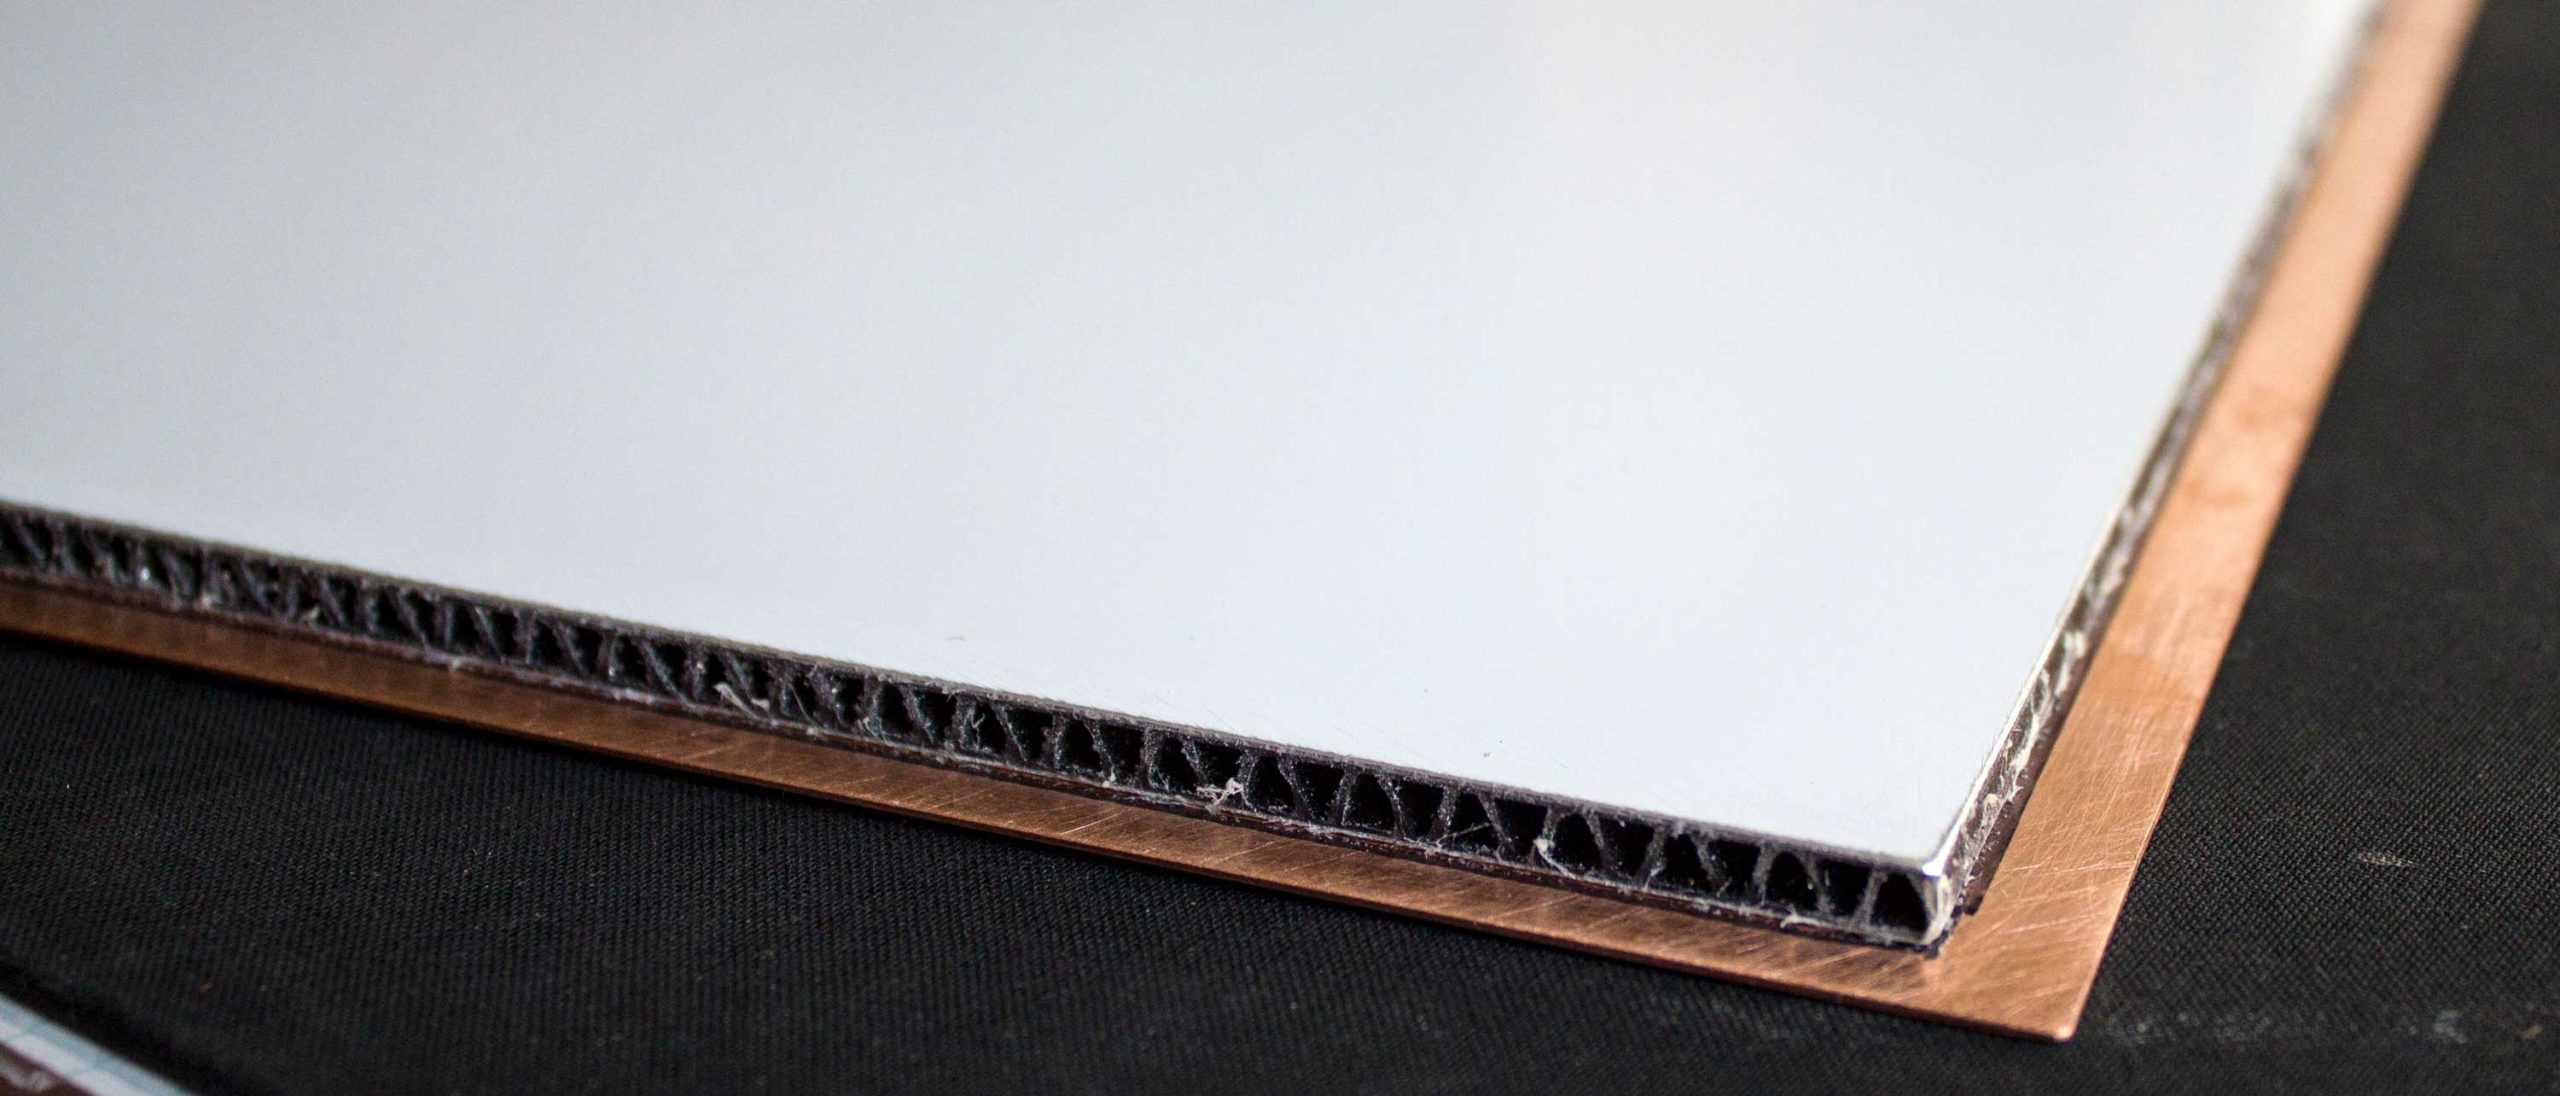
Once you have your copper surface, we recommend that you affix it to a solid backing, or substrate. Copper is an expensive, relatively soft metal, and most artists will be using plates in thicknesses that are vulnerable to dents, dings, bends and scratches, all of which can wreak havoc on a finished oil painting and lead to the deterioration or discoloration of the work.
The substrate should be rigid enough to prevent flexing, and be made of a sturdy, preferably lightweight material, compatible with any installation and/or framing hardware that might be used. In the past, we have used anything from MDF (medium-density fiberboard), lightweight aluminum panels (i.e. Dibond®), and expanded PVC panels for this purpose.
Whatever the choice in backing, it should be adhered properly to the raw copper plate with a good glue such as Miracle Muck, which is reversible, or a polyurethane adhesive like Gorilla Glue, which is permanent.
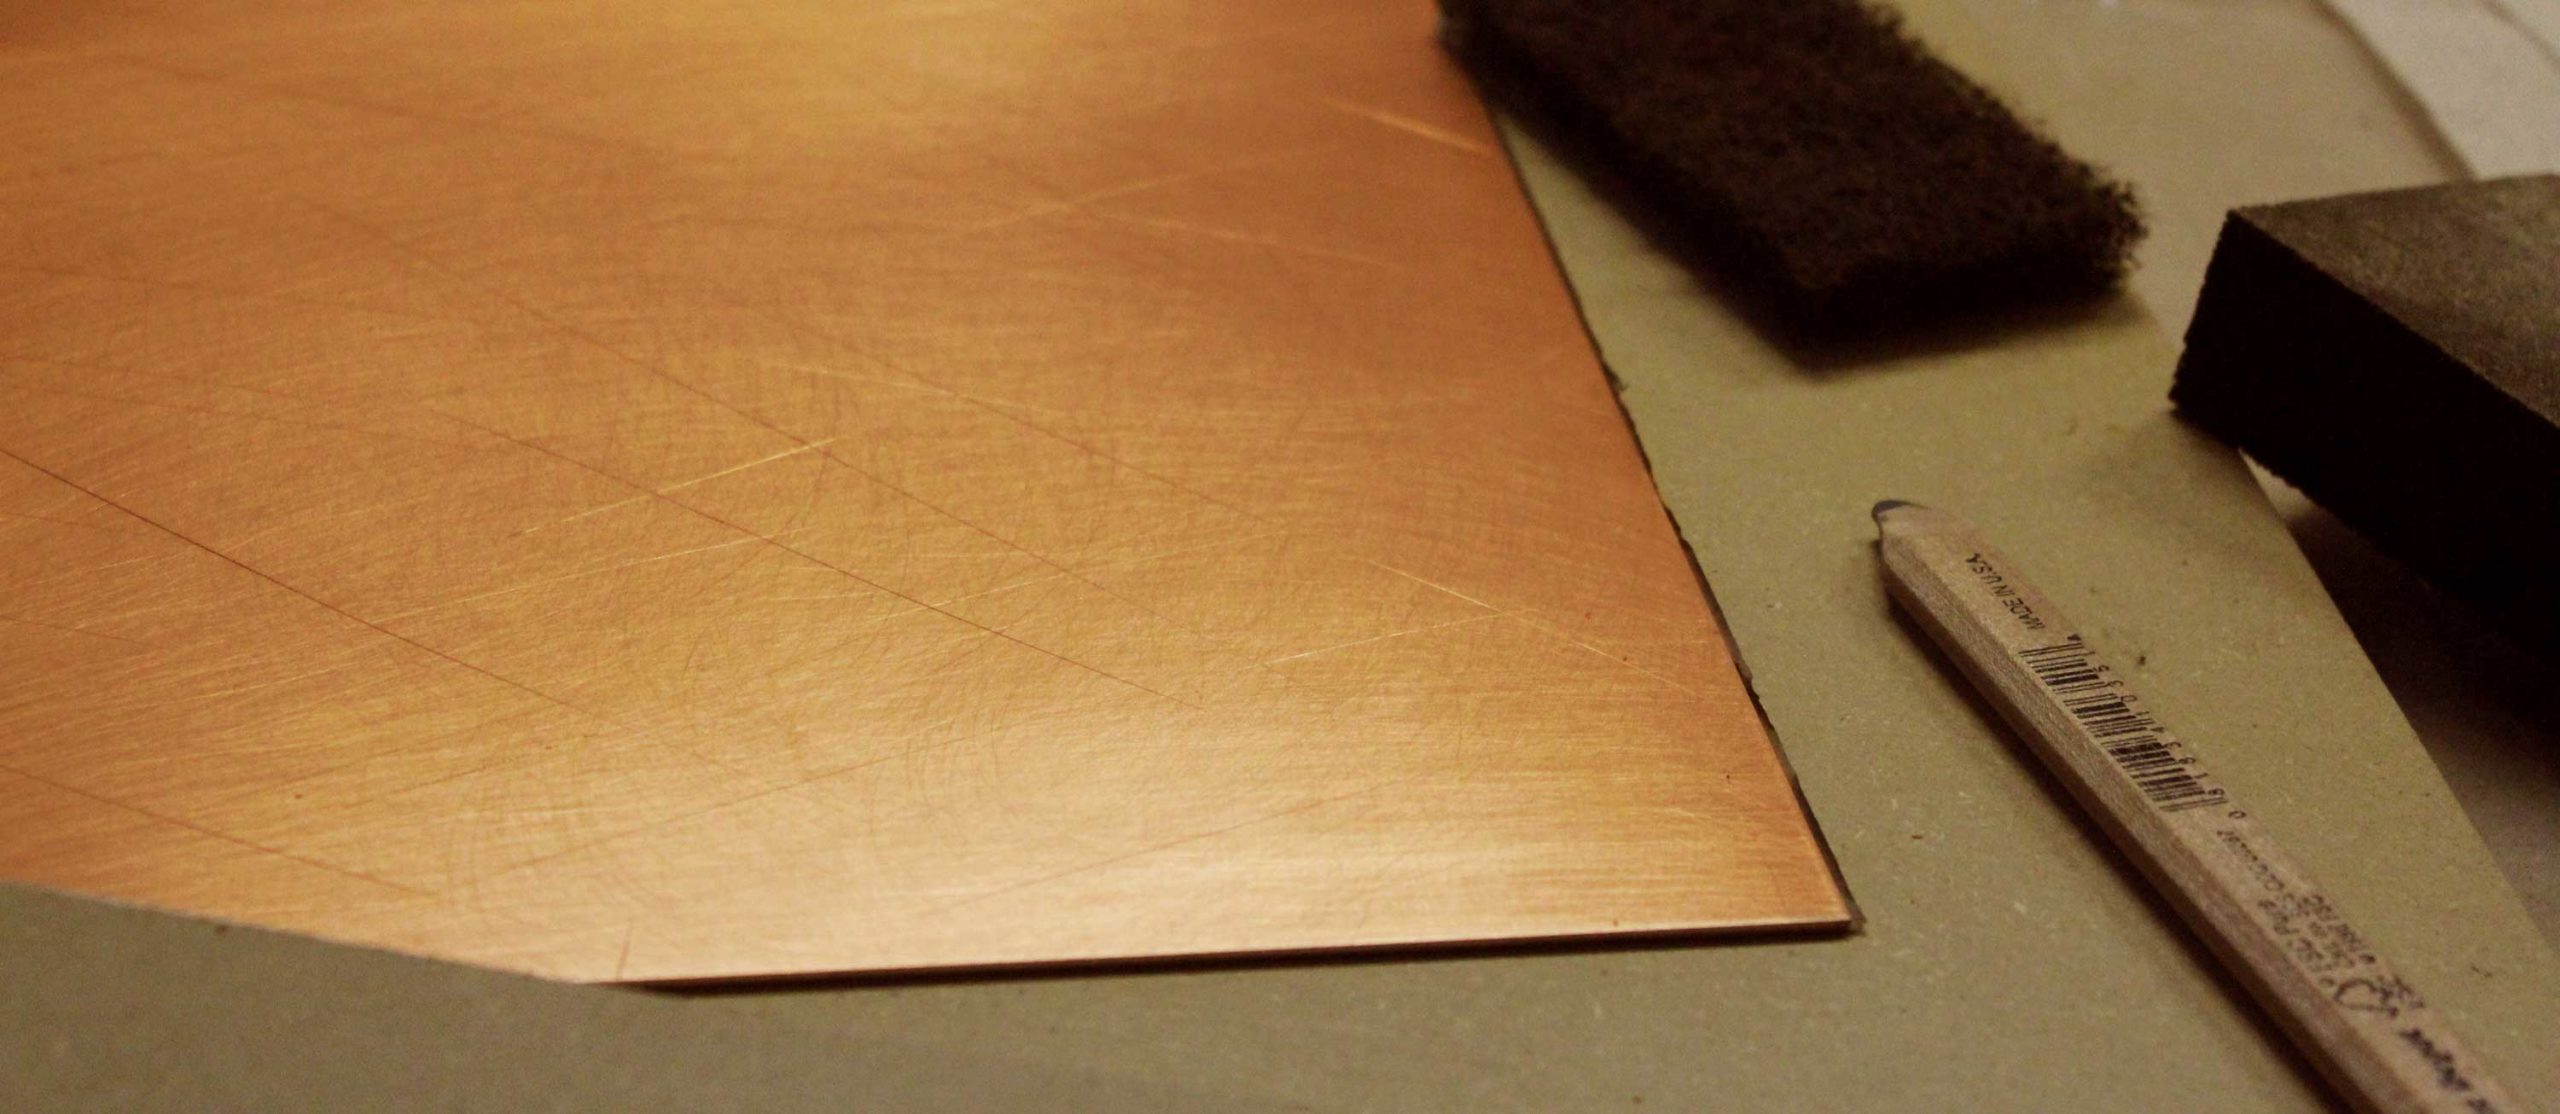

Before we apply any glue, we sand, score and clean the back of the copper, and we do the same to the front of the backing material to ensure the glue has good adhesion to both surfaces. Denatured alcohol on a clean rag can be used to wipe down the sanded surfaces and remove any dust or oil that may prevent good adhesion.
Apply the glue, then clamp or press the two surfaces together with even pressure. We use clamps, heavy books, weights, bags of clay, small children, loaves of fruitcake, or any combination of the aforementioned heavy objects, depending on the size of the plate—whatever gets the job done.
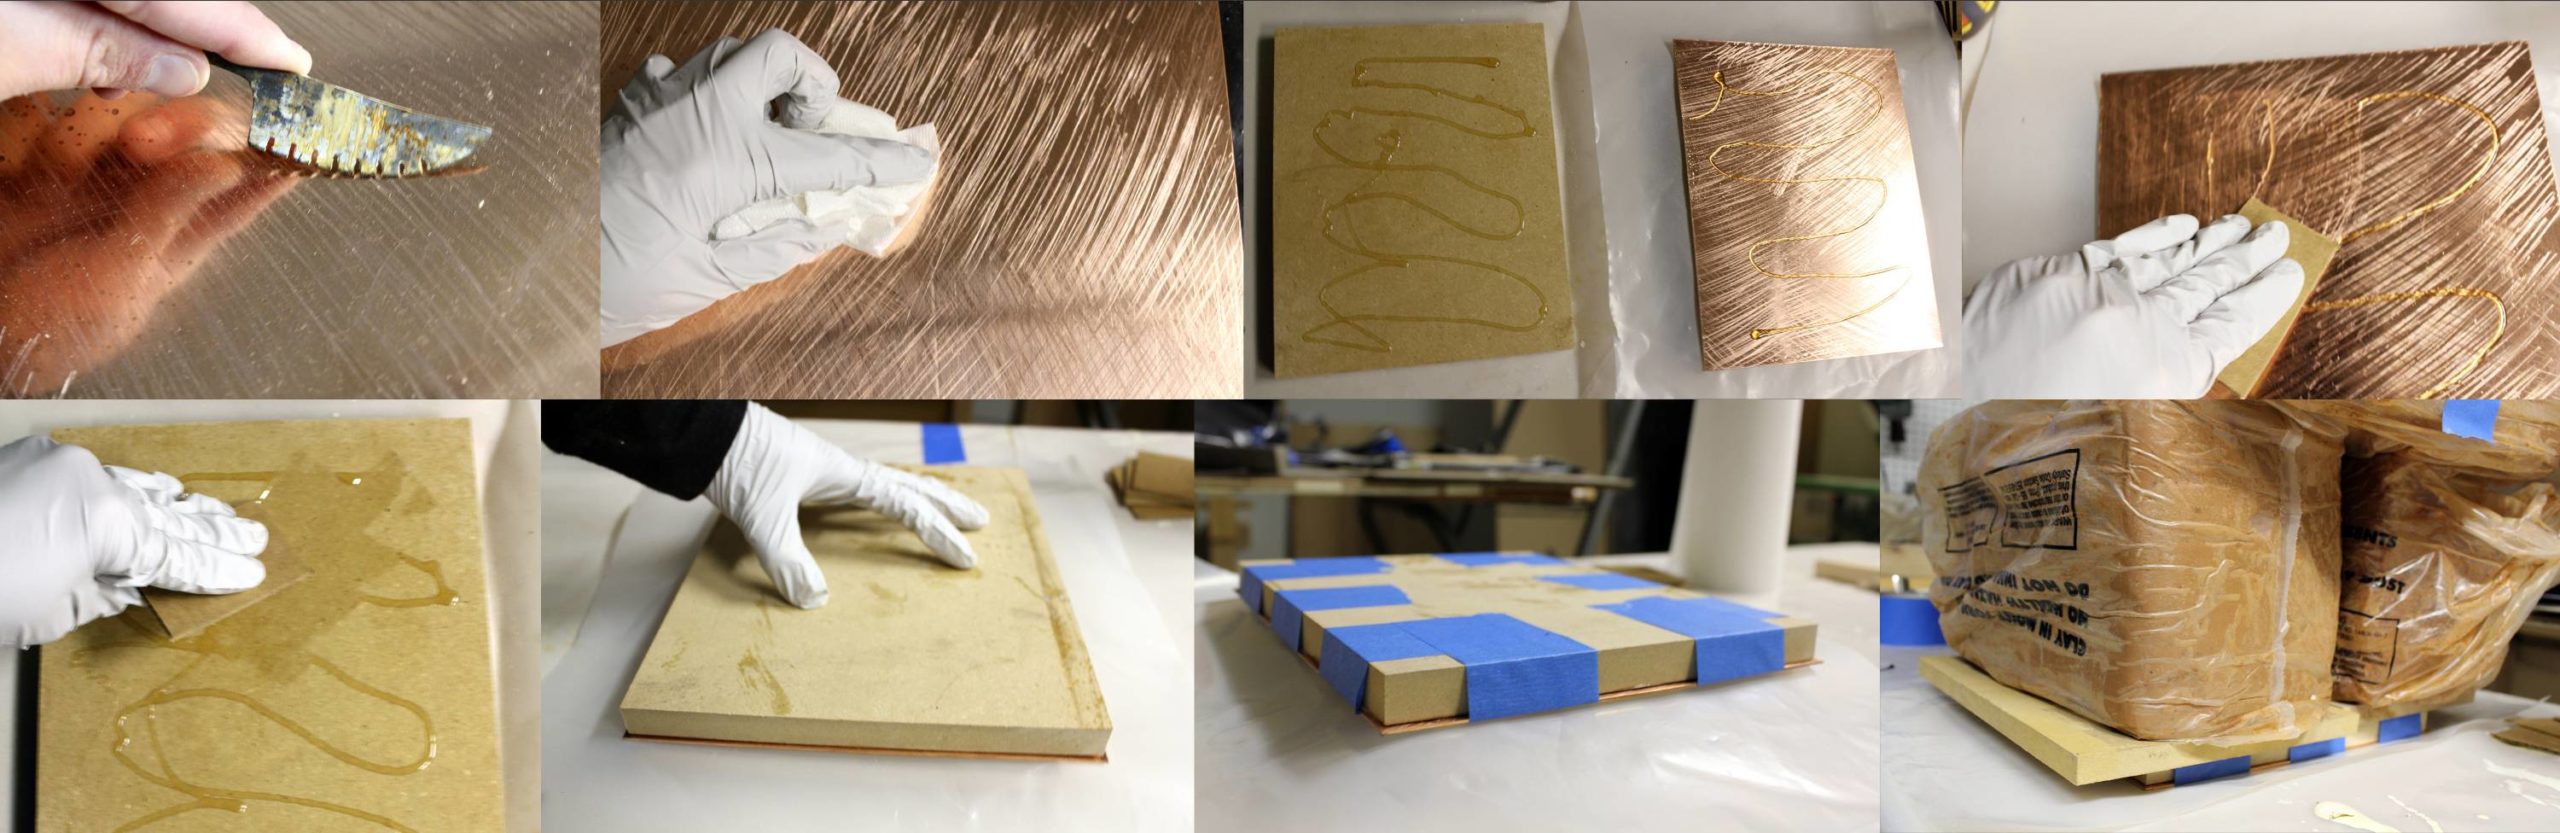
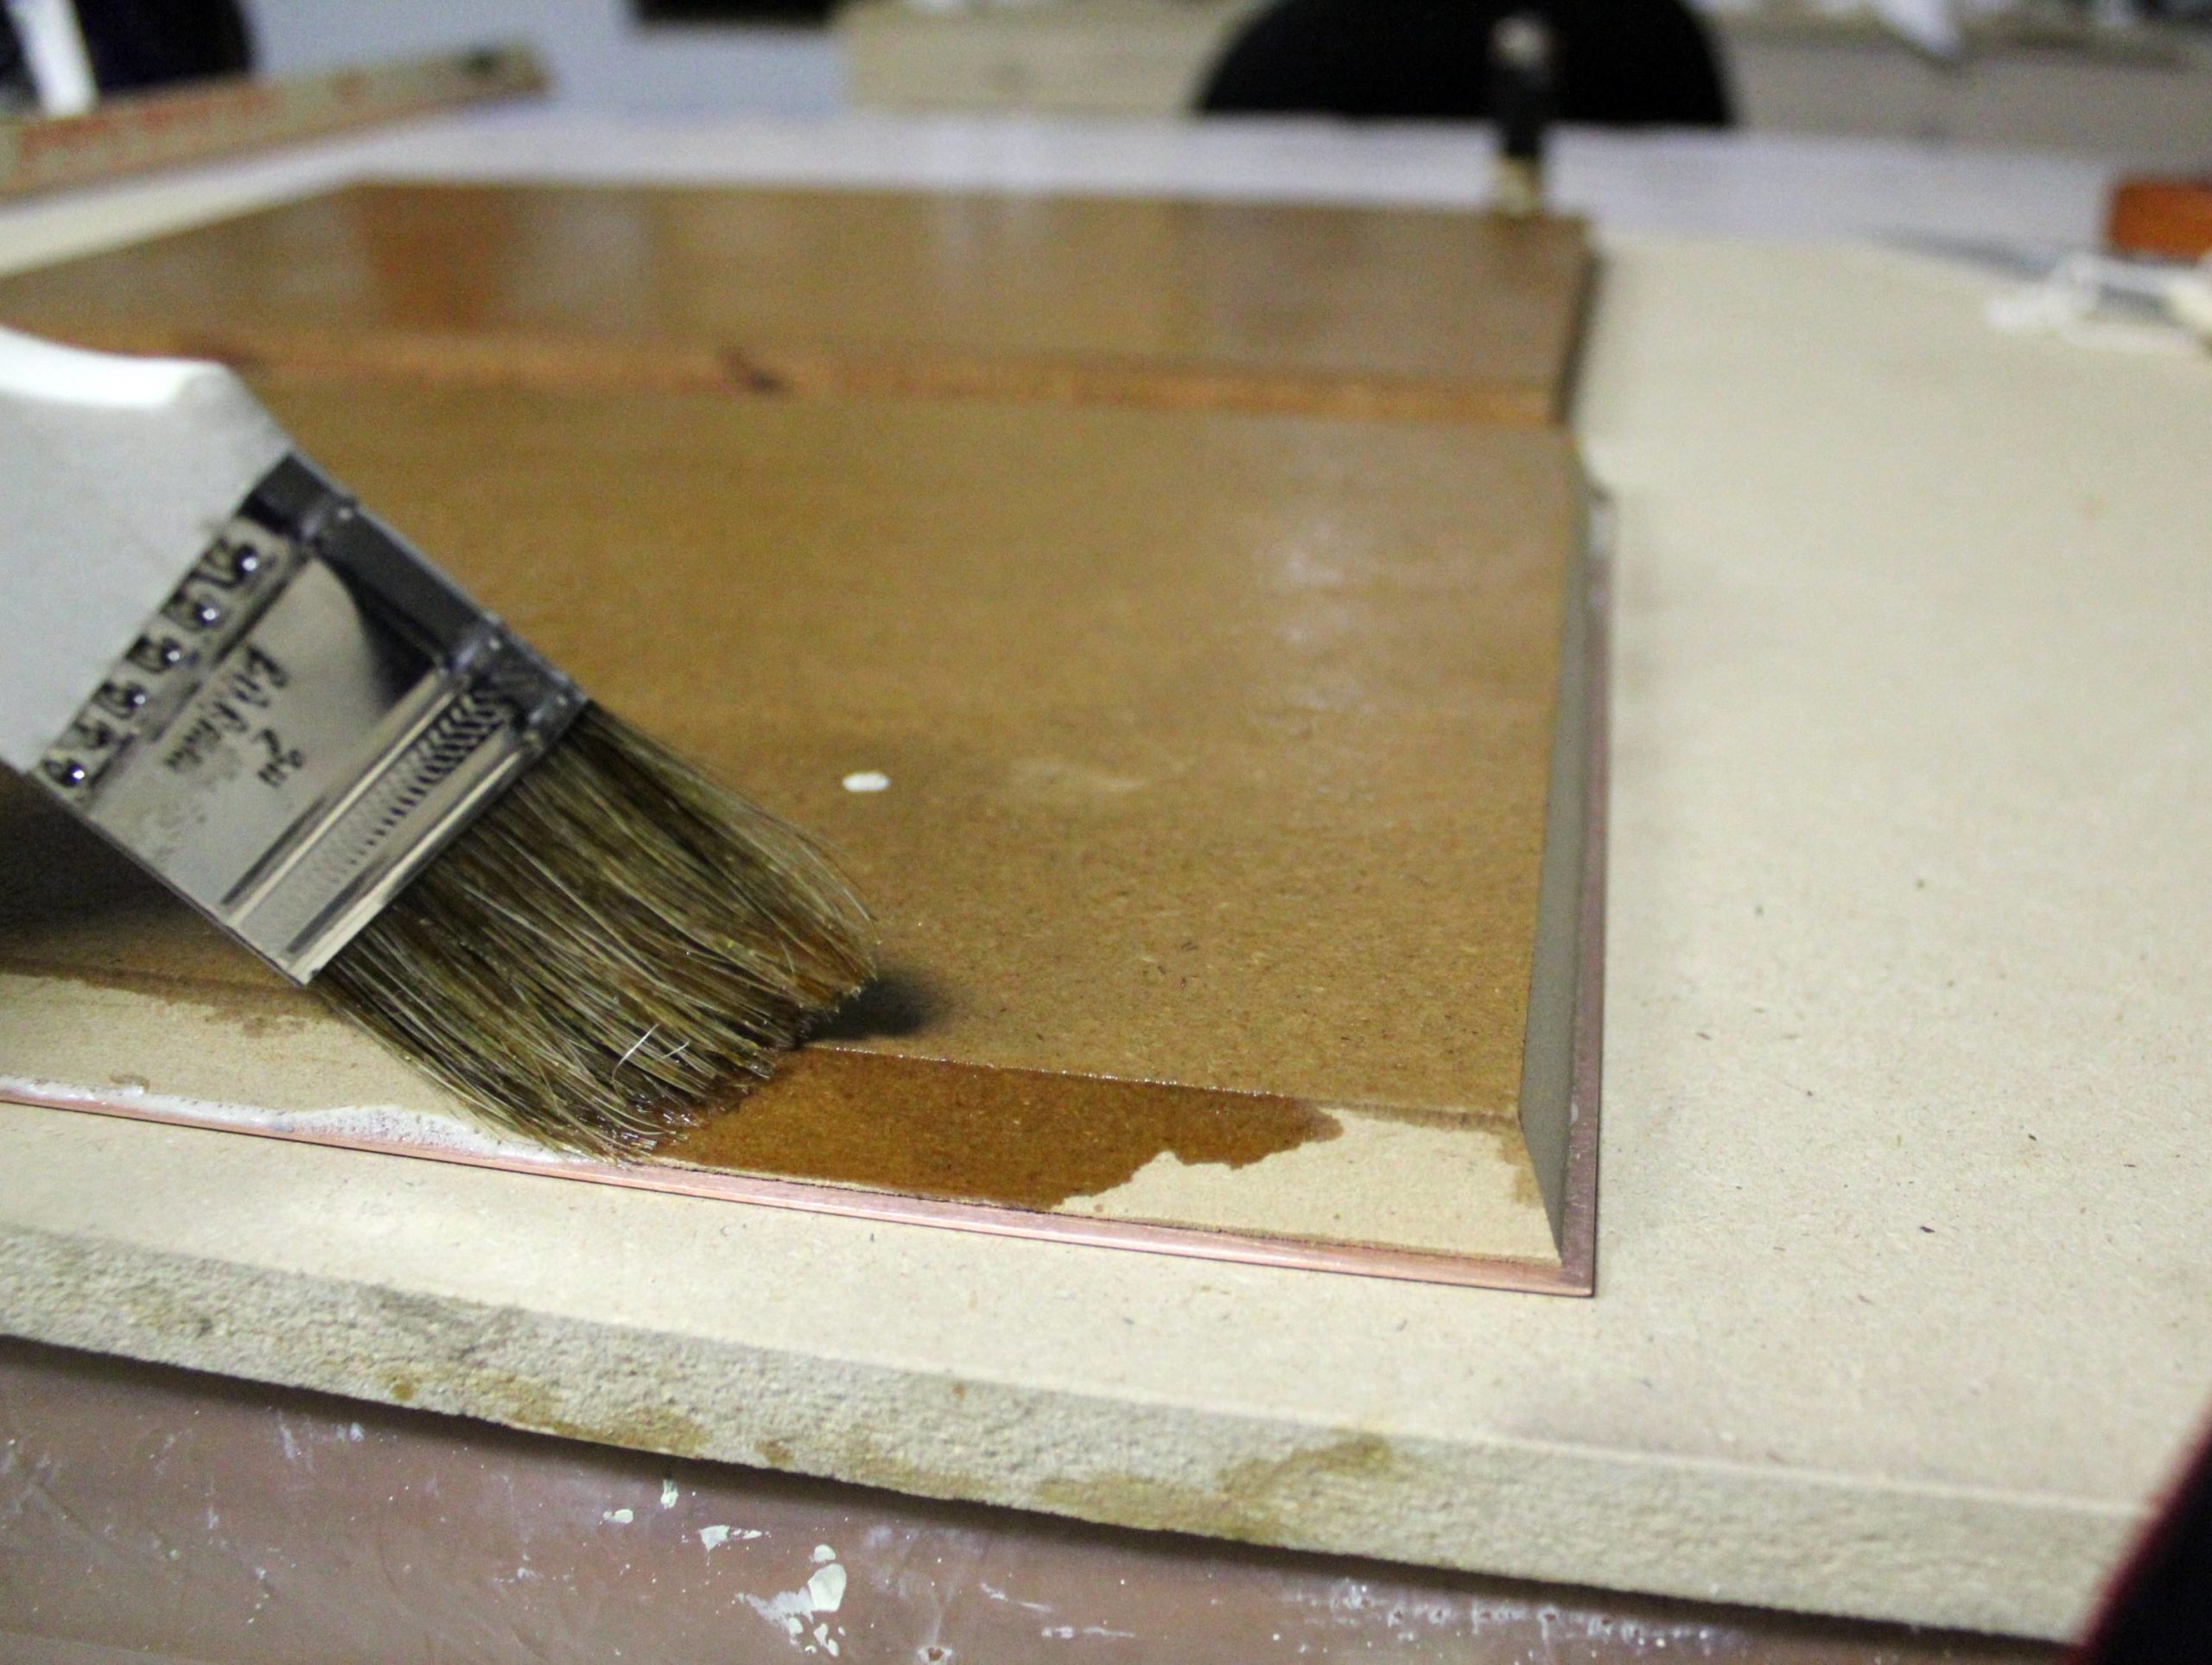
If you are using MDF as a backing, or any material sensitive to atmospheric moisture, be sure to seal it from the elements; skip this step if you’re using aluminum or expanded PVC. Two to three coats of a polyurethane outdoor sealer will do just fine. The sealer will help minimize any damage caused by moisture, such as warping, or substrate-induced discoloration (SID).
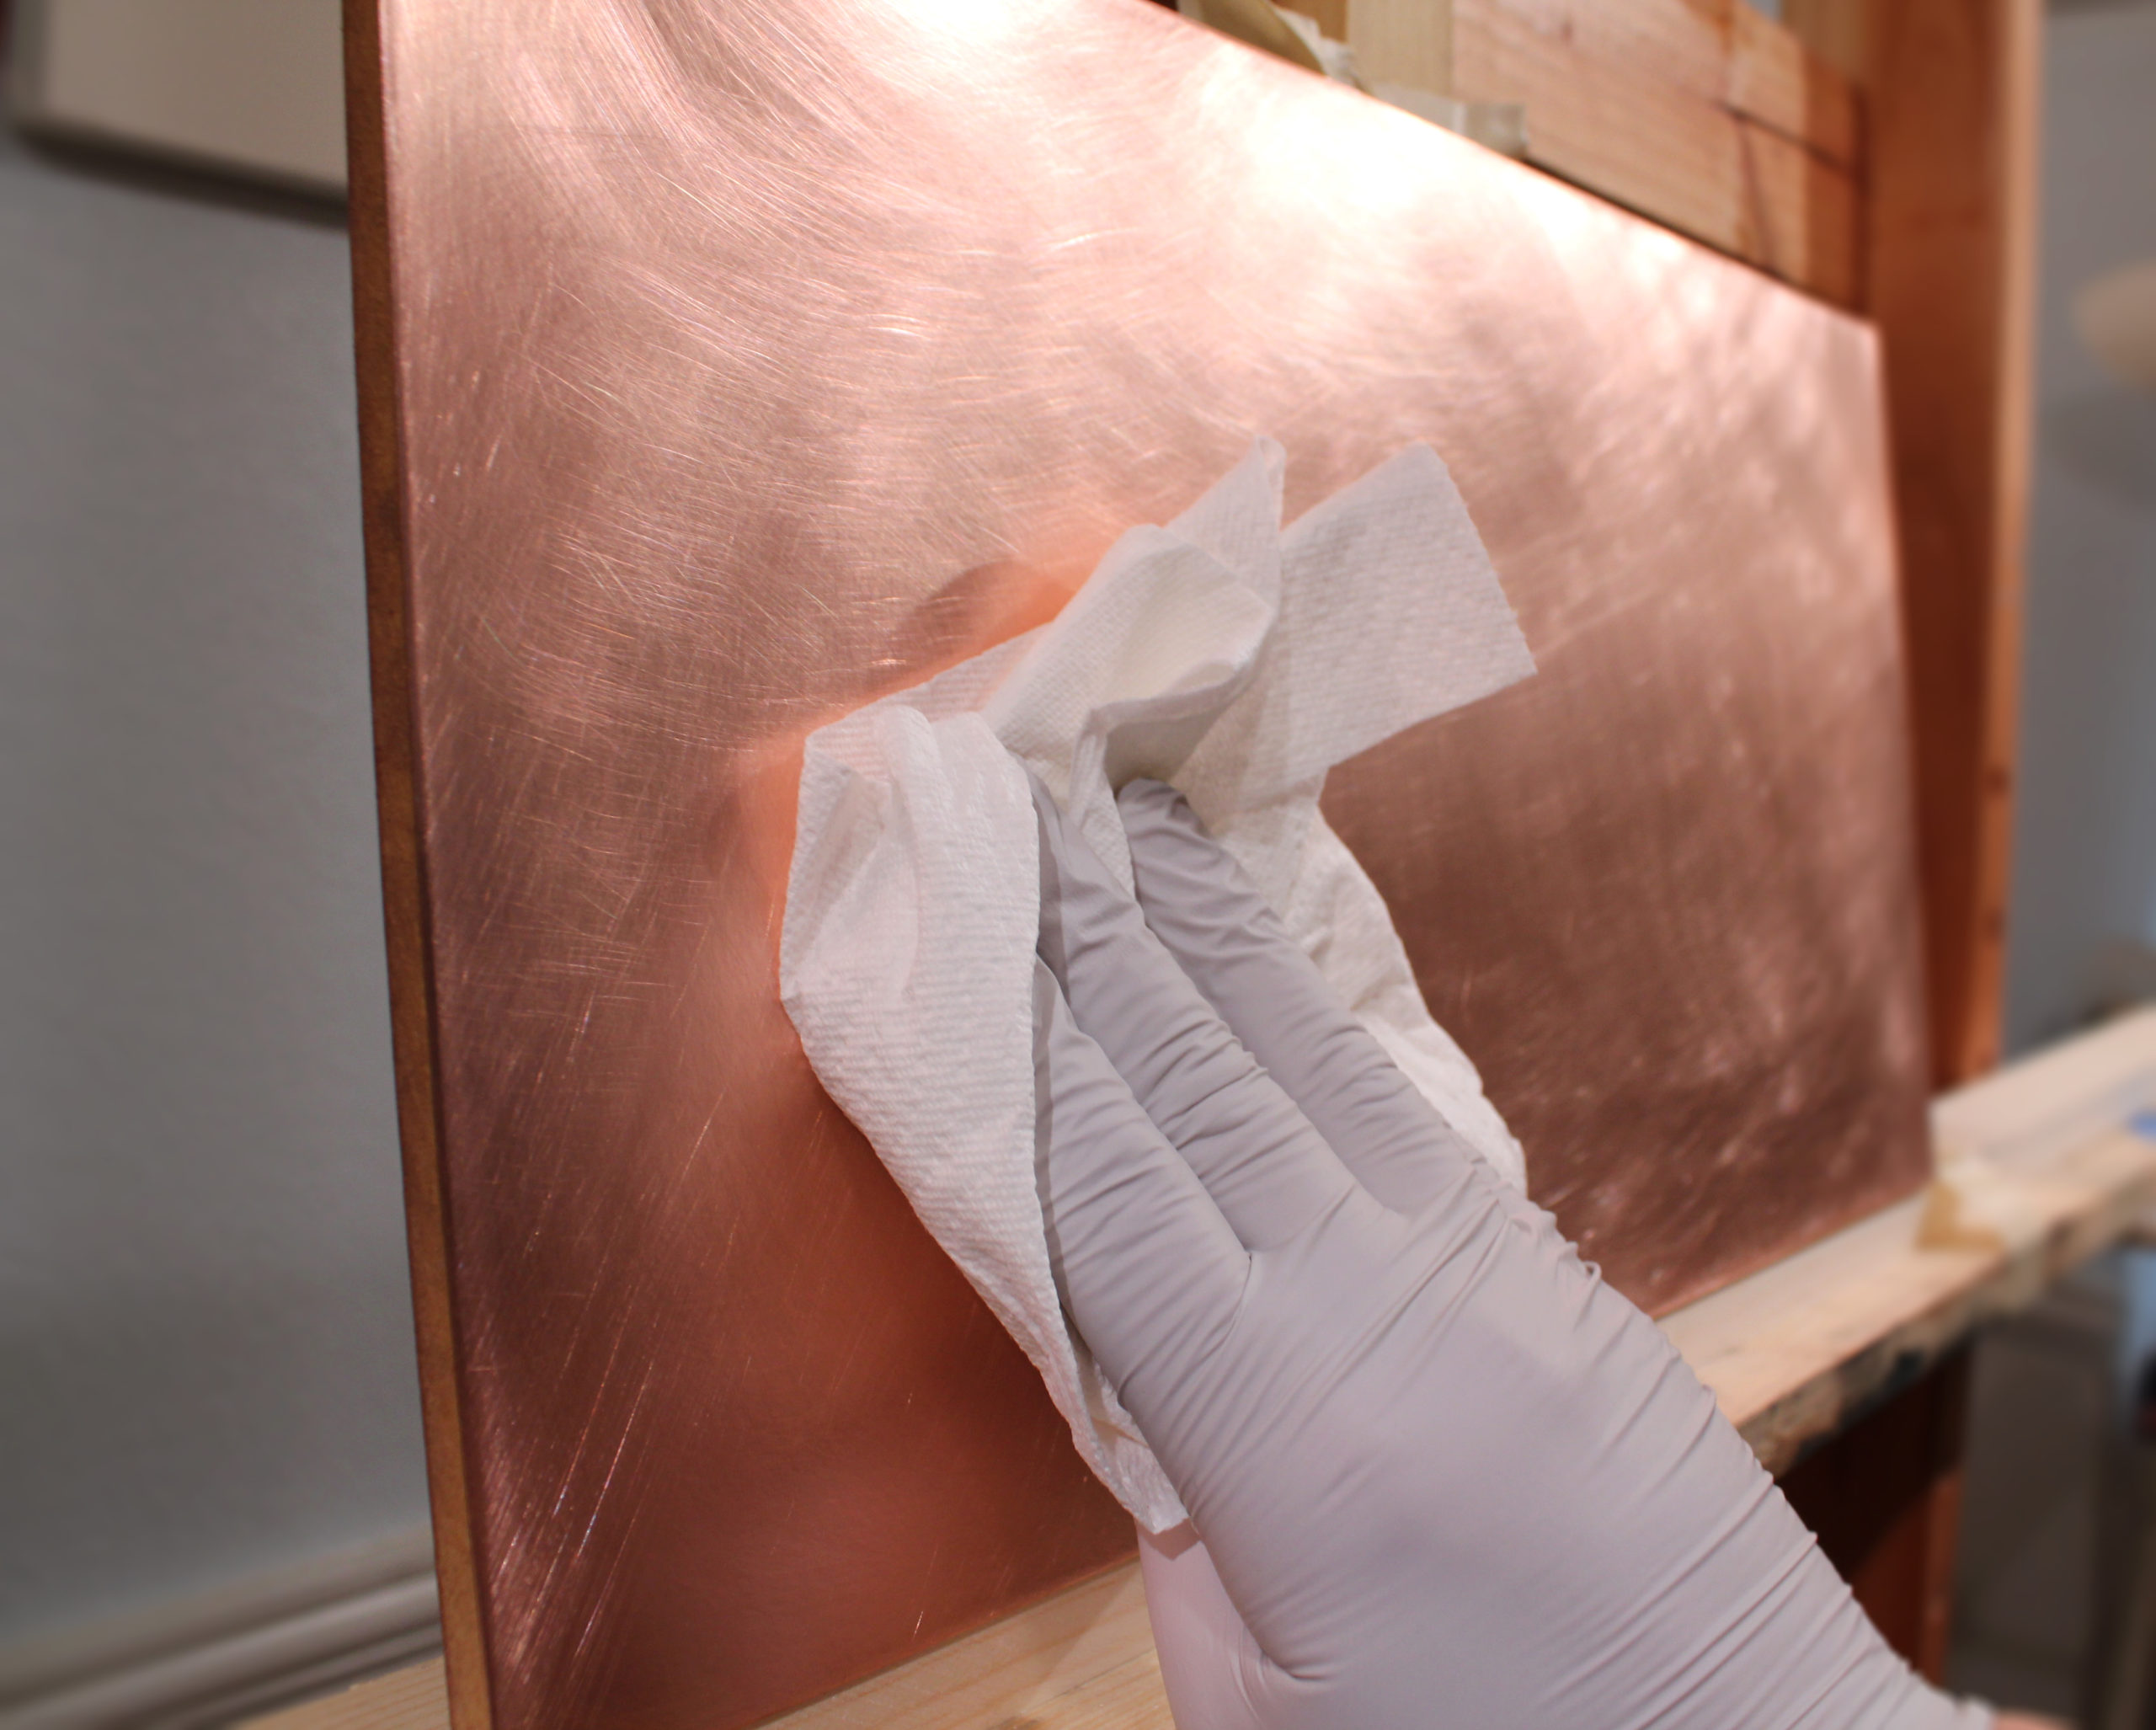
To prepare the copper to receive paint, you will want to thoroughly sand the surface with a medium to fine grit sandpaper to remove any oxidation. This step will also alter the smoothness of the surface so that it creates enough tooth in the metal for the first layers of oil paint to achieve a strong mechanical bond.
Be sure to wear clean gloves to prevent oils from your hands from rubbing off on the sanded surface, and carefully clean the plate surface with denatured or isopropyl alcohol to remove any dust or grease. Both dust and grease will prevent the oil paint from adhering properly, and if they are not fully removed they may lead to delamination over time.
Once the surface of the copper has been sanded and cleaned, you should continue to wear clean gloves when handling it to prevent fingerprints or oily smudges. And here’s where things get culinary! Gently apply a thin layer of garlic juice to the surface of the copper plate, either by rubbing freshly cut garlic cloves on the surface or by brushing on liquid garlic juice that’s available in bottles at grocery stores.
We usually use raw garlic for this process by slicing a clove in half and rubbing the halved garlic directly to the copper in small circular motions. This should be thought of less as a “layer” and more like a damp wiping treatment. Make new slices in the garlic every now and then to access more juice as it dries; we use clean razor blades to slice off these thin layers.
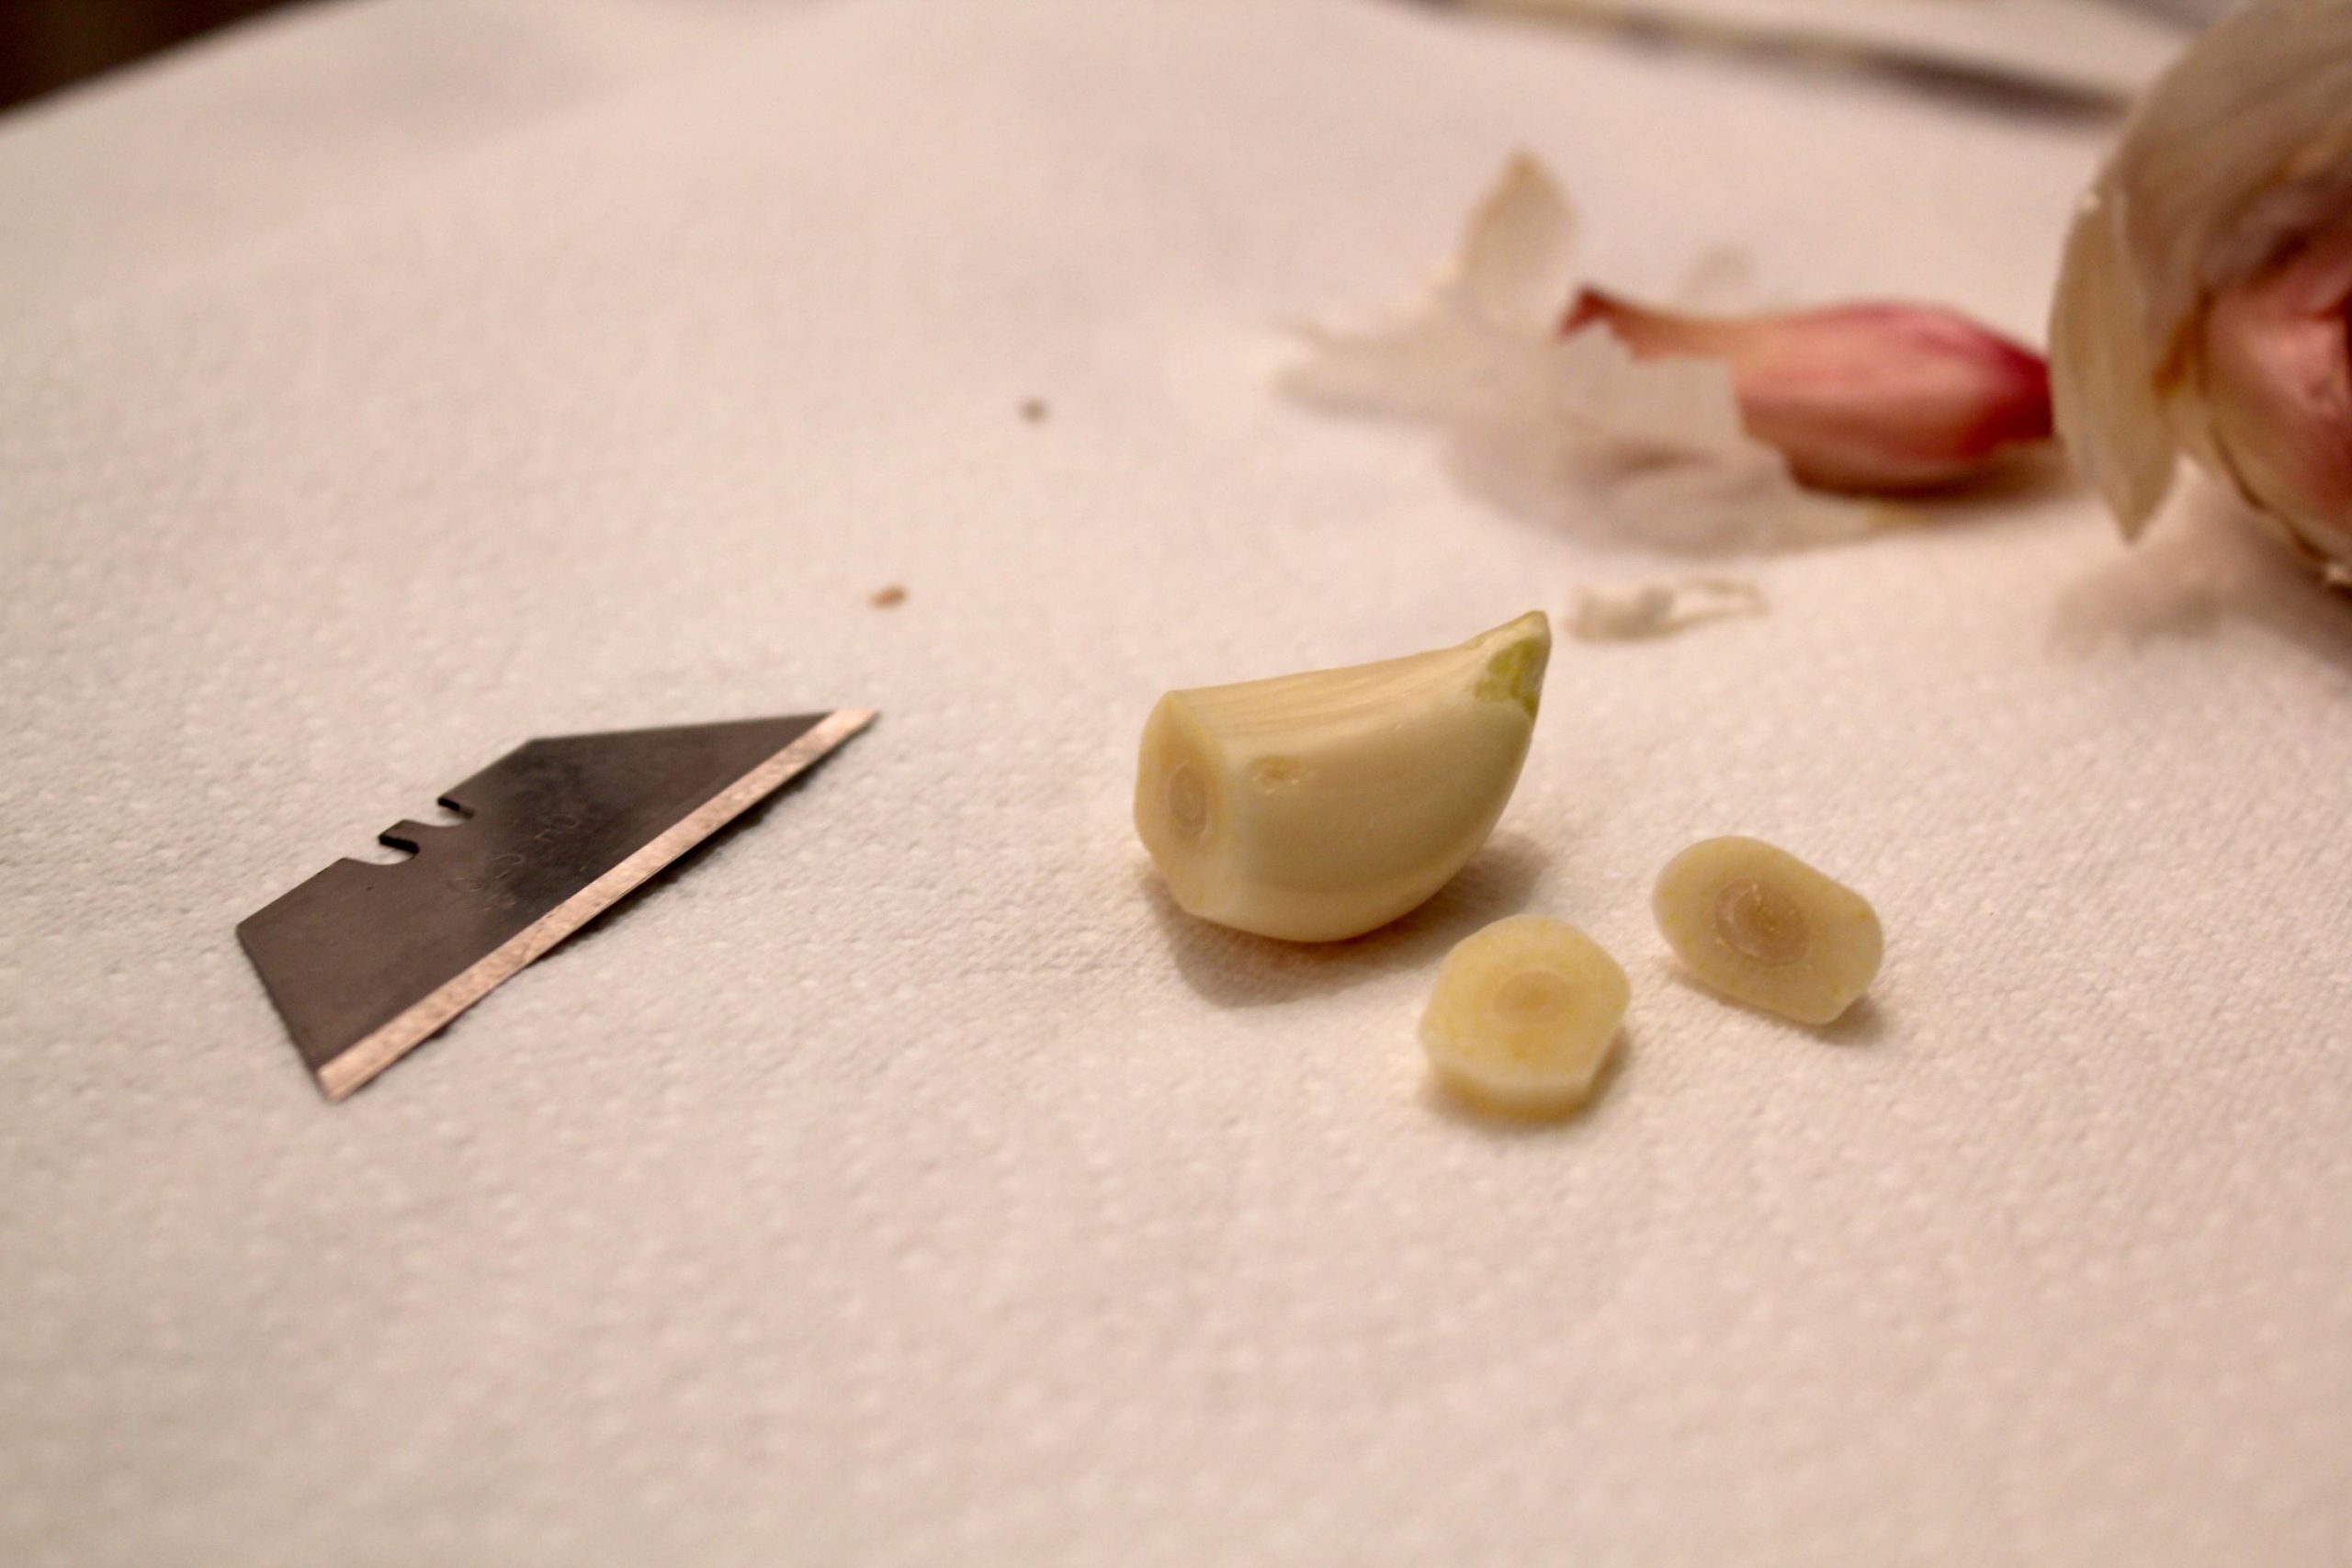
The garlic juice was used traditionally to alter the surface tension of the copper and provide a surface that makes applying paint or ground easier. Otherwise, the paint has a tendency to bead up due to the differences in surface energy. The mild acid from the garlic juice actually etches the surface of the copper. You will be able to see the metal change in color and sheen as you apply the garlic juice. The effect is subtle, so keep careful watch so you don’t backtrack over areas you’ve already covered.
The copper will form a chemical bond to the lead in your primer/paint and the other heavy metals in your oil paints such as lead, cobalt, cadmium, etc. This bonding is in addition to the mechanical bond that sanding alone would provide. Together these individual steps contribute to what you really want when painting on metal, or any surface for that matter: a strong and lasting bond between the paint and the surface.
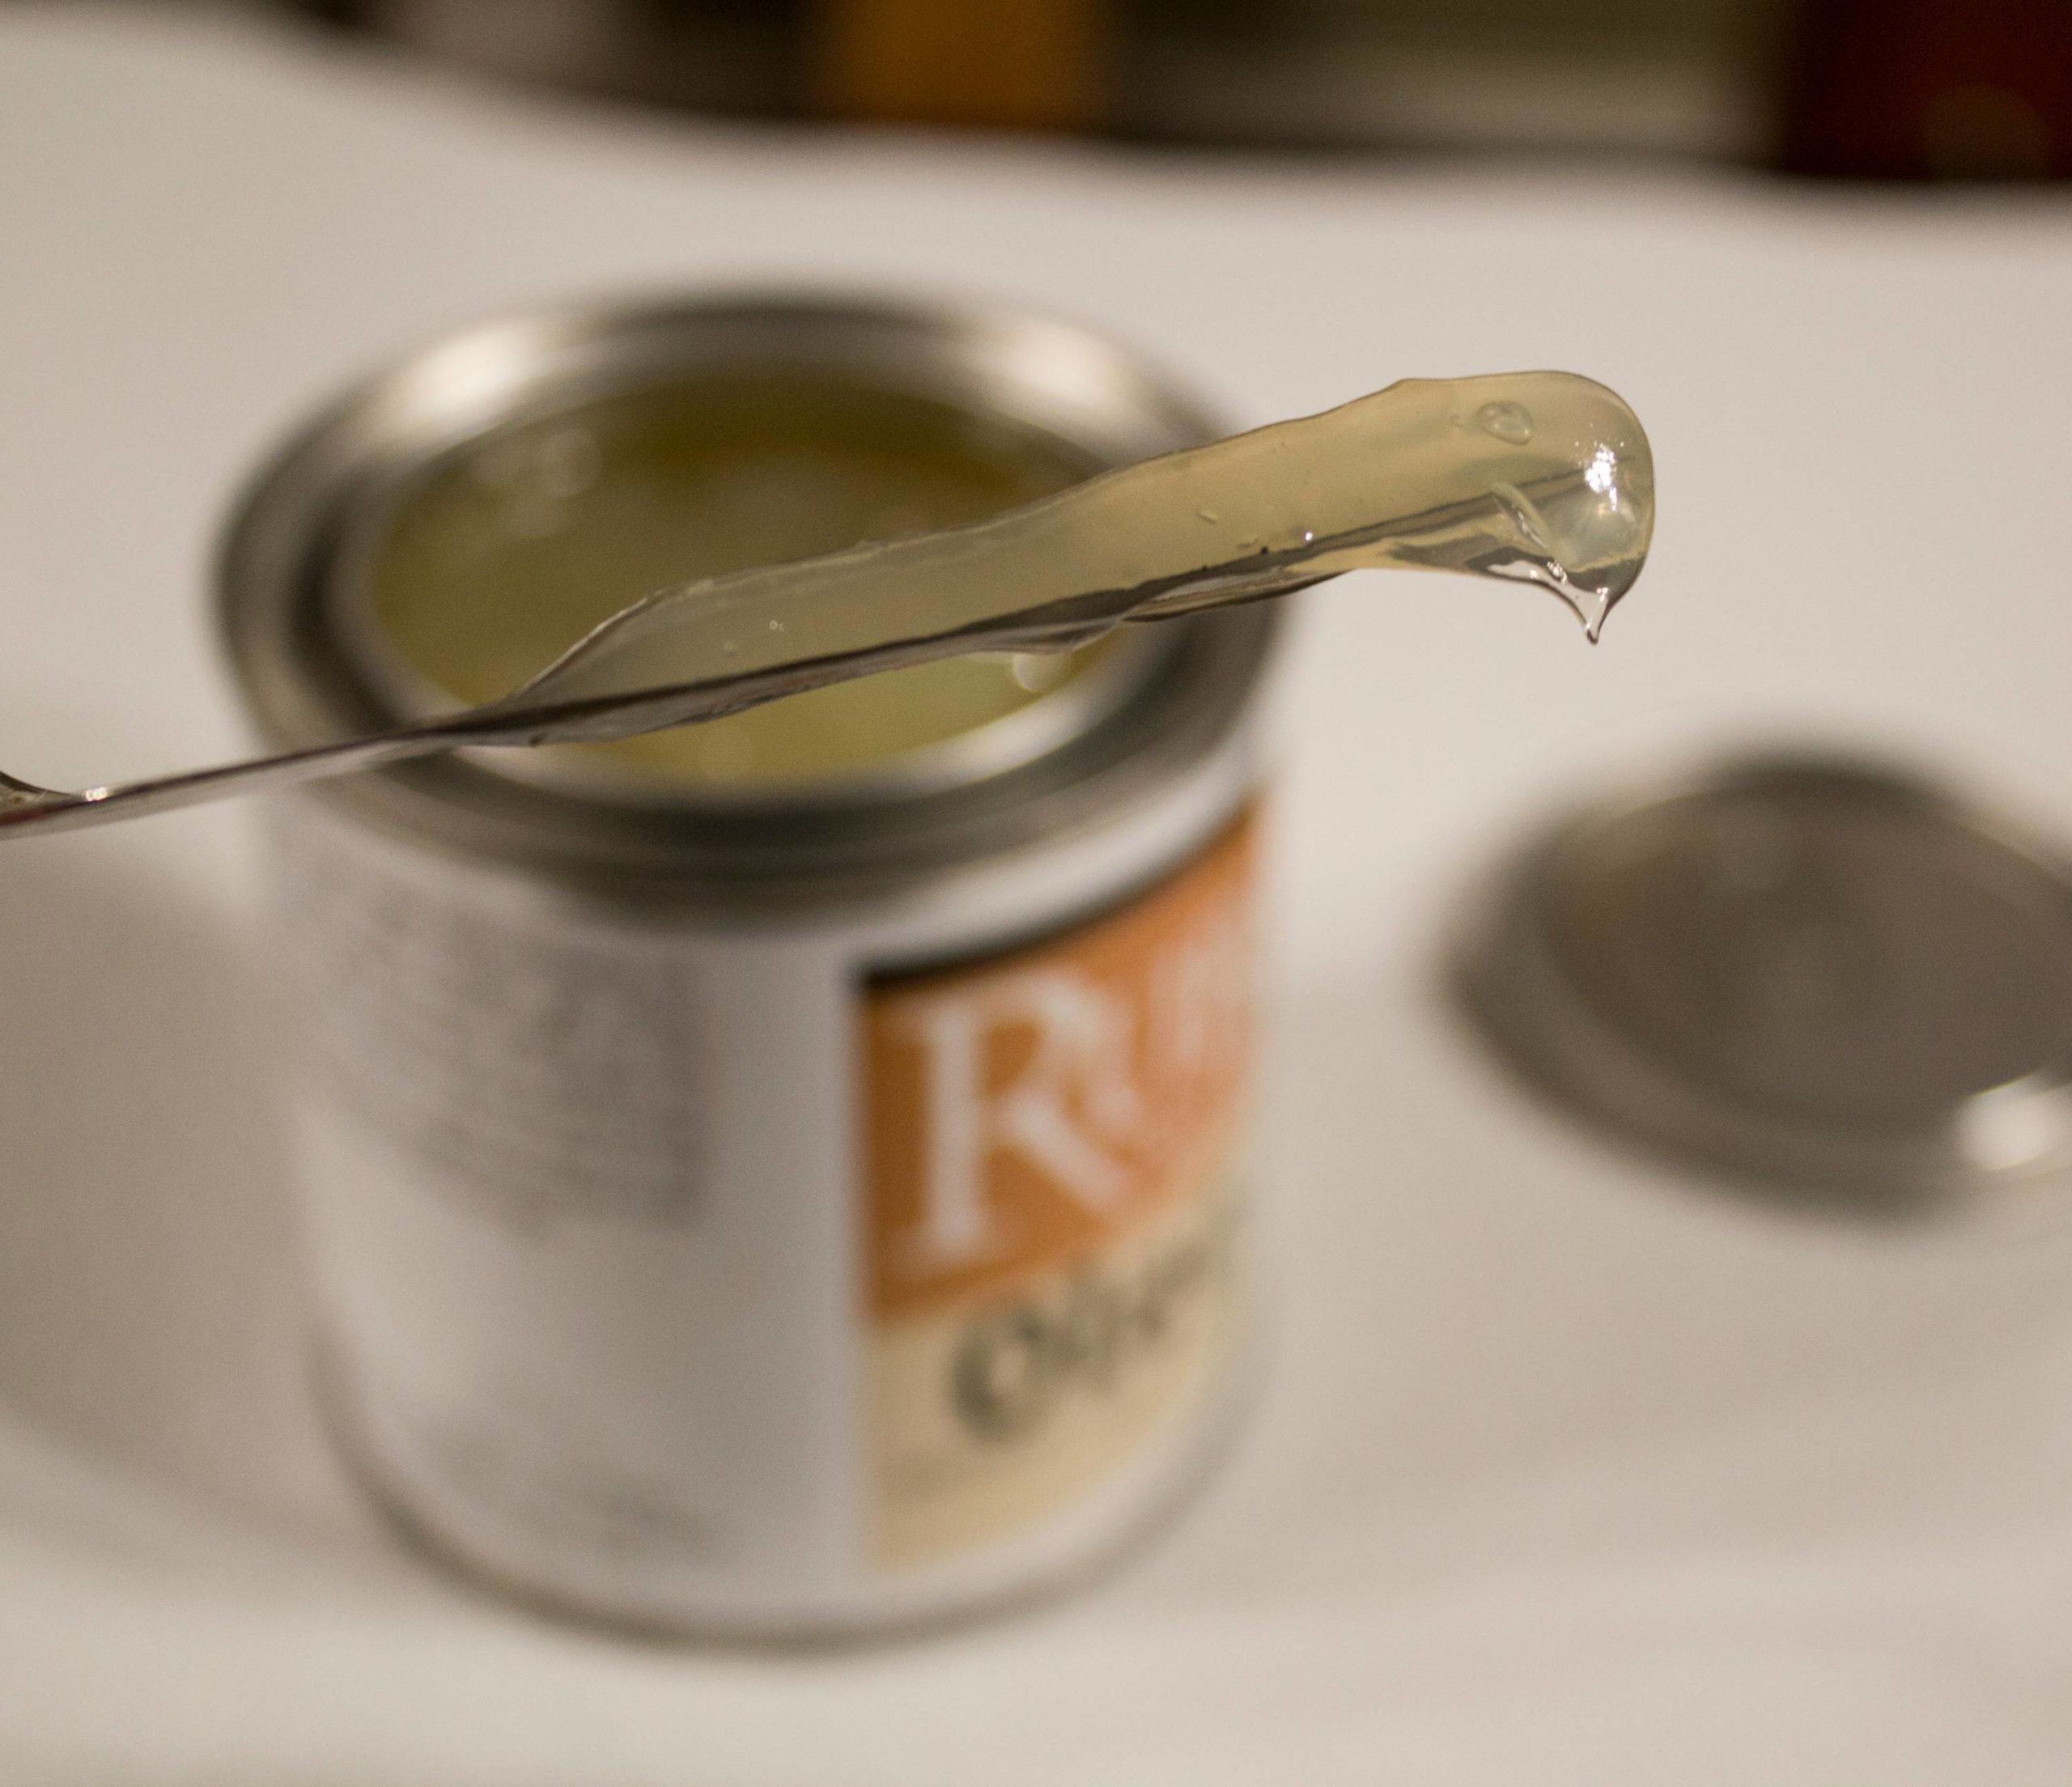
After the garlic has dried, you may choose to apply a thin layer of lead white ground to the copper to create a smooth, opaque surface. Or if you prefer, you may just begin painting right away on the freshly dried garlic covered copper. If you’re going to prime the surface, it’s preferable to use a lead-based primer. If you choose to forgo the primer we recommend that a lead white oil paint be used for mixing with colors. This is because the etched copper will achieve a chemical bond to the lead in the paint, which it will not do with titanium. This added provision aids in the longevity of the work and is, perhaps admittedly, splitting hairs. However, if it is within good reason to practice a deeper, more disciplined level of craft, then we will ALWAYS err in that direction. A bit obsessive? Absolutely. So it’s up to you.
If you are priming (the traditional preparation method), use two coats of very thinly applied primer. It’s desirable to keep these layers smooth and thin. For a smoother surface, after the primer is dry it can be carefully wet-sanded with linseed oil and fine grit sandpaper. If painting directly onto the copper plate without primer, be careful to leave no areas of the plate exposed to air without a layer of paint, medium or varnish covering it, because the copper will eventually oxidize and change colors in those areas.
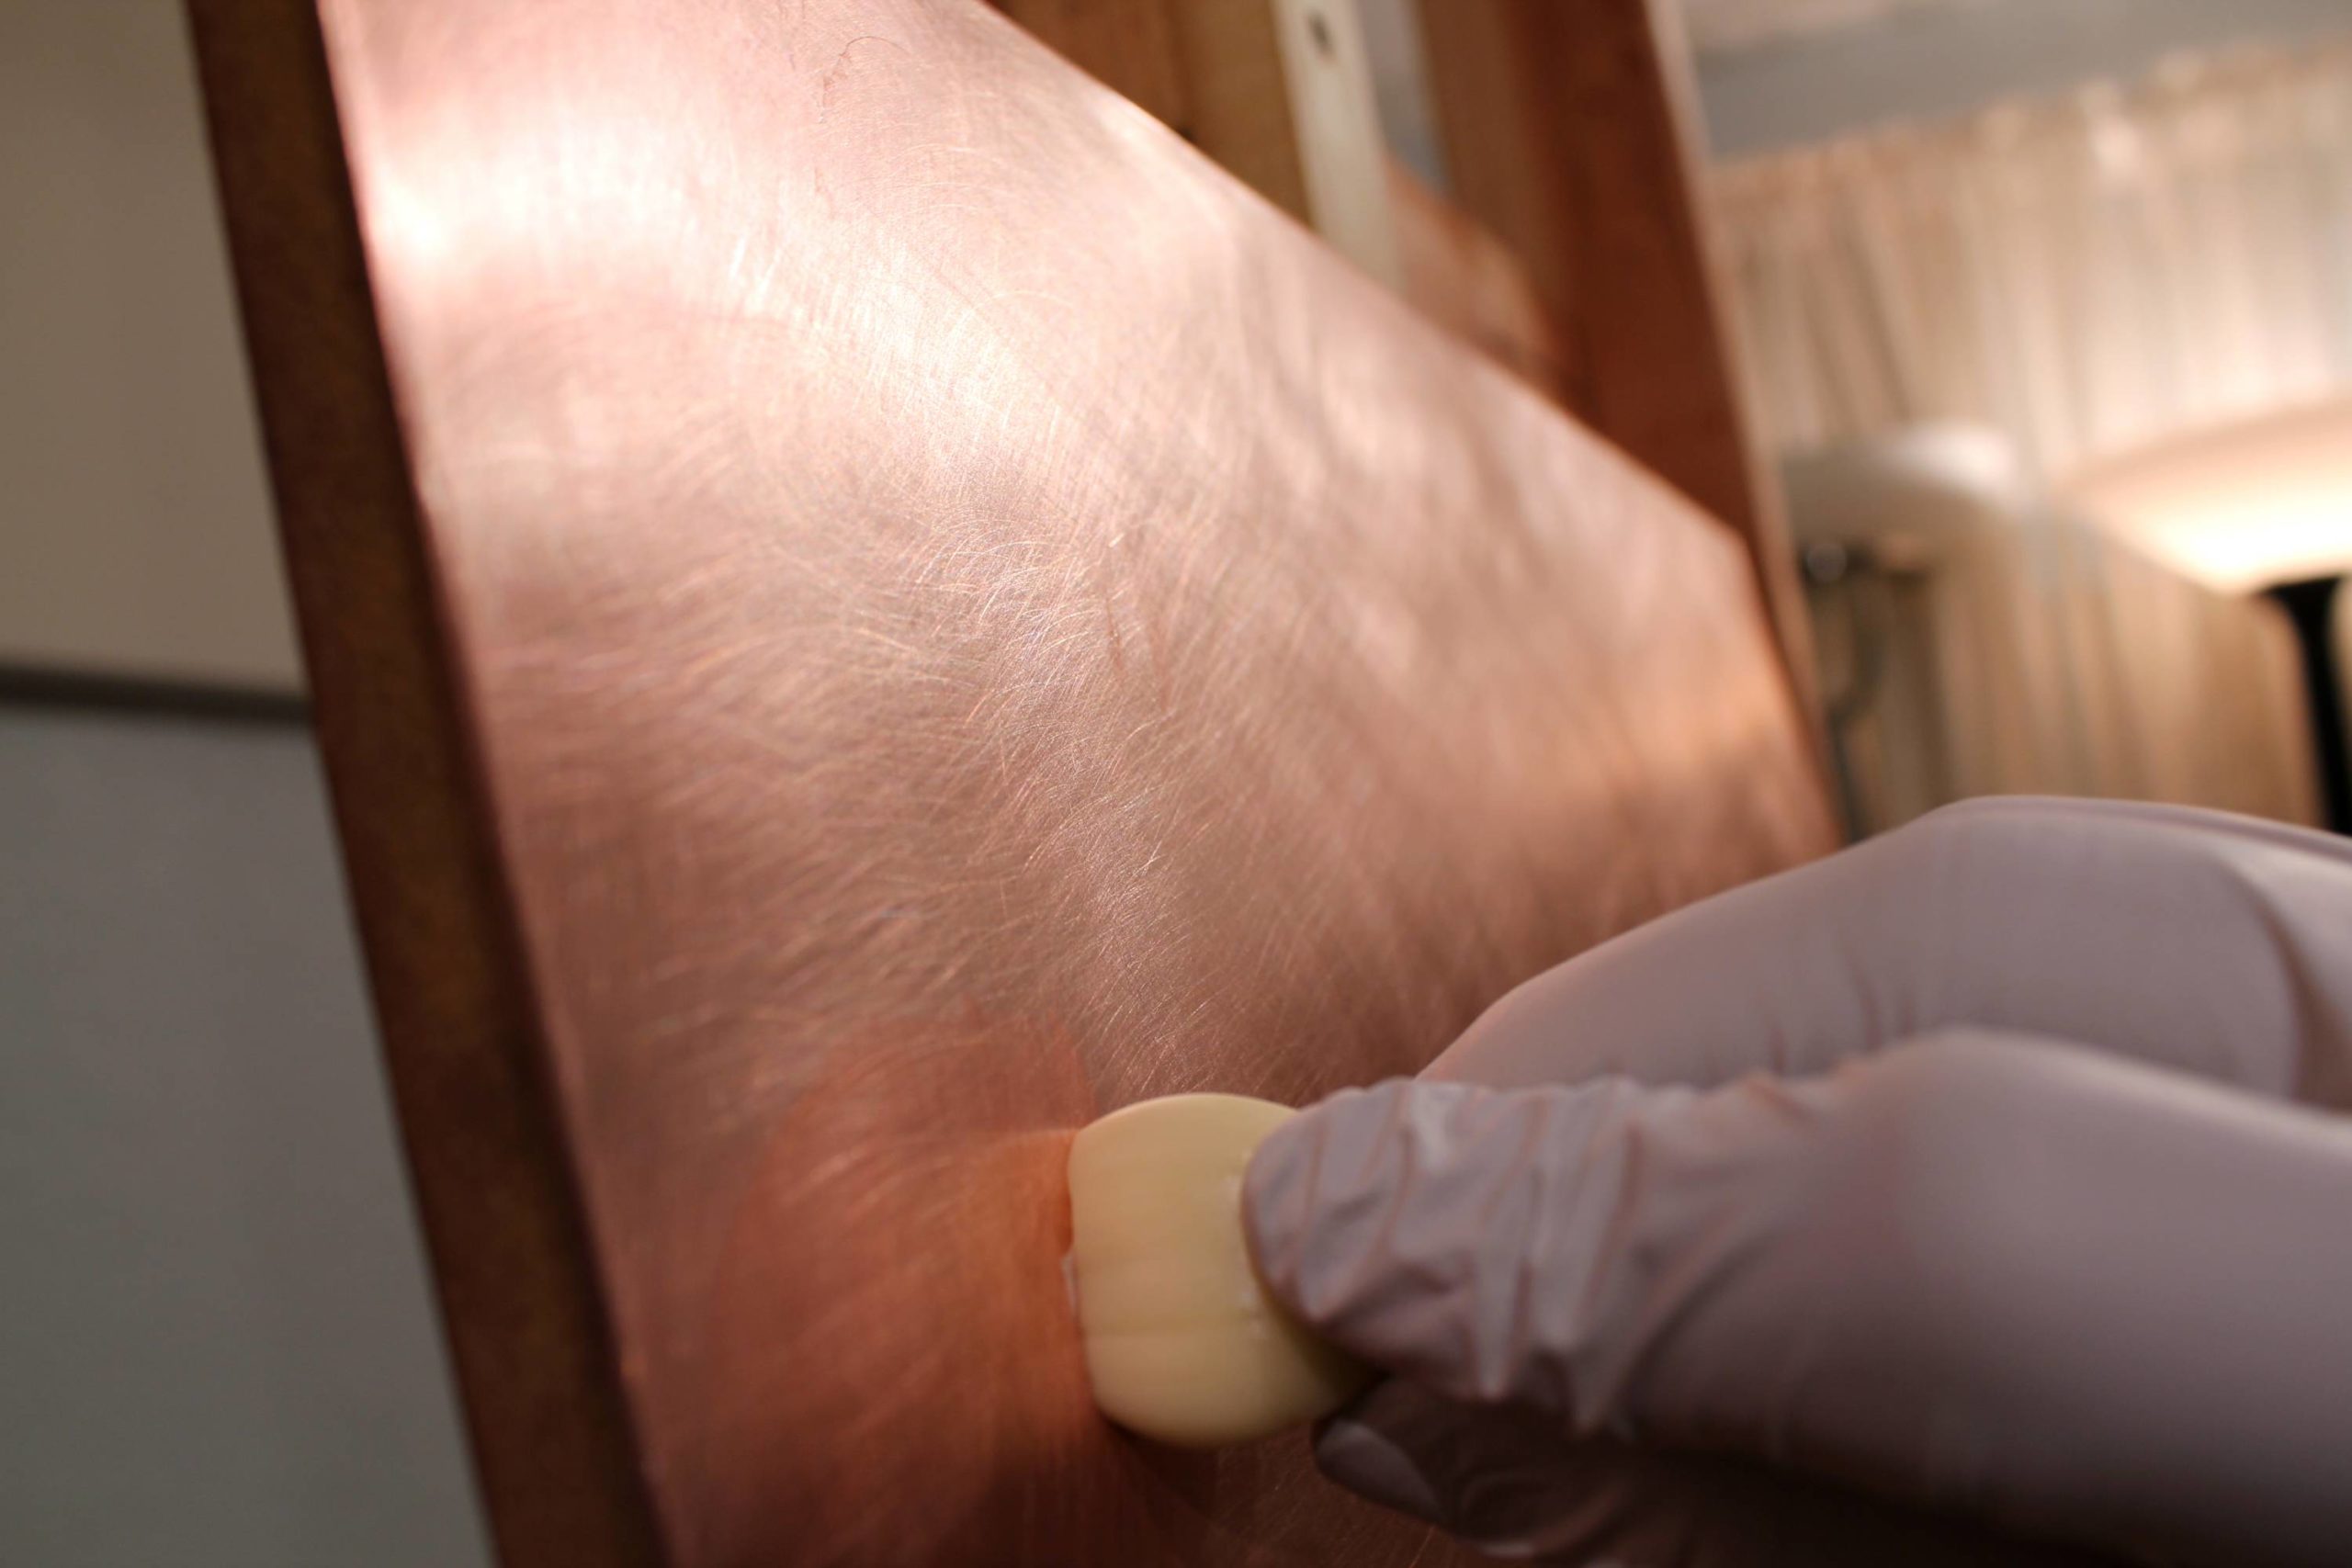
Painting on copper is a different experience than painting on canvas or board. Copper prepared in this manner really doesn’t have a slick feel under the brush as you might assume—it actually has a lot of grip and the brush will drag and chatter. This will most likely change the way you paint and the type of brushes you’ll decide to use.
This “grippy” characteristic of the copper isn’t something we really enjoy, so here’s a little studio secret revealed: a medium made by Natural Pigments called Oleogel overcomes the grippiness obstacle. Oleogel is a thixotropic gel medium made with linseed oil and pyrogenic silica. This medium behaves similarly to “neo-meglip” and it is also completely transparent and thixotropic. We rub in a thin layer across the entire surface, being sure to cover every inch of exposed copper. This could be allowed to dry and then burnished, to make a clear “ground”—but we just paint right into it. It is similar to painting into a “couch.” The Oleogel will meld with the oil colors we are applying and dry in a single uniform paint layer that is smooth to work into and completely seals the copper from oxidation. Painting into this clear gel medium also allows for far more open working time on day one, as the raw copper plate dries the first layers of paint very quickly.
We believe that working on copper can provide a rewarding new experience, add a distinctive look to a painting, and expand the artist’s repertoire. Its relative rarity and unique attributes create an undeniable allure for both the artist and the observer. The challenges and rewards of working in oil on copper are considerable, appealing to our creative energies and demanding we produce paintings worthy of the materials from which they are made. If any of the qualities we have mentioned in this article appeal to your artistic sensibilities, you may wish to try making your next work of art on copper.
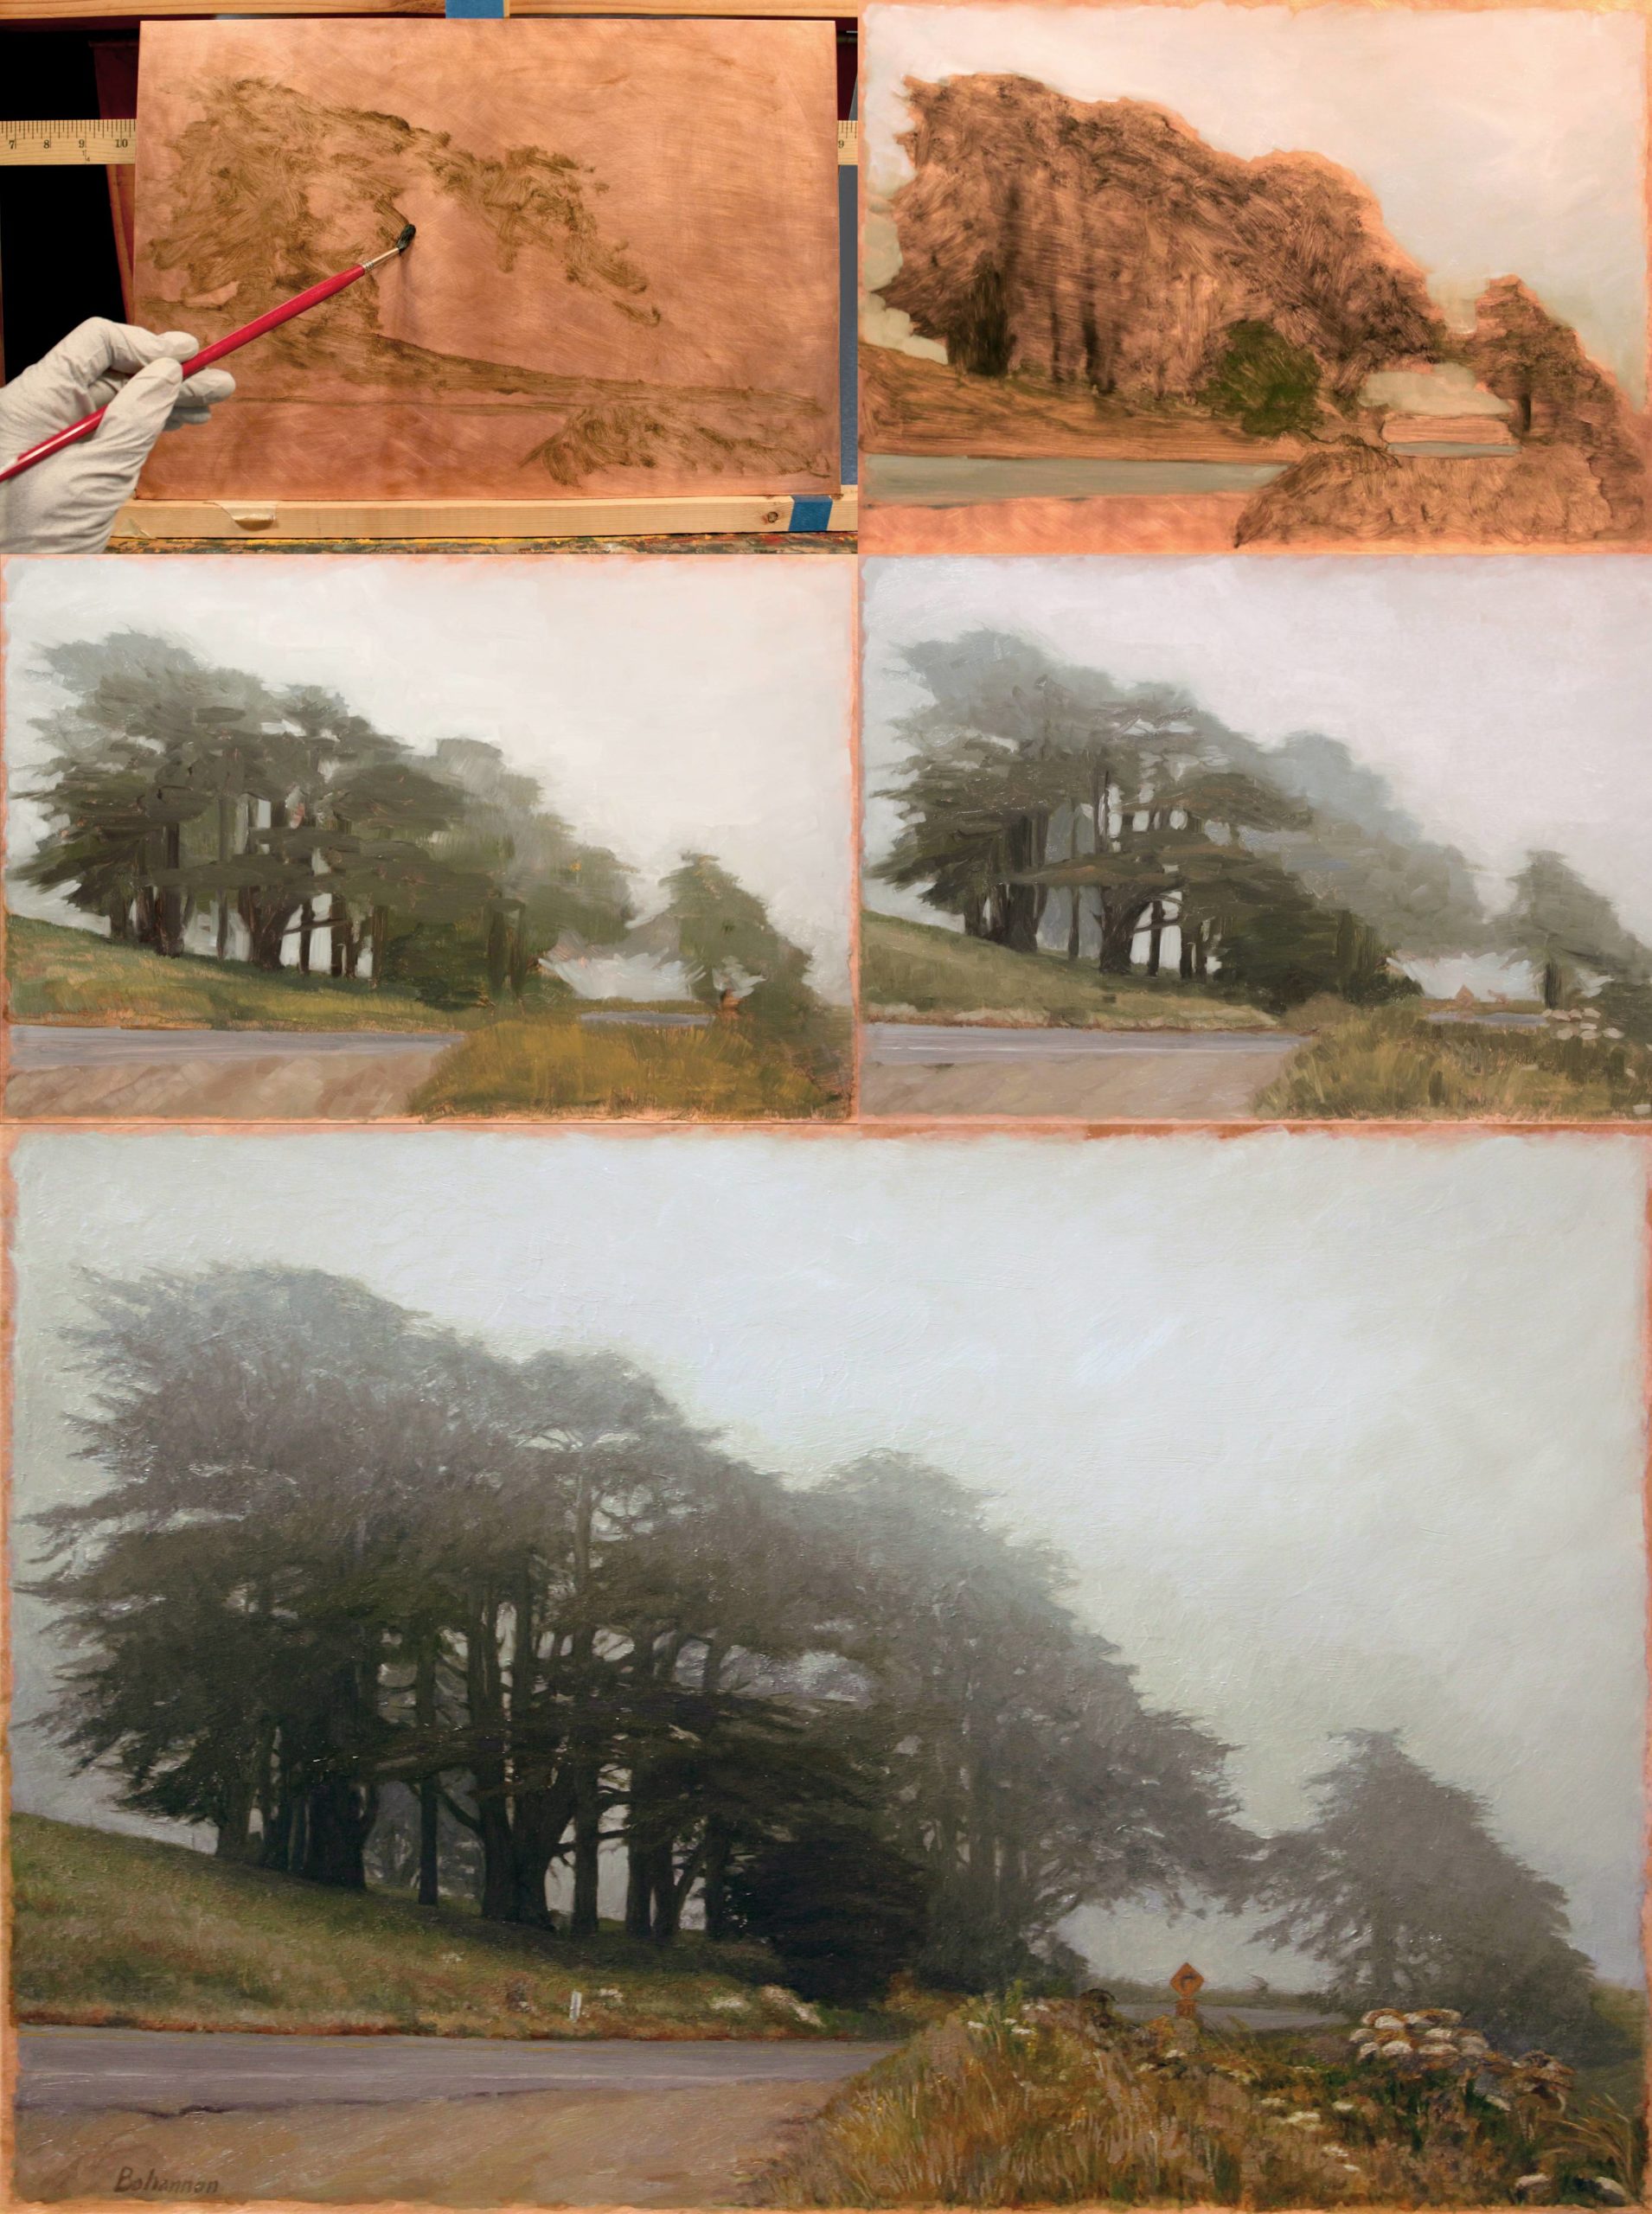
Oil Painting on Copper: Process
For more information on the history of artists painting on copper, we recommend reading the book Copper as Canvas by the Phoenix Art Museum.
Learn more about Julio Reyes and Candice Bohannon, visit their websites at: www.JulioReyes.com
www.CandiceBohannon.com
Read another article by Julio Reyes:
Become a Realism Today Ambassador for the chance to see your work featured in our newsletter, on our social media, and on this site.


”")