While value studies can stand on their own or be enhanced with natural specimens, the possibilities grow exponentially when every color is added to the options.

Continuing the exploration of painting with acrylics, three more benefits come to mind: Portability, Permanence, and a way to add Pizzazz.

This mini-lesson is sponsored by David Kitler’s 90-minute art workshop video, “Painting Nature’s Textures in Acrylic.” David’s advanced art techniques center around the transparent qualities of acrylic paint. He uses that transparency to create luminous feathers and intriguing eyes.

The Three P’s of Painting with Acrylics

By David Kitler

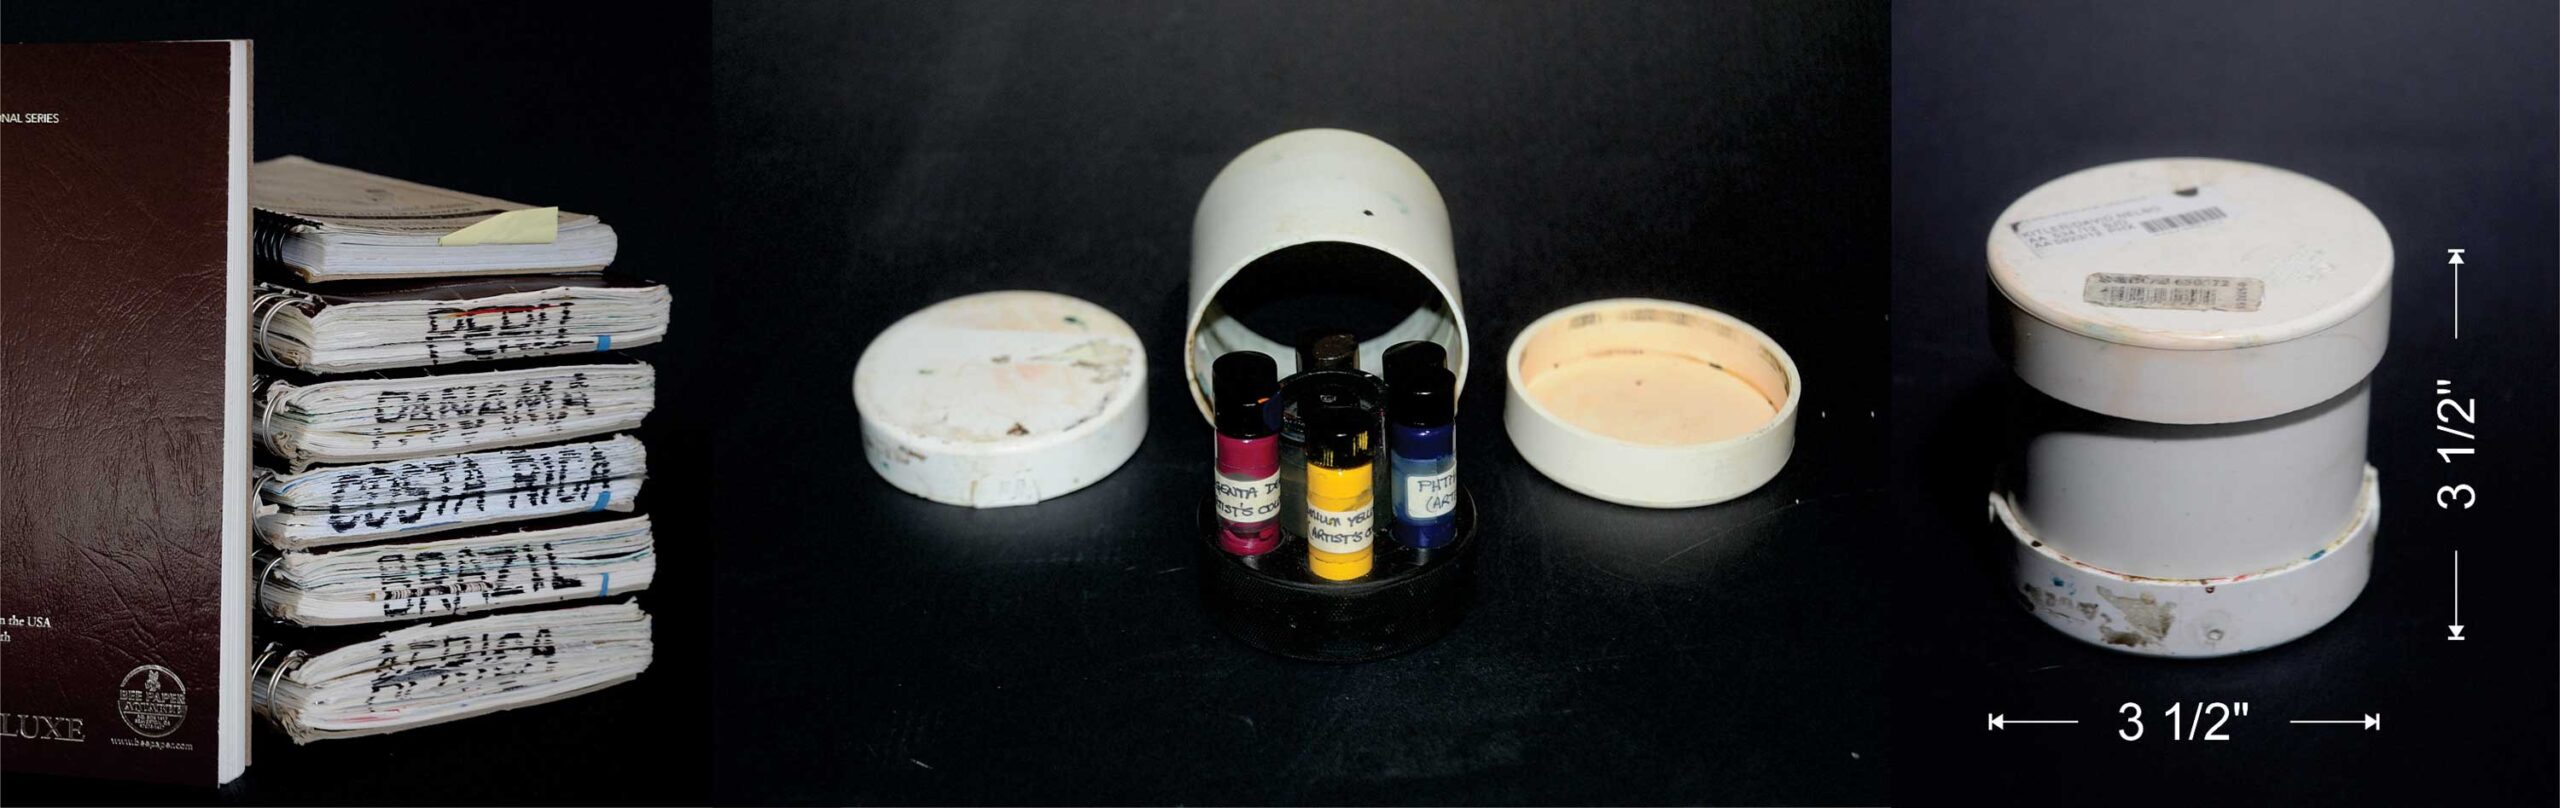
1. Portability: Painting with acrylics is convenient because it’s an easy medium to travel with. Two “must have” travel companions are a sketchbook/journal* and an acrylic paint travel kit. They don’t cost much and they don’t take up much space, but they have filled countless hours while travelling the world. It’s here that one of the advantages of using a limited palette comes to the forefront, because of the minimal space they take – especially when it comes to carry-on allowance – being water-based, acrylics clear custom inspections hassle-free.

*Any artist familiar with the creative process of making original art knows the value of a sketchbook. That’s where ideas first take on physical form.

what you need for painting with acrylics
A few pieces of PVC and a hockey puck were the only materials required to assemble this paint set, holes drilled into the puck provide nesting spots for both the paint vials and a film canister containing water. The lids serve as water or mixing trays, and when upright, the container elevates and supports the puck & paints, keeping things compact when working on a hammock, lap, airplane tray table or even a boat.
what you need for painting with acrylics
Having pencil, paper and portable color handy when waiting in airports, bus stations, lobbies, or border outposts(!), not only eliminates boredom and wasted time, it also means that you have everything required to capture an event or inspiration, the moment it takes place.
Traveling with acrylic paint
Don’t downplay the benefits of real-time reference gathering. Your drawings and journals can be a powerful way to grow as an artist, and they can open doors, whether on the road or at home. This compilation of pages – from a journal created from a reference gathering trip to the Darien Gap region of Panama – was later published. Being awarded the funding “to travel anywhere in the world to document any endangered species,” came down to being able to show existing journals and sketchbooks.
Traveling with acrylic paint
The creative process is always at work for the full-time artist, and there are times the “idea” side of the process benefits from additional input. As a way to visualize some of the options, thumbnail drawings can be very useful. “Drawing with your brush” is an easy way to explore color possibilities; all that is required is the laying of a few washes of acrylics over some quick thumbnail sketches (or photocopies of).
Traveling with acrylic paint
Two bonus benefits of using acrylics on location are that, because they do “set,” colors can be layered on top of one another without the fear of creating “mud”. Another is if the pages you are working on are tinted or colored – as with the Panama journal shown earlier – you are “allowed” to use white without it being called “cheating” by the watercolor purists.

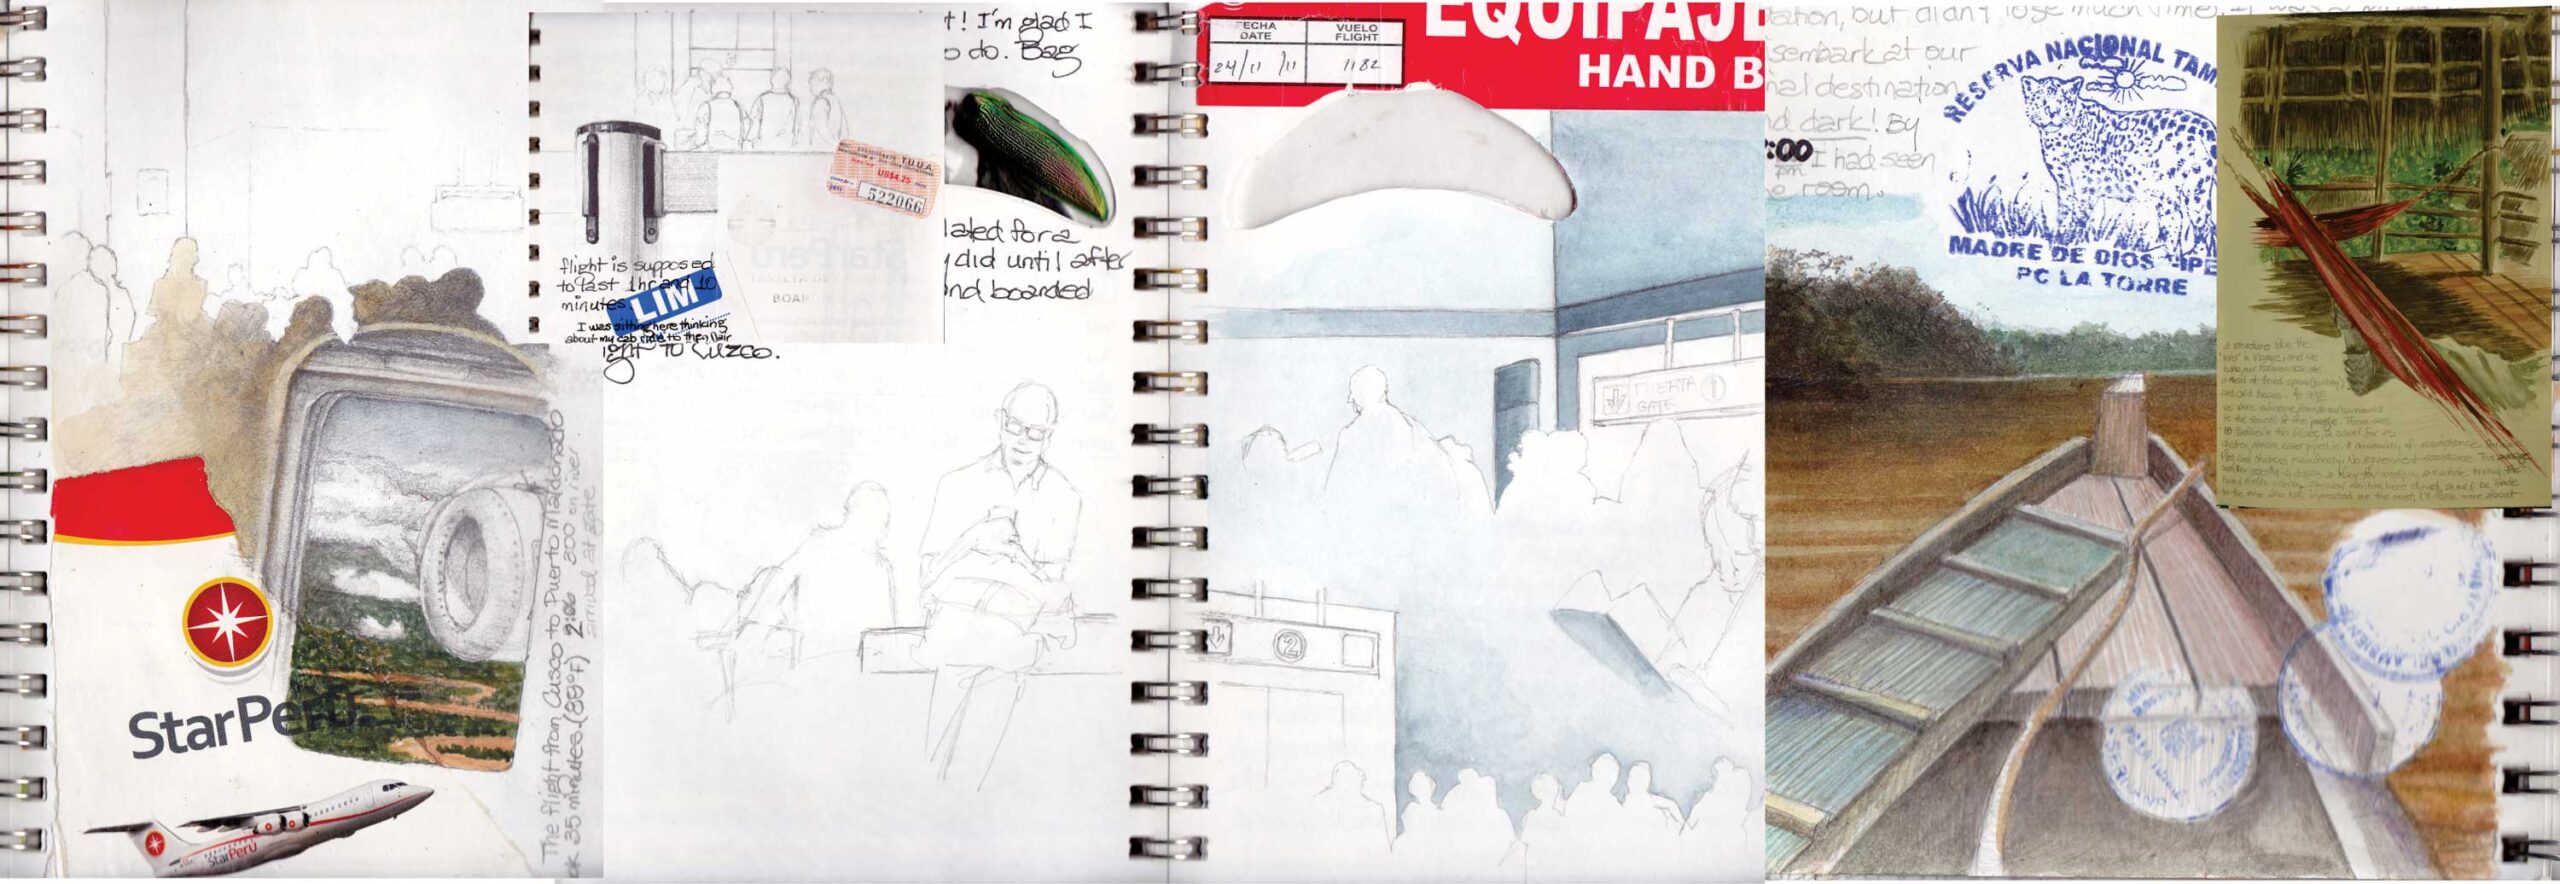
2. Permanence: Further benefits of using acrylics are realized in locations that have high humidity. Hand-in-hand with travels to off-grid destinations for research and reference gathering, are photographs, written notes, and drawings, adding color being an option for the latter. In humid locales, there are occasions when even using graphite becomes difficult, because it can’t “grab” the paper. In those situations, switching to a pen allows a limited, short-term, color option; watercolors have limitations and oil paints are not feasible.

Increased humidity levels create a problem for watercolor users that acrylics side-step. In high humidity conditions, watercolor paints have difficulty drying, and even if they do, they never “set” and can be re-activated with moisture; when acrylics dry, they remain fixed. Instead of the disappointment of opening the book used to record your sketches and finding a “Rorschach test” – a reversed, often smeared, image of the original painting on the opposite page – acrylics dry permanently. It’s highly comforting to know that not only for the remainder of the adventure, but far into the future, your drawings, notes and color sketches will remain intact, unaffected by handling, light and humidity.

{To put this problem into perspective, try living out this real-world, personal recollection… Imagine yourself in a rainforest (or on a beach) anywhere in the world, experiencing a once-in-your-lifetime observation. After working well into the night recording that event for posterity, you close the pages of your journal and turn off the headlamp that has been the only source of illumination in your shelter. With the earlier encounter already becoming a memory, in the blackness of the night, envision the anticipation there would be for the morning to arrive, bringing with it, the first opportunity to view your previous night’s efforts in the light of day. That scenario has been lived over and over personally, but it only took the first time to come to the conclusion that using watercolors wasn’t the answer, (oil paints never were).}

preliminary sketches for painting with acrylics
These are some examples of preliminary sketches that have been advanced beyond the line drawing and graphite stages with the addition of a few washes of acrylics. By drawing a preliminary sketch on a separate, high-quality piece of paper, the artist is able to: learn about their subject, figure out things like feather patterns, do the designing (sizing and placement), etc., – with the side benefit of another income source, one that would otherwise be buried under layers of paint.

3. Pizzaz: There are four steps in creating that one-of-a-kind piece of art: the idea, the drawing, the painting and the signature – listed in order of highest difficulty/most time consuming, to least. While the idea is the hardest and drawing takes the most time, a sound drawing paves the way for an easier time painting and the eventual placing of the “stamp of approval” – your signature. There are benefits in doing a drawing on a separate piece of paper and here is where acrylics can be used to give them something extra.

Wherever life’s travels take you, a ready source of entertainment could be at your fingertips, consider these options as you show the world how you see it – no other medium works better!

Realistic wildlife art
Preparations are currently underway for an upcoming solo gallery exhibit, part of which will feature an educational presentation showcasing the steps involved in the making of a painting. Above is a detail of the actual 7’ x 3’ painting that will be hung in the gallery as an unfinished piece, beside it will be a monitor showing a time-lapse video of the 500+ steps involved in bringing it to the current state.
Preliminary sketch of birds
This is how the early line drawing stage of one of the preliminary sketches appeared as the painting got underway. The essential information was gathered onto tracing paper placed on top of it, and the individual elements were copied and then transferred onto the painting itself using chalked tracing paper – notice that the bird in the center (Kingfisher) was repositioned on the actual painting.
Drawing birds with graphite
Even though a line drawing is all that is required to make all the aforementioned design decisions, it doesn’t take much to advance it further with graphite, and even less to brush in a dab or two of color to give it some pizzazz.
Drawing birds with graphite
Thin layers of acrylics applied over the graphite with a dry-brush, transforms the black and white drawing into a vibrant end product – see full view (right-side image) for completed eye and beak. This preliminary sketch, as well as the others, will be framed and hung beside the larger painting to educate viewers attending the upcoming exhibit.

Related Article: The Versatility – and Workability – of Acrylics